

电镜图像模拟:基于Advanced Computing in Electron Microscopy配套软件
source link: https://iphyer.github.io/blog/2013/08/06/acem/
Go to the source link to view the article. You can view the picture content, updated content and better typesetting reading experience. If the link is broken, please click the button below to view the snapshot at that time.

电镜图像模拟:基于Advanced Computing in Electron Microscopy配套软件
今年的毕业论文就是关于电子显微镜的图像计算问题。《Advanced Computing in Electron Microscopy》这本书给了我巨大的帮助,这本书确实是经典,关于电子显微学图像计算的方方面面都有涉及,同时给出了详细的讲解。当然有些遗憾的是作者没有详细的阐述关于球差校正电子显微镜的部分,但是作为电子显微学最新的进展方向之一,不能对于作者的这样处理求全责备,毕竟这只是对于电子显微镜在2008年做多的的一个总结性专著。我们没有任何理由要求包括科研领域最论文需要的新最前沿的内容,这也不是一本专著所要承担的任务,这个任务恰恰是科研论文所需要承担的。
但是这本书也有些其他的问题,在我尝试用这个软件计算很多的内容的时候非常之纠结,说实话一开始搜索到这个软件的时候我一直以为这个软件没办法使用,但是经过尝试最后发现其实这个软件编写的非常好。
这篇博文就是总结自己在使用中的感受和一些总结,包括软件的安装,使用和自动化使用。
这里再次感谢Cornell大学的Earl John Kirkland,《Advanced Computing in Electron Microscopy》真是一本非常好的入门书(简称ACEM吧)。
下载和安装
这本书配套软件原来网址为:http://people.ccmr.cornell.edu/~kirkland/
现在根据Kirkland教授表述,似乎打算向Sourceforge迁移:
NOTE: this URL may soon disappear. I plan to move the code to sourceforge under the name computem. Please look there in the future.
遵照Kirkland的命名,所以下面我都把这个软件称为computem。所以现在的下载地址是:http://sourceforge.net/projects/computem/
请大家自行下载。
Kirkland教授在软件包中给出了详细的说明。需要补充的是computm基于命令行,而如果你不习惯命令行的模式的话,可能使用的话不是非常习惯。我的电脑安装的Lubuntu12.04,下面我也都基于Ubuntu系统说明Linux下怎么安装。按照Kirkland教授的软件包说明,在windows下也可以使用该软件,但是需要安装MinGW(MinGW Minimalist GNU for Windows)。MinGW的功能就是在windows中模拟出GNU/Linux的系统。所以如果MinGW安装成功则可以复制在Linux下安装的过程。
在我安装的时候fftw库总是出错,后来仔细上网搜索后才发现是这样的。fftw库默认只安装双精度(double precision)库,但是computm软件需要单精度(single precision)库。所以需要两次编译fftw。具体可以参照这里这篇教程\footnote{\url{http://hi.baidu.com/linzch/item/28841483cb437adfd1f8cdd4}}。
computm的使用
在Kirkland教授的专著《Advanced Computing in Electron Microscopy》中有详细论述,这里略过。
需要注意的是,Kirkland教授不不断更新Computm但是《Advanced Computing in Electron Microscopy》不太能够及时更新,所以在使用中还是要动态的灵活把握软件的使用。
computm的自动化使用
Computm在使用的过程中需要很多的参数输入,同时在改变欠焦量和样品厚度形成一系列图像的过程中需要反复操作软件。这个过程可以利用Linux中Bash Shell的重定向功能,将需要的参数在一个文本文件中全部输入完毕,然后将参数重定向给程序。
这个过程的好处是,同时可以设置多个欠焦量和样品厚度,从而形成一系列的图像。
这里我只说明如果连续变化欠焦量,其他参量的调节与之类似。
首先是一个如何把参数赋值给程序的Bash Shell脚本。
#!/bin/sh
cd /home/waventropy/source
./image</home/waventropy/source/si110setup/100.txt
./image</home/waventropy/source/si110setup/150.txt
./image</home/waventropy/source/si110setup/200.txt
./image</home/waventropy/source/si110setup/250.txt
./image</home/waventropy/source/si110setup/300.txt
./image</home/waventropy/source/si110setup/350.txt
./image</home/waventropy/source/si110setup/400.txt
./image</home/waventropy/source/si110setup/450.txt
./image</home/waventropy/source/si110setup/500.txt
./image</home/waventropy/source/si110setup/550.txt
./image</home/waventropy/source/si110setup/600.txt
./image</home/waventropy/source/si110setup/650.txt
./image</home/waventropy/source/si110setup/700.txt
./image</home/waventropy/source/si110setup/750.txt
./image</home/waventropy/source/si110setup/800.txt
./image</home/waventropy/source/si110setup/850.txt
./image</home/waventropy/source/si110setup/900.txt
./image</home/waventropy/source/si110setup/950.txt
随后是一个在Shell中的每一个参数文件的生成程序,用Python写成。
# -*- coding: utf-8 -*-
"""
Created on Thu May 23 12:23:33 2013

@author: waventropy
"""
import os
os.chdir("/home/waventropy/source/c3ssetup")
inputfilename='c3smul.tif \n'
coherent='0 \n'
csc3='1.2 1.3 \n'
objectiveaperture='9.33 \n'
twofoldasting='0 0 \n'
threefoldasting='0 0 \n'
lensandaperturecenter='0 0 \n'
for n in range(100,1000,50):
    strn=str(n)
    fh=open(strn+'.txt','a+')
    fh.write(inputfilename)
    fh.write(coherent)
    outputfilename='c3simg-'+strn+'.tif \n'
    fh.write(outputfilename)
    fh.write(csc3)
    defocus=strn+'\n'
    fh.write(defocus)
    fh.write(objectiveaperture)
    fh.write(twofoldasting)
    fh.write(threefoldasting)
    fh.write(lensandaperturecenter)
    fh.write
    print 'Done'
电子显微学的一个传统是排列一系列不同欠焦量和厚度的图像,这里我使用Phatch和ImageMatrick来联合实现需要的功能。
图片批处理
本文使用的是Phatch,url=http://www.phatch.org/download/index.html作为图片批量处理的工具。
因为image模拟产生的是tif格式文件,虽然tif格式保存了最大的突变信息,但是tif不易使用和保存且较消耗存储空间,所以使用Phatch可以就将tif格式的输出结果转化为需要的png格式。
图片矩阵排列
因为产生的图片较多往往达到18幅,所以我们采用了Linux发行版一般自带的ImageMatrick程序进行格式转换。具体的来说,我们主要使用的是ImageMatrick的Montage Concatenation Mode功能url=http://www.imagemagick.org/Usage/montage/#columns。
montage Image000.png Image001.png Image002.png Image003.png Image004.png Image005.png Image006.png Image007.png Image008.png Image009.png Image010.png Image011.png Image012.png Image013.png Image014.png Image015.png Image016.png Image017.png -mode Concatenate -tile 6x3 new.jpg
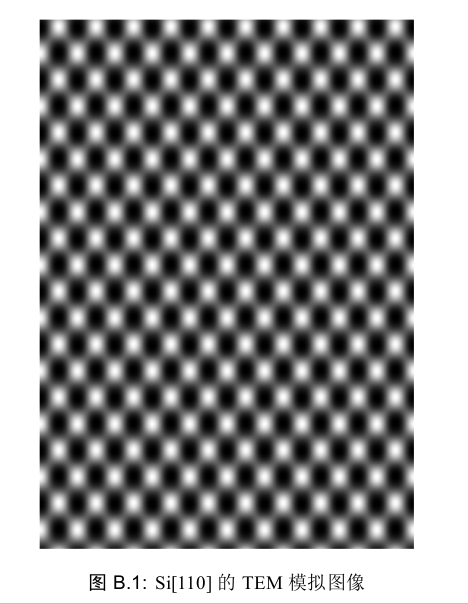
电镜图像示例
Recommend
About Joyk
Aggregate valuable and interesting links.
Joyk means Joy of geeK