

博客折腾记:使用 Travis CI 自动部署博客
source link: https://xiang578.com/post/use-travis-ci-to-auto-build-blog.html
Go to the source link to view the article. You can view the picture content, updated content and better typesetting reading experience. If the link is broken, please click the button below to view the snapshot at that time.

博客折腾记:使用 Travis CI 自动部署博客
已切换到 Github Action
之前一周在封闭接受公司培训,最重要的任务是熟悉「项目开发全流程」。其中有一点:服务的稳定性。不知道为什么,前几天自己的博客崩溃了,输入域名只能看到 404 页面。当时以为是 Travis CI 的原因,所以进行了全面的一次排查:
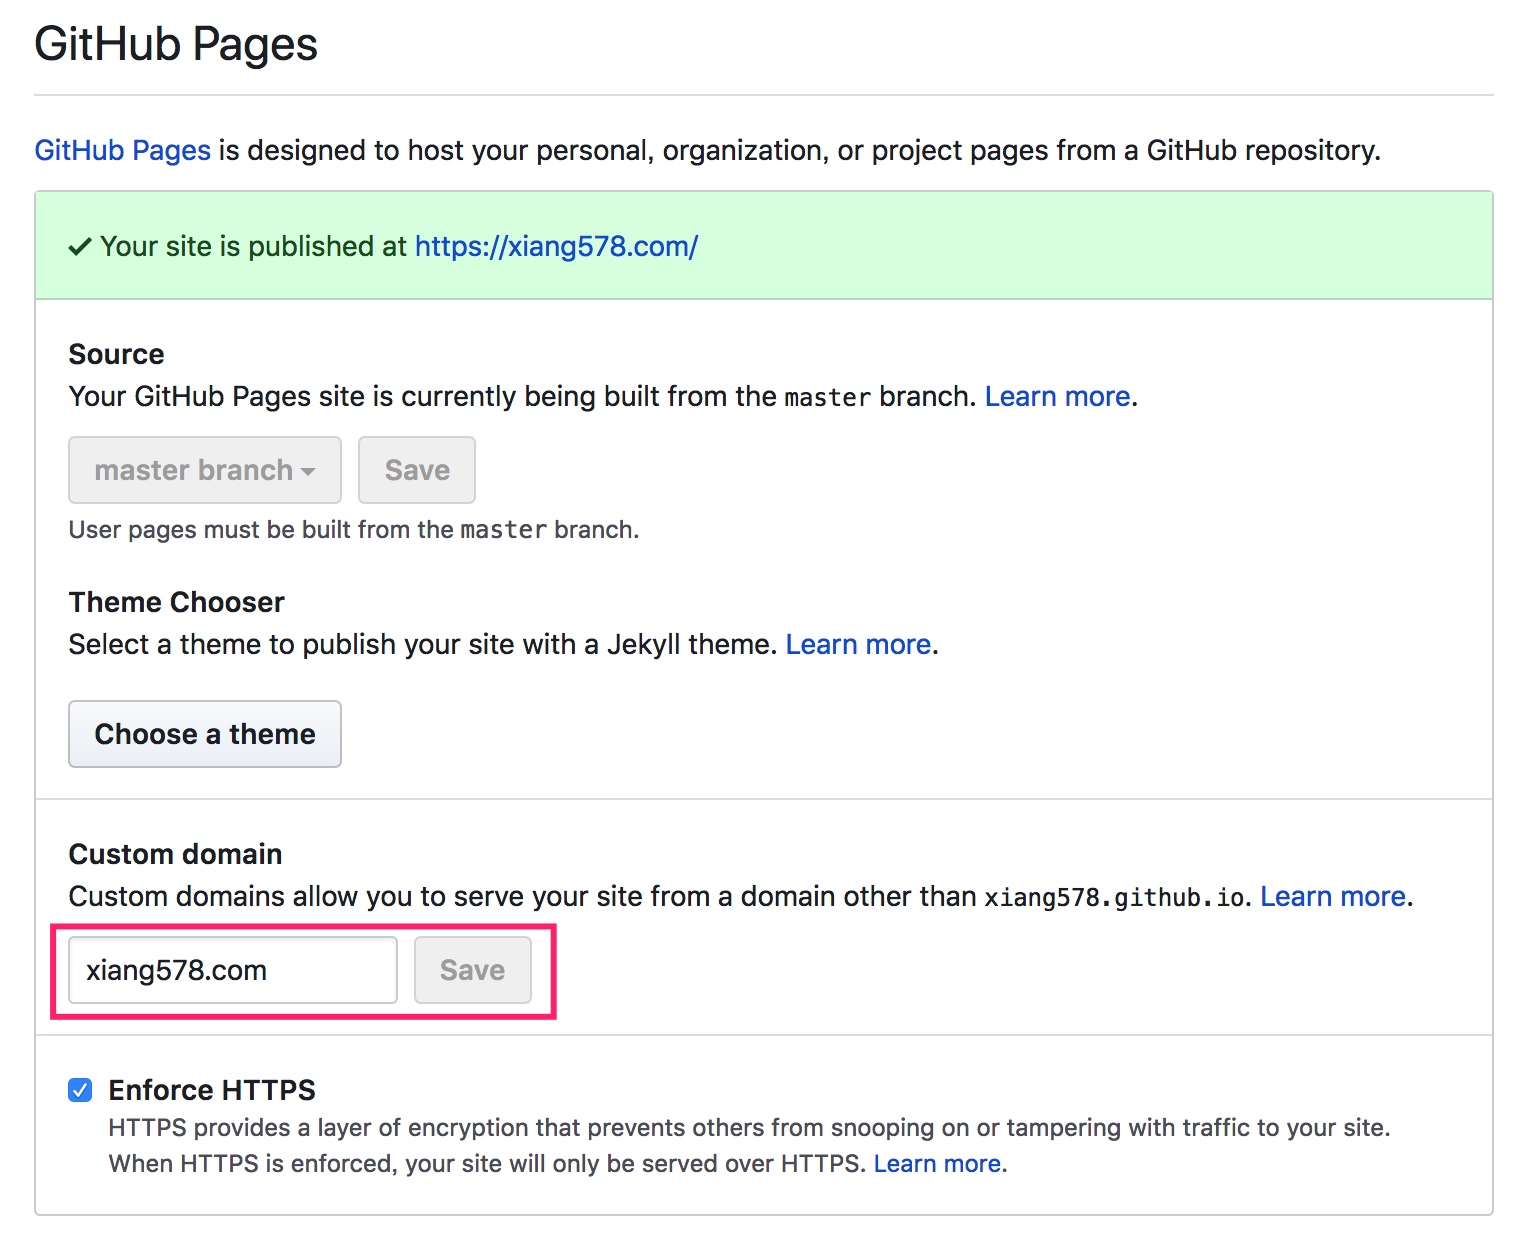
- 问题出现在 Github Pages 的 Custom domain 设置中。
- 具体表现:通过 Travis CI 推送博客静态文件到仓库中的 master 后,下图框中的域名就会变成空的,导致无法访问。
- 解决方法:在源文件的 source 目录下创建一个 CNAME 文件,写上你自己的域名。
Travis CI
其实看一眼就应该知道,我的博客是基于 hexo 搭建的,文件托管在 github 仓库中。不过,按照之前的设想博客应该在 Coding 中也有一份备份。后来由于一些原因,在利用 hexo 生成静态文件之后,自动推送到 Coding 上的命令不起作用。自己也没有时间去排查问题,所以最近访问速度有点慢。
传统的 hexo 博客更新过程是:在完成写作之后,利用命令行调用 hexo g && hexo d 来生成静态博客文件以及并推送到远端的仓库中。这种方法会产生三个痛点:
- 每一次修改源文件后都需要重新生成一边静态文件,当大量修改时,步骤就变得繁琐且无趣。
- 生成静态文件依赖电脑中的 hexo 和 node.js 环境,不方便在外出时临时写或修改博客。
- 博客源文件没有自动的备份功能,不符合安全原则。
Travis CI 是一种持续集成开发所使用的工具,在写作过程中引入他可以解决上面我提到的痛点。Travis CI 具体的含义也不是很清楚,直接介绍我是怎么使用的。
博客依赖 3 个 git 仓库:
和大部分人一样,这个博客的静态文件保存在 github 的 xiang578.github.io 仓库 master 分支中。但是,我还创建了一个新的分支 hexo,用来保存博客源文件。每一次修改博客源文件之后,我不在本地生成静态文件,而是利用 git 命令,将所有的修改内容推送到仓库中的 hexo 分支。Travis CI 服务监听到新的 push 时,会根据你的配置将 git 仓库拉倒他的服务器上,编译源文件成为静态文件,并推送生成的文件到指定仓库的指定分支中。而且,如果编译静态文件失败,他也会通过邮件通知你结果。
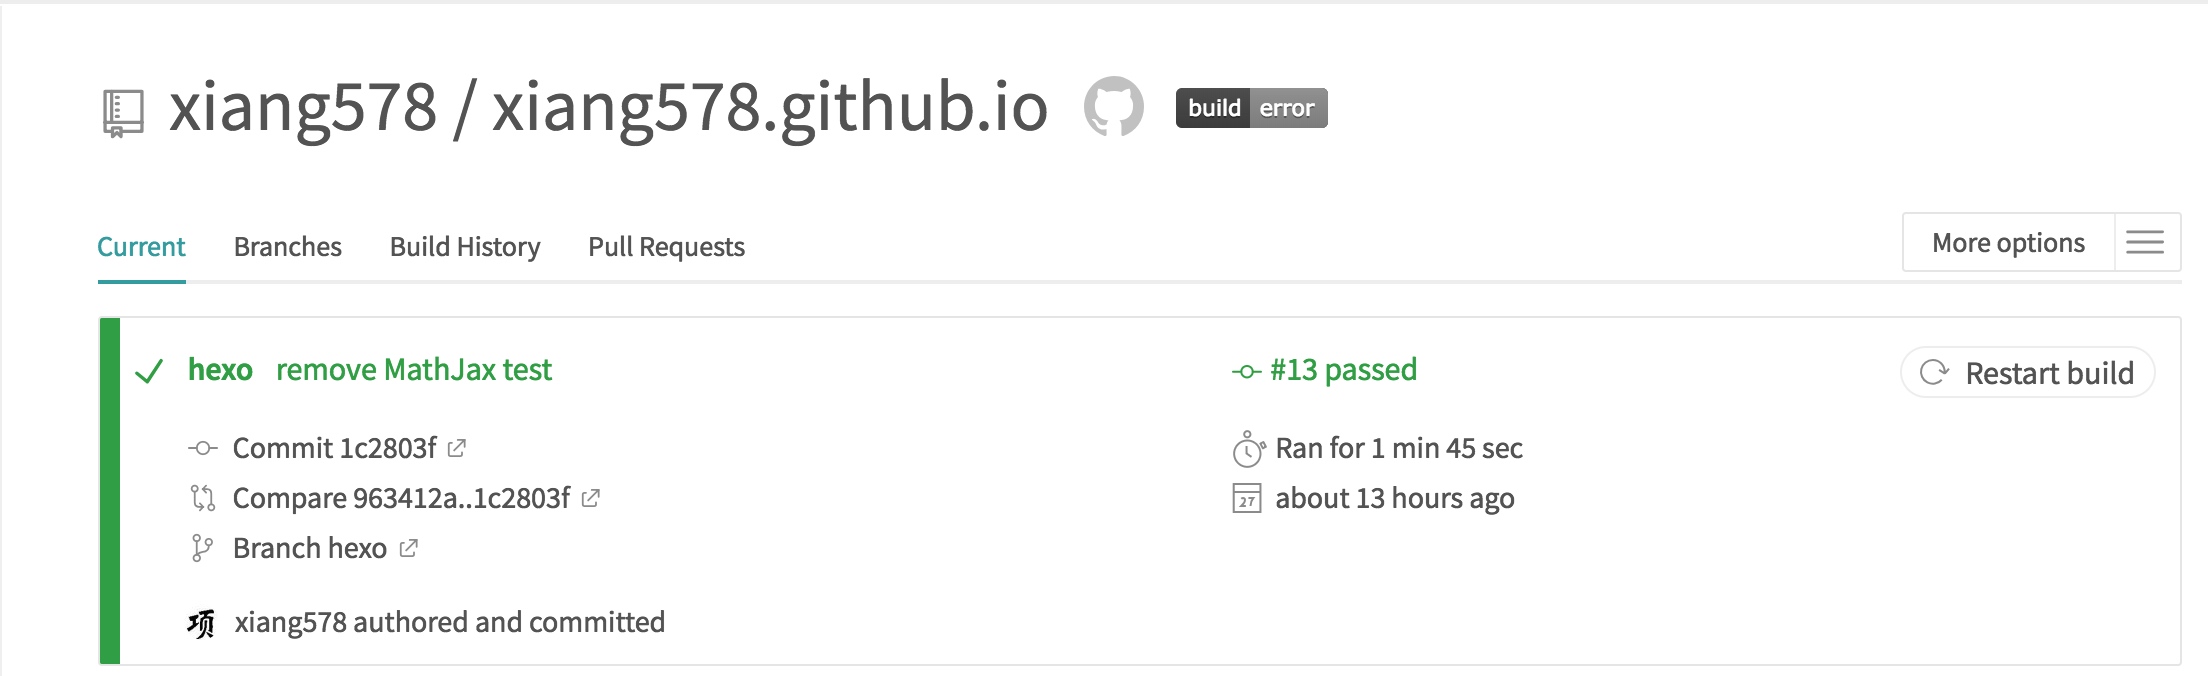 编译成功截图
- 将 github 上存放静态博客源文件的仓库拉下来,利用
git checkout -b hexo创建并进入新的分支,删除分支内所有的文件。 - 将博客源文件复制到第一步中的文件夹中。
- 添加一个
.travis.yml文件,文件内容可以参考下一节 Travis-ci 配置文件。 - https://travis-ci.org/ 提供免费的持续集成服务,可以通过 github 登入,直接选择需要管理相关的项目。
- 第一次将源文件上传到 github 时,可能会遇到问题。主题
themes/xxx是通过 git clone 下载的,无法直接 push 包含嵌套关系的 git 库。删除 themes/xxx/.git 正确的姿势是,最开始就使用git modules引用依赖库。所幸还能编辑.git/config,添加下面几行代码解决:
- 打开
themes对应的 github 网页,你会看到主题链接到其他仓库(其中 @commitid 控制对应的版本)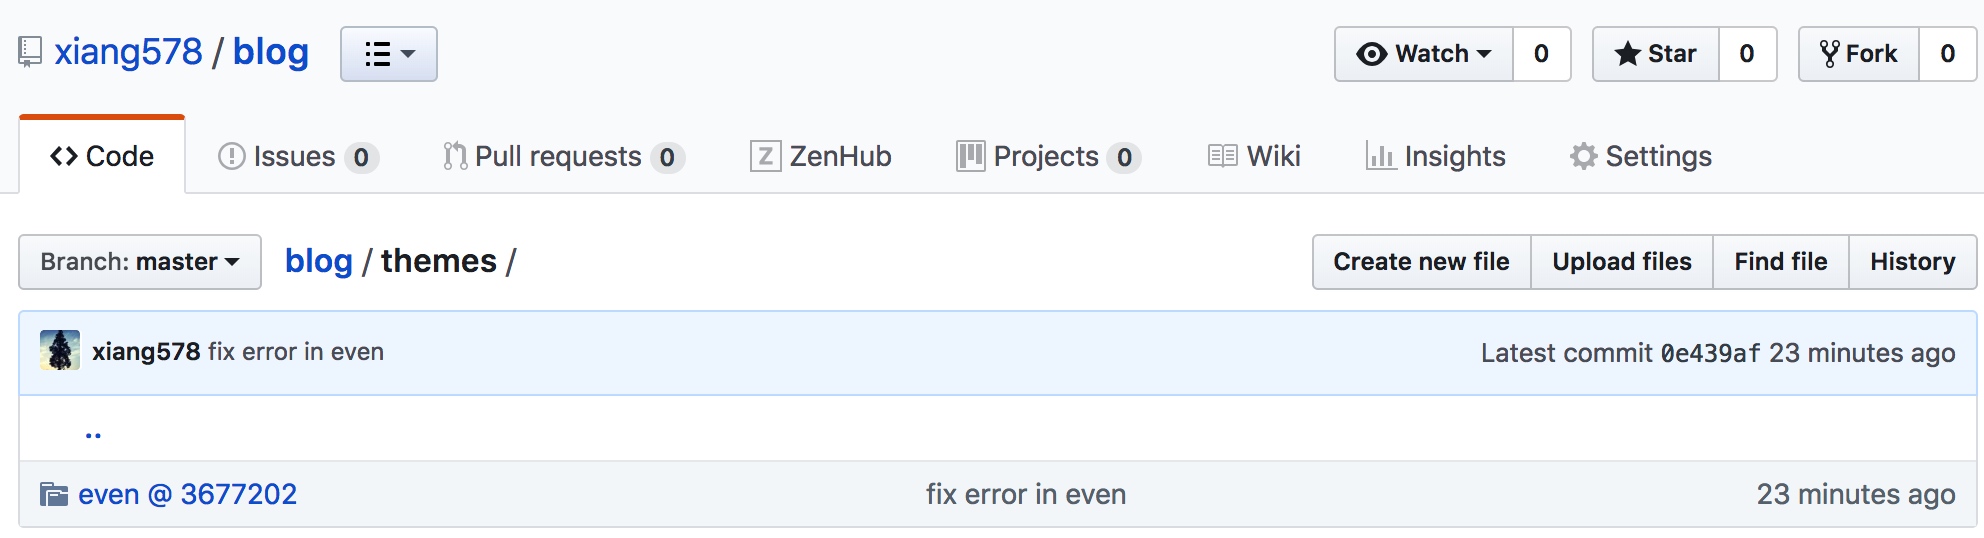
- 完成这样的设置,修改主题文件后,需要先将修改 push 到主题的仓库,然后在博客文件夹下 push 修改到远端仓库(修改依赖的 commitid)。最终,才能再网页上看到修改效果。
Travis-ci 配置文件
language: node_js
node_js:
- 9.11.1
cache:
  directories:
  - node_modules
before_install:
- export TZ='Asia/Shanghai'
- npm install hexo-cli -g
install:
- npm install
script:
- hexo clean
- hexo generate
after_script:
  -  git clone https://${GH_REF} .deploy_git  # GH_REF是最下面配置的仓库地址
  - cd .deploy_git
  - git checkout master
  - cd ../
  - mv .deploy_git/.git/ ./public/
  - cd ./public
  - git config user.name "xiang578"
  - git config user.email "[email protected]"
  - git add .
  # - git commit -m "Deploy at $(date +"%Y-%m-%d %T")"
  - git commit -m "Travis CI Auto Builder at `date +"%Y-%m-%d %H:%M"`"
  # Github Pages
  - git push --force --quiet "https://${CI_TOKEN}@${GH_REF}" master:master
  # Coding Pages
  # - git push --force --quiet "https://xiang578:${Coding_TOKEN}@${CO_REF}" master:master

branches:
  only:
  - hexo

env:
 global:
   # Github Pages
   - GH_REF: github.com/xiang578/xiang578.github.io
   # Coding Pages
   # - CO_REF: git.coding.net/xiang578/xiang578.git
hexo 两个错误
在这一次的过程中,又遇到两个本地编译 hexo 的错误,一同记录一下。错误表现如下:
ERROR Plugin load failed: hexo-renderer-sass
Error: Cannot find module 'node-sass'
    at Function.Module._resolveFilename (internal/modules/cjs/loader.js:581:15)
   ...
ERROR Plugin load failed: hexo-renderer-scss
Error: Node Sass does not yet support your current environment: OS X 64-bit with Unsupported runtime (64)
For more information on which environments are supported please see:
https://github.com/sass/node-sass/releases/tag/v4.8.3
   ...
网上的建议是修改 npm 的源地址为淘宝的镜像,并且重新下载这两个包。
sudo npm config set registry https://registry.npm.taobao.org
npm install hexo-renderer-sass --save
npm install hexo-renderer-scss --save
Reference
Recommend
About Joyk
Aggregate valuable and interesting links.
Joyk means Joy of geeK