

Jenkins on Windows 心得分享 (05):如何將介面顯示語言設定為英文(en)
source link: https://blog.miniasp.com/post/2021/05/01/Jenkins-on-Windows-05-Display-English-locale-by-default
Go to the source link to view the article. You can view the picture content, updated content and better typesetting reading experience. If the link is broken, please click the button below to view the snapshot at that time.

早期版本的 Jenkins 由於多國語系的設定完全依賴瀏覽器的語言設定自動判斷,為了要強制將介面調整為 English (英文) 還需要特別安裝 Chrome 擴充套件才能做到。不過新版的 Jenkins 已經不用這麼麻煩了,你只要加裝 Locale 外掛,就可以指定顯示語言。本篇文章也順便講解使用 Docker 建置 Jenkins 的完整過程。
使用 Docker 安裝與啟動 Jenkins 最新版本
-
取得最新版
jenkins/jenkins:ltsimagedocker pull jenkins/jenkins:lts -
建立
jenkins-datavolume 用來保存 Jenkins 所有設定docker volume create jenkins-data -
啟動 Jenkins 容器
docker run -d --rm --name jenkins -p 8080:8080 -p 50000:50000 -v jenkins-data:/var/jenkins_home jenkins/jenkins:lts注意:Port
8080是 Jenkins 預設 Web 介面。Port50000則是用來讓 Jenkins Agent 建立連線的 Port 埠號。 -
取得預設管理者密碼(
initialAdminPassword)docker exec -it jenkins cat /var/jenkins_home/secrets/initialAdminPassword | clipWindows 10 有內建一個
C:\Windows\System32\clip.exe執行檔,可以將 Console 輸出直接放入「剪貼簿」中,對於複製 Jenkins 預設管理者密碼非常方便!👍 -
啟動 Jenkins 介面
start http://localhost:8080/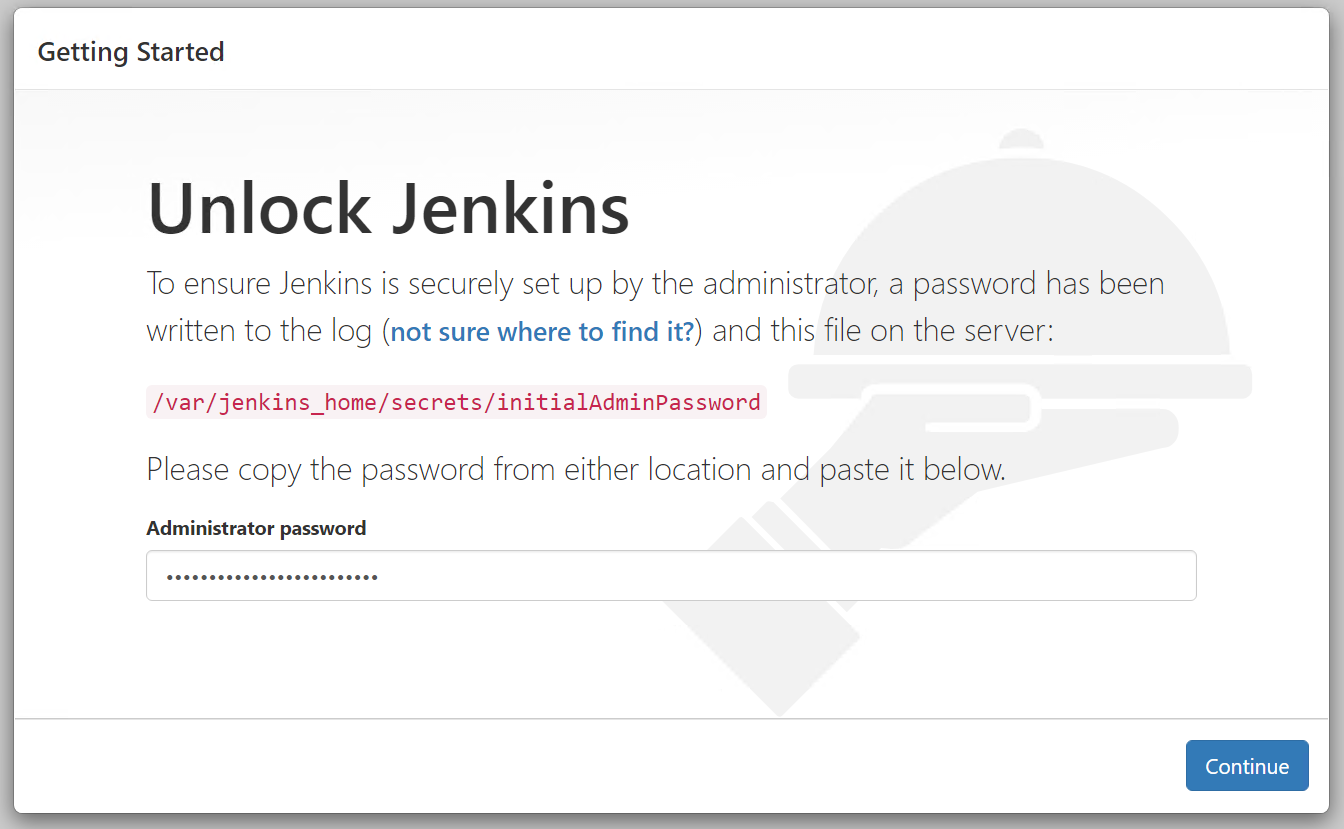
因為步驟 4 已經複製了預設管理者密碼,所以直接
Ctrl-V貼上即可登入成功!
加裝 Locale 外掛
-
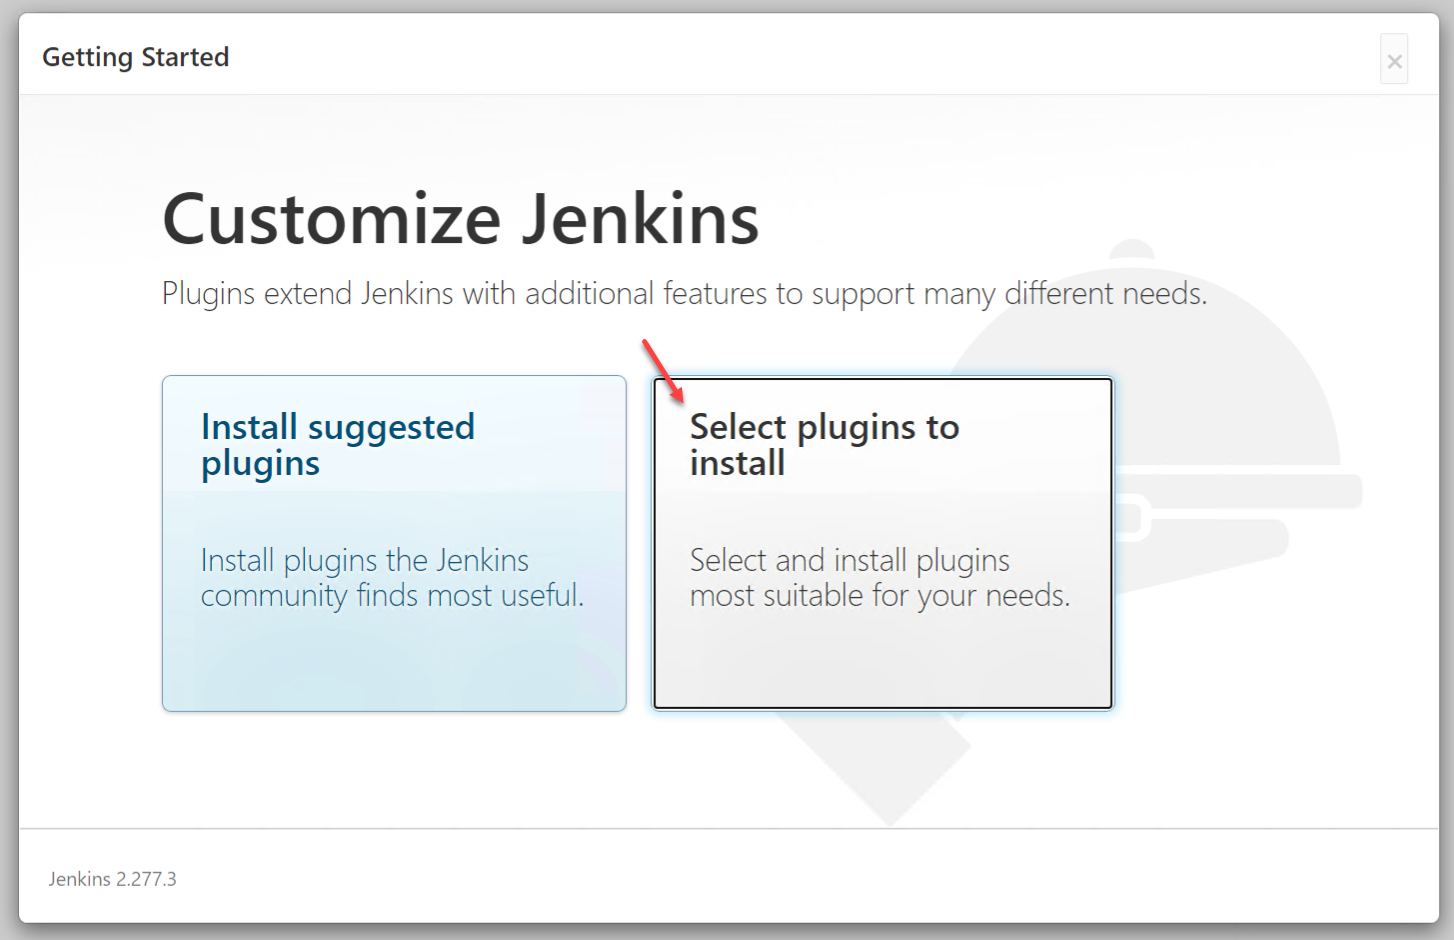
在首次安裝的時候,你就可以選取 Select plugins to install 按鈕
-
除了預設的 Plugins 之外,建議加裝 Locale 外掛,然後按下 Install 按鈕
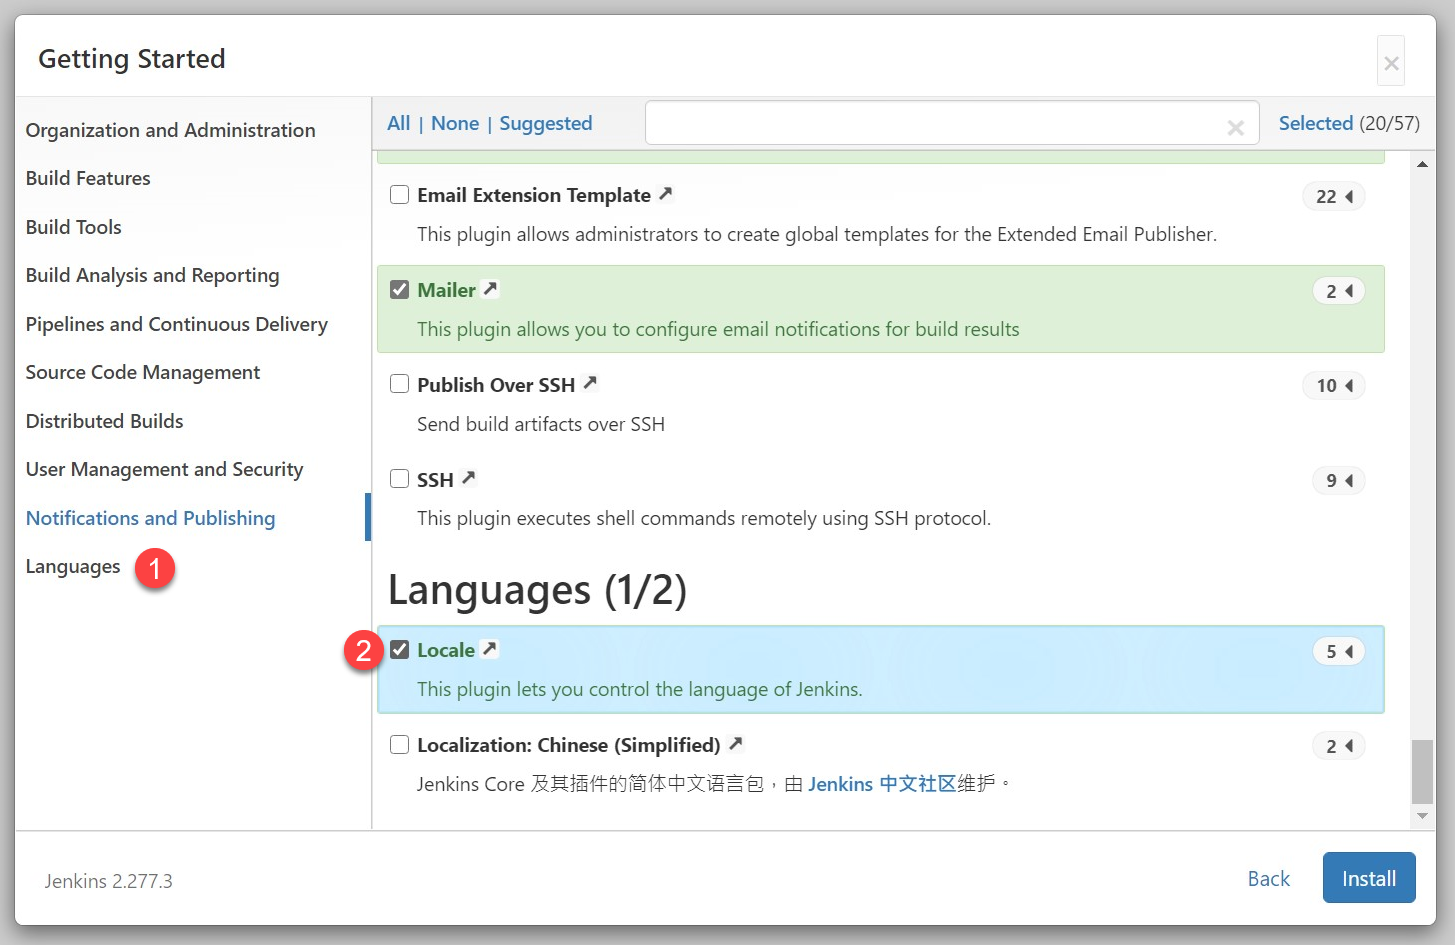
如果你要在 Windows 建置 .NET 專案,建議可加裝 MSBuild 外掛!
-
安裝完成並成功登入後,先針對系統進行 Locale 設定
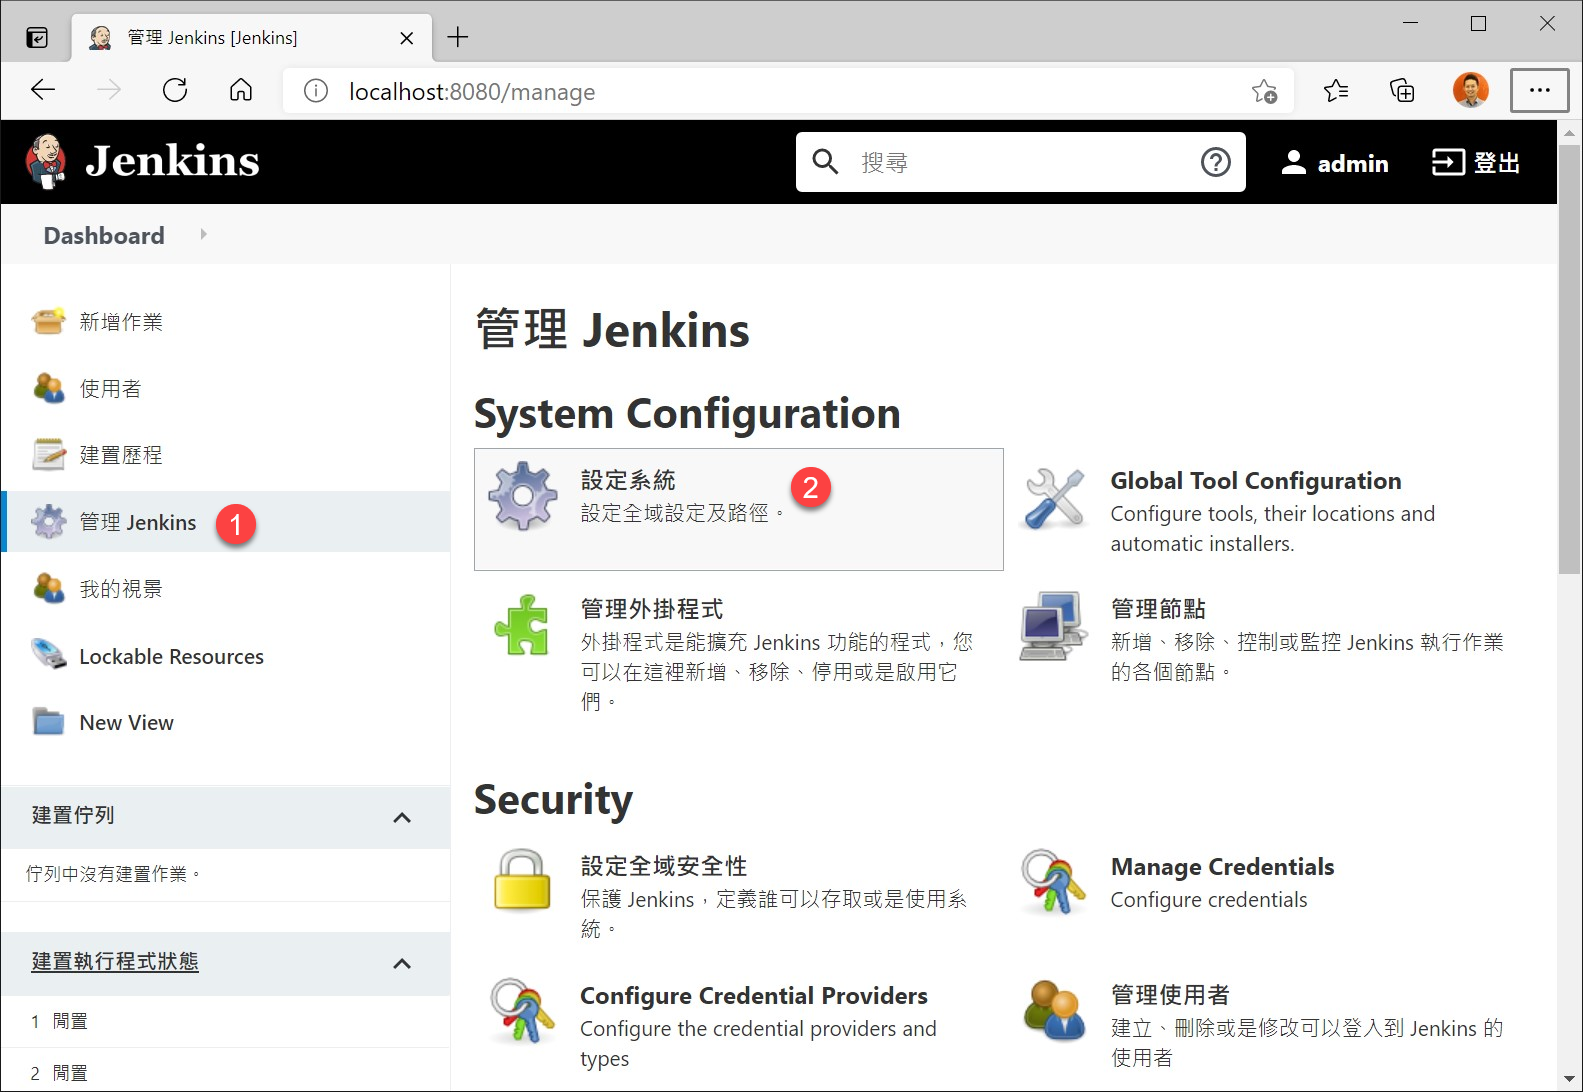
請找到 Locale 區段的設定,並將 Default Language 設定
en,而Ignore browser preference and force this language to all users請務必勾選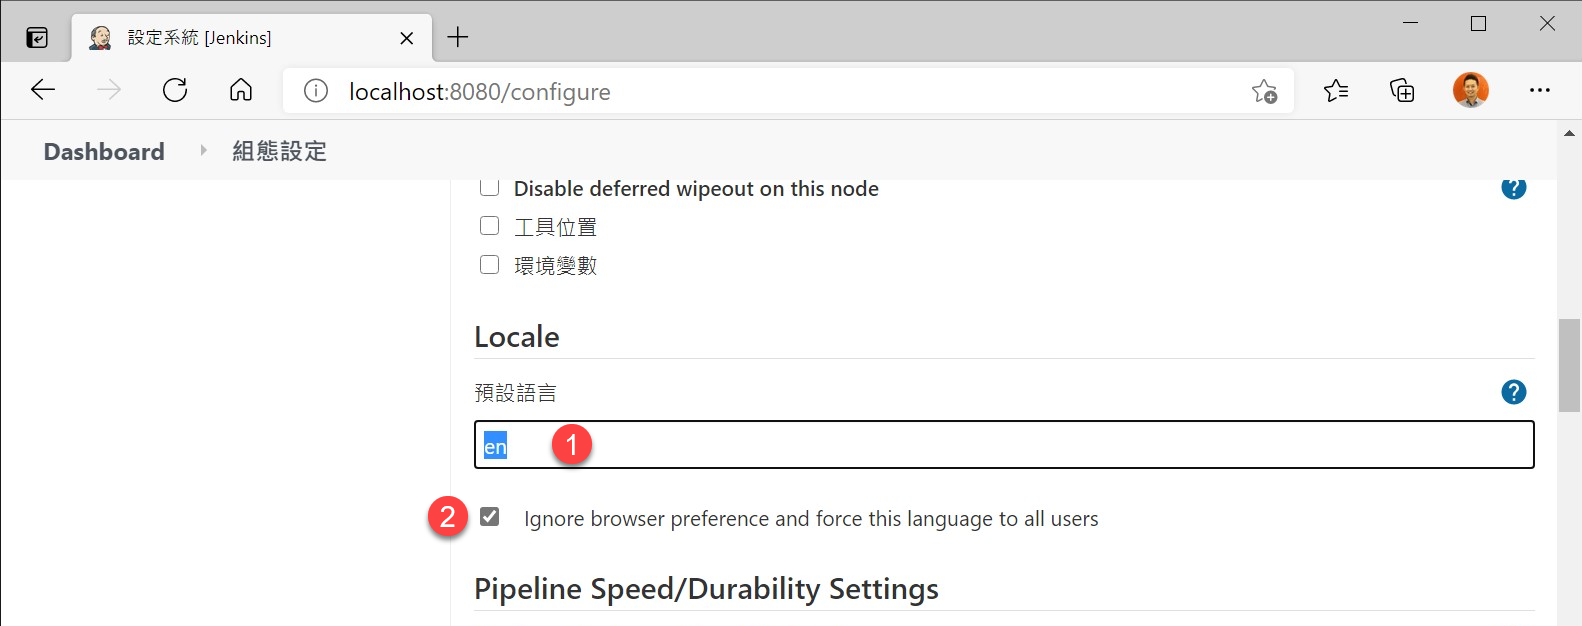
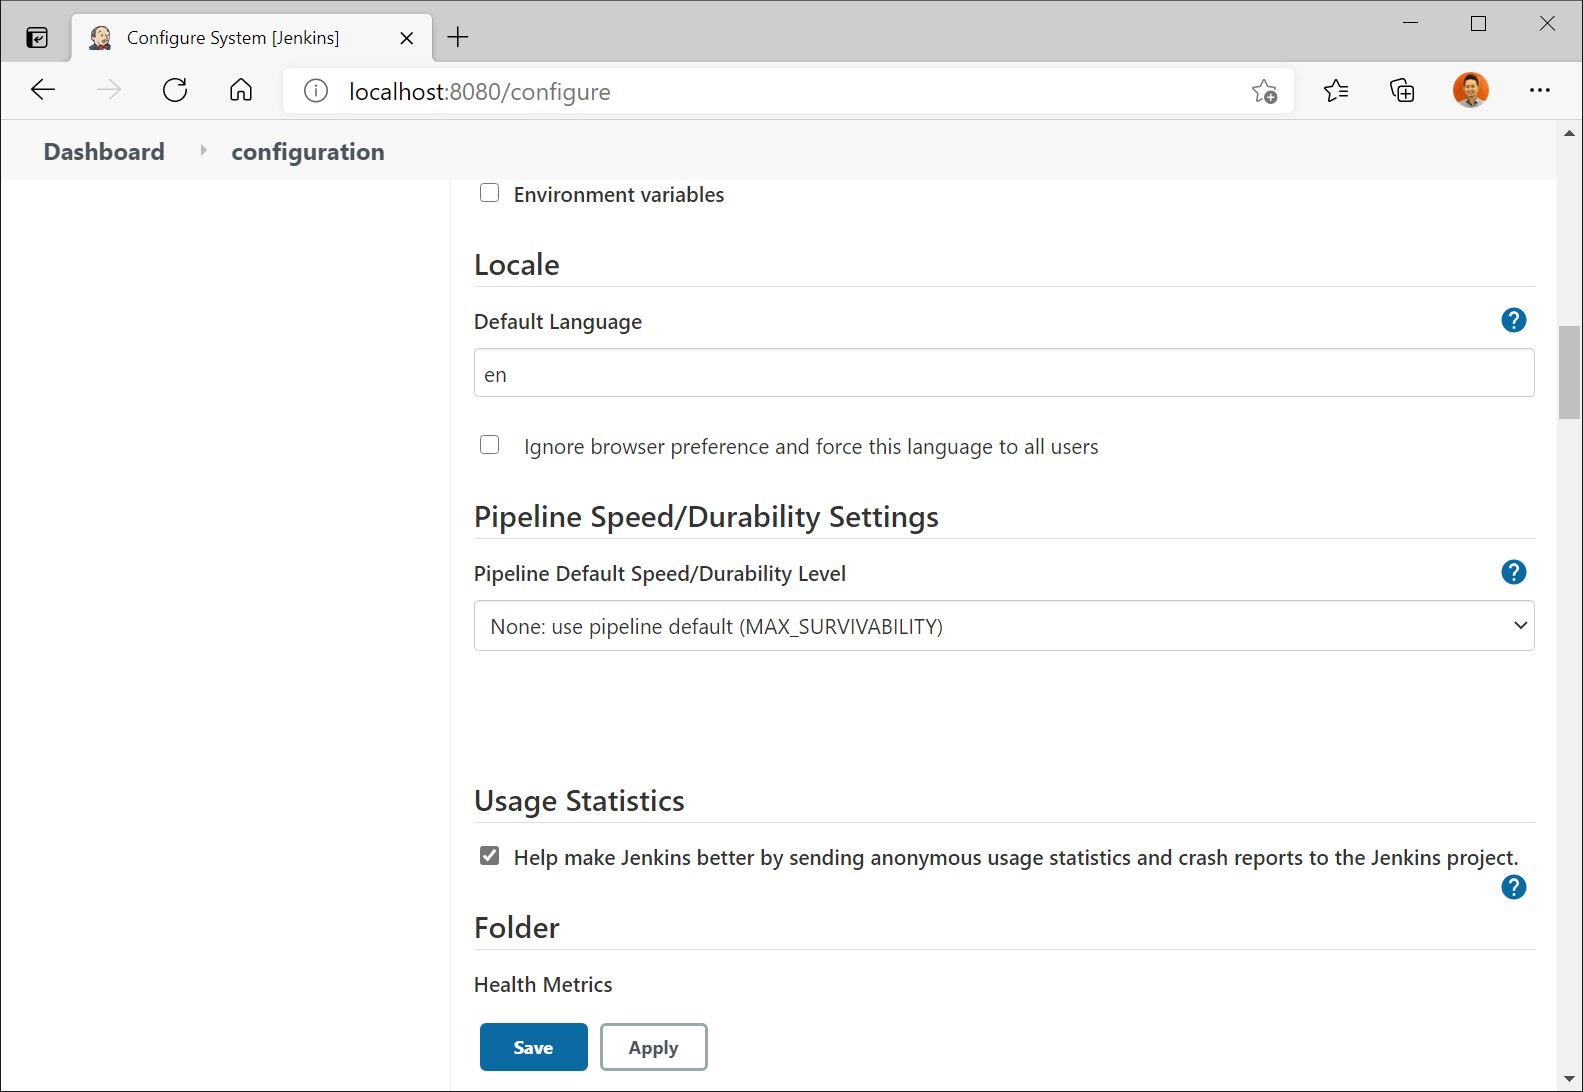
按下 Apply 之後,畫面就會全部顯示為「英文」了!
Recommend
About Joyk
Aggregate valuable and interesting links.
Joyk means Joy of geeK