
12

Python-基于OpenCV的轮廓填充 泛洪算法 孔洞填充
source link: https://blog.csdn.net/qq_44936246/article/details/115421013
Go to the source link to view the article. You can view the picture content, updated content and better typesetting reading experience. If the link is broken, please click the button below to view the snapshot at that time.

Python-基于OpenCV的轮廓填充 泛洪算法 孔洞填充

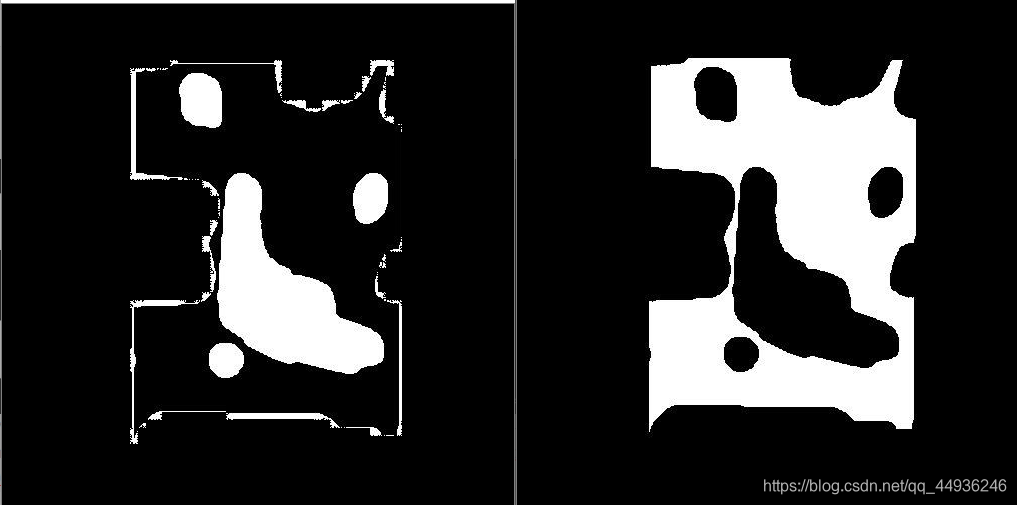
左为原图 右为填充后
针对轮廓填充,我们先要提取图像中的轮廓,在对里面的进行颜色填充,这个我自己也有点分不清楚,他和阈值分割进行填充有什么区别,要是有大佬知道,分享一下,将感激不尽!轮廓填充的方法常用的是泛洪算法!
孔洞填充就是在二值化下,图像中出现了“白点”或者“黑点”,这会影响我们计算轮廓里面的面积计算!
孔洞填充在这里我们针对的是二值图,并不是灰度图!
在OpenCV中实现imfill的步骤
阅读以下步骤时请参考下图.
- 读取图片。
- 将输入图像二值化。
- 从像素(0,0)填充颜色。请注意,步骤2和步骤3的输出之间的差异在于步骤3中的图像的背景现在是白色的。
- 反转洪水填充的图像(即黑色变为白色,白色变为黑色)。
- 使用按位OR运算将阈值图像与反向洪水填充图像组合以获得填充有孔的最终前景掩模。步骤4中的图像在边界内具有一些黑色区域。通过步骤2,填充了图像中的孔。因此,我们将两者结合起来得到前景蒙版。
左为二值化取反图 右为二值化图
简单来说就是两张背景不变图像,将轮廓里面的颜色取反,再将两张图片合并,这样就能对轮廓里面的“孔洞”进行填充;
方法很笨,但是有效!
重点来啦,上代码!!!!!
import cv2;
import numpy as np;

'''
图像说明:
图像为二值化图像,255白色为目标物,0黑色为背景
要填充白色目标物中的黑色空洞
'''
imgPath = "H:/image.jpg"
im_in = cv2.imread(imgPath, cv2.IMREAD_GRAYSCALE);

# 复制 im_in 图像
im_floodfill = im_in.copy()

# Mask 用于 floodFill,官方要求长宽+2
h, w = im_in.shape[:2]
mask = np.zeros((h+2, w+2), np.uint8)

# floodFill函数中的seedPoint必须是背景
isbreak = False
for i in range(im_floodfill.shape[0]):
    for j in range(im_floodfill.shape[1]):
        if(im_floodfill[i][j]==0):
            seedPoint=(i,j)
            isbreak = True
            break
    if(isbreak):
        break
# 得到im_floodfill
cv2.floodFill(im_floodfill, mask, seedPoint, 255);

# 得到im_floodfill的逆im_floodfill_inv
im_floodfill_inv = cv2.bitwise_not(im_floodfill)
# 把im_in、im_floodfill_inv这两幅图像结合起来得到前景
im_out = im_in | im_floodfill_inv
cv2.imshow('de',im_out)
cv2.waitKey(0)
cv2.destroyAllWindows()

谢谢点赞评论!
Recommend
About Joyk
Aggregate valuable and interesting links.
Joyk means Joy of geeK