

Android 自己实现 NavigationView [Design Support Library(1)]
source link: https://blog.csdn.net/lmj623565791/article/details/46405409
Go to the source link to view the article. You can view the picture content, updated content and better typesetting reading experience. If the link is broken, please click the button below to view the snapshot at that time.

Android 自己实现 NavigationView [Design Support Library(1)]
转载请标明出处:
http://blog.csdn.net/lmj623565791/article/details/46405409;
本文出自:【张鸿洋的博客】
Google I/O 2015 给大家带来了Android Design Support Library,对于希望做md风格的app的来说,简直是天大的喜讯了~大家可以通过Android Design Support Library该文章对其进行了解,也可以直接在github上下载示例代码运行学习。为了表达我心中的喜悦,我决定针对该库写一系列的文章来分别介绍新增加的控件。
ok,那么首先介绍的就是NavigationView。
注意下更新下as的SDK,然后在使用的过程中,在build.gradle中添加:
compile 'com.android.support:design:22.2.0'在md风格的app中,例如如下风格的侧滑菜单非常常见:
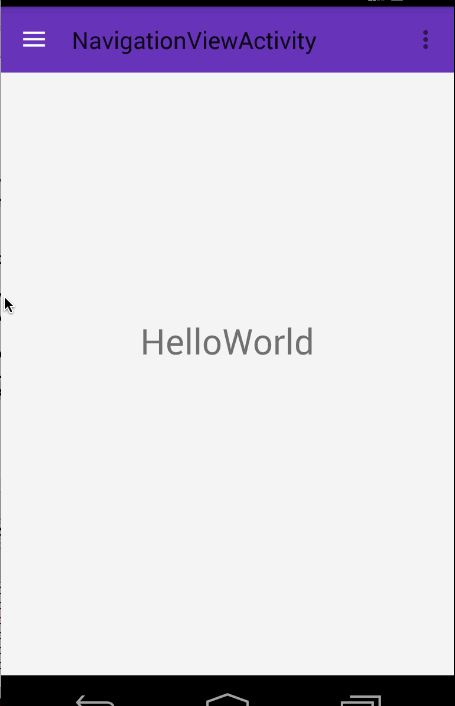
在之前的设计中,你可能需要考虑如何去布局实现,例如使用ListView;再者还要去设计Item的选中状态之类~~
but,现在,google提供了NavigationView,你只需要写写布局文件,这样的效果就ok了,并且兼容到Android 2.1,非常值得去体验一下。接下来我们来介绍如何去使用这个NavigationView!
使用起来very simple ,主要就是写写布局文件~
(一)布局文件
<?xml version="1.0" encoding="utf-8"?>
<android.support.v4.widget.DrawerLayout
    android:id="@+id/id_drawer_layout"
    xmlns:android="http://schemas.android.com/apk/res/android"
    xmlns:app="http://schemas.android.com/apk/res-auto"
    android:layout_width="match_parent"
    android:layout_height="match_parent"
    android:fitsSystemWindows="true"
    >

    <RelativeLayout
        android:layout_width="match_parent"
        android:layout_height="match_parent">

        <android.support.v7.widget.Toolbar
            android:id="@+id/id_toolbar"
            android:layout_width="match_parent"
            android:layout_height="?attr/actionBarSize"
            android:background="?attr/colorPrimary"
            app:layout_scrollFlags="scroll|enterAlways"
            app:popupTheme="@style/ThemeOverlay.AppCompat.Light"/>

        <TextView
            android:id="@+id/id_tv_content"
            android:layout_width="wrap_content"
            android:layout_height="wrap_content"
            android:layout_centerInParent="true"
            android:text="HelloWorld"
            android:textSize="30sp"/>
    </RelativeLayout>

    <android.support.design.widget.NavigationView
        android:id="@+id/id_nv_menu"
        android:layout_width="match_parent"
        android:layout_height="match_parent"
        android:layout_gravity="left"
        android:fitsSystemWindows="true"
        app:headerLayout="@layout/header_just_username"
        app:menu="@menu/menu_drawer"
        />

</android.support.v4.widget.DrawerLayout>
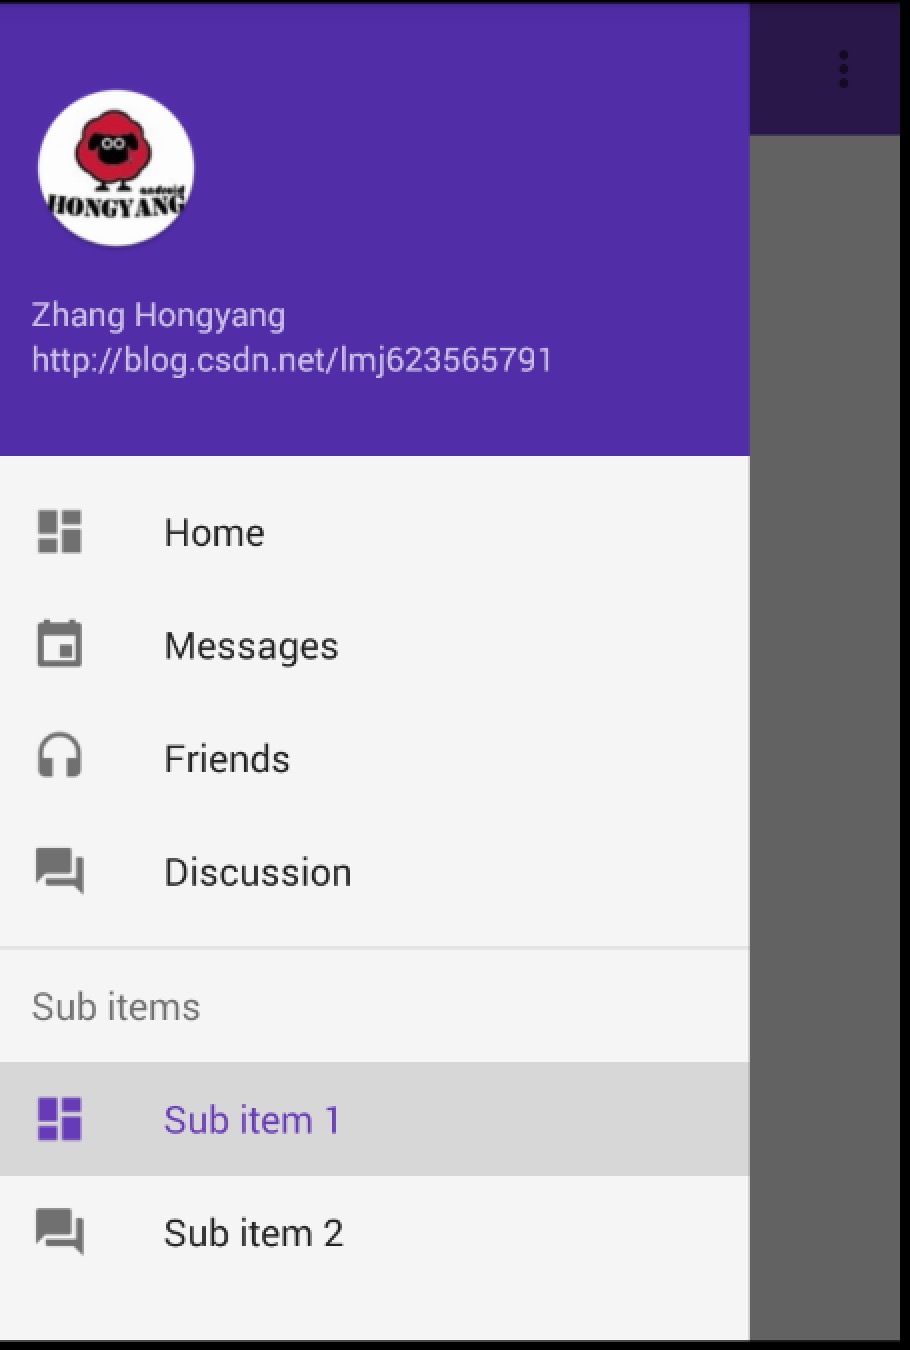
可以看到我们的最外层是DrawerLayout,里面一个content,一个作为drawer。我们的drawer为NavigationView。
注意这个view的两个属性app:headerLayout="@layout/header_just_username"和app:menu="@menu/menu_drawer",分别代表drawer布局中的header和menuitem区域,当然你可以根据自己的情况使用。
接下来看看header的布局文件和menu配置文件:
<?xml version="1.0" encoding="utf-8"?>
<RelativeLayout xmlns:android="http://schemas.android.com/apk/res/android"
                android:layout_width="match_parent"
                android:layout_height="192dp"
                android:background="?attr/colorPrimaryDark"
                android:orientation="vertical"
                android:padding="16dp"
                android:theme="@style/ThemeOverlay.AppCompat.Dark">


    <TextView
        android:id="@+id/id_link"
        android:layout_width="wrap_content"
        android:layout_height="wrap_content"
        android:layout_alignParentBottom="true"
        android:layout_marginBottom="16dp"
        android:text="http://blog.csdn.net/lmj623565791"/>

    <TextView
        android:id="@+id/id_username"
        android:layout_width="wrap_content"
        android:layout_height="wrap_content"
        android:layout_above="@id/id_link"
        android:text="Zhang Hongyang"/>

    <ImageView
        android:layout_width="72dp"
        android:layout_height="72dp"
        android:layout_above="@id/id_username"
        android:layout_marginBottom="16dp"
        android:src="@mipmap/icon"/>


</RelativeLayout>
<?xml version="1.0" encoding="utf-8"?>
<menu xmlns:android="http://schemas.android.com/apk/res/android">

    <group android:checkableBehavior="single">
        <item
            android:id="@+id/nav_home"
            android:icon="@drawable/ic_dashboard"
            android:title="Home"/>
        <item
            android:id="@+id/nav_messages"
            android:icon="@drawable/ic_event"
            android:title="Messages"/>
        <item
            android:id="@+id/nav_friends"
            android:icon="@drawable/ic_headset"
            android:title="Friends"/>
        <item
            android:id="@+id/nav_discussion"
            android:icon="@drawable/ic_forum"
            android:title="Discussion"/>
    </group>

    <item android:title="Sub items">
        <menu>
            <item
                android:icon="@drawable/ic_dashboard"
                android:title="Sub item 1"/>
            <item
                android:icon="@drawable/ic_forum"
                android:title="Sub item 2"/>
        </menu>
    </item>

</menu>
别放错文件夹哈~
布局文件写完了,基本就好了,是不是很爽~看似复杂的效果,写写布局文件就ok。
ps:默认的颜色很多是从当前的主题中提取的,比如icon的stateColor,当然你也可以通过以下属性修改部分样式:
app:itemIconTint=""
app:itemBackground=""
app:itemTextColor=""
(二)Activity
最后是Activity:
package com.imooc.testandroid;

import android.os.Bundle;
import android.support.design.widget.NavigationView;
import android.support.v4.widget.DrawerLayout;
import android.support.v7.app.ActionBar;
import android.support.v7.app.ActionBarActivity;
import android.support.v7.widget.Toolbar;
import android.view.MenuItem;


public class NavigationViewActivity extends ActionBarActivity
{

    private DrawerLayout mDrawerLayout;
    private NavigationView mNavigationView;

    @Override
    protected void onCreate(Bundle savedInstanceState)
    {
        super.onCreate(savedInstanceState);
        setContentView(R.layout.activity_navigation_view);

        mDrawerLayout = (DrawerLayout) findViewById(R.id.id_drawer_layout);
        mNavigationView = (NavigationView) findViewById(R.id.id_nv_menu);

        Toolbar toolbar = (Toolbar) findViewById(R.id.id_toolbar);
        setSupportActionBar(toolbar);

        final ActionBar ab = getSupportActionBar();
        ab.setHomeAsUpIndicator(R.drawable.ic_menu);
        ab.setDisplayHomeAsUpEnabled(true);

        setupDrawerContent(mNavigationView);


    }

    private void setupDrawerContent(NavigationView navigationView)
    {
        navigationView.setNavigationItemSelectedListener(

                new NavigationView.OnNavigationItemSelectedListener()
                {

                    @Override
                    public boolean onNavigationItemSelected(MenuItem menuItem)
                    {
                        menuItem.setChecked(true);
                        mDrawerLayout.closeDrawers();
                        return true;
                    }
                });
    }


    @Override
    public boolean onCreateOptionsMenu(Menu menu)
    {
        // Inflate the menu; this adds items to the action bar if it is present.
        getMenuInflater().inflate(R.menu.menu_navigation_view, menu);
        return true;
    }

    @Override
    public boolean onOptionsItemSelected(MenuItem item)
    {
        if(item.getItemId() == android.R.id.home)
        {
            mDrawerLayout.openDrawer(GravityCompat.START);
            return true ;
        }
        return super.onOptionsItemSelected(item);
    }

}
我们在Activity里面可以通过navigationView去navigationView.setNavigationItemSelectedListener,当selected的时候,menuItem去setChecked(true)。
别忘了设置theme~
<resources>

    <!-- Base application theme. -->
    <style name="AppTheme" parent="Theme.AppCompat.Light.DarkActionBar">
        <!-- Customize your theme here. -->
    </style>

    <style name="Theme.DesignDemo" parent="Base.Theme.DesignDemo">
    </style>

    <style name="Base.Theme.DesignDemo" parent="Theme.AppCompat.Light.NoActionBar">
        <item name="colorPrimary">#673AB7</item>
        <item name="colorPrimaryDark">#512DA8</item>
        <item name="colorAccent">#FF4081</item>
        <item name="android:windowBackground">@color/window_background</item>
    </style>

</resources>


<color name="window_background">#FFF5F5F5</color>

 <activity
    android:name=".NavigationViewActivity"
    android:label="@string/title_activity_navigation_view"
    android:theme="@style/Theme.DesignDemo">
</activity>
ok,到此就搞定了~~
不过存在一个问题,此时你如果点击Sub items里面的Sub item,如果你期望当前选中应该是Sub item,你会发现不起作用。那怎么办呢?
(三)Sub Item支持Cheable
这里可以修改menu的配置文件:
<?xml version="1.0" encoding="utf-8"?>
<menu xmlns:android="http://schemas.android.com/apk/res/android">

    <group>
        <item
            android:id="@+id/nav_home"
            android:checkable="true"
            android:icon="@drawable/ic_dashboard"
            android:title="Home"/>
        <item
            android:id="@+id/nav_messages"
            android:checkable="true"
            android:icon="@drawable/ic_event"
            android:title="Messages"/>
        <item
            android:id="@+id/nav_friends"
            android:checkable="true"
            android:icon="@drawable/ic_headset"
            android:title="Friends"/>
        <item
            android:id="@+id/nav_discussion"
            android:checkable="true"
            android:icon="@drawable/ic_forum"
            android:title="Discussion"/>
    </group>

    <item android:title="Sub items">
        <menu>
            <item
                android:checkable="true"
                android:icon="@drawable/ic_dashboard"
                android:title="Sub item 1"/>
            <item
                android:checkable="true"
                android:icon="@drawable/ic_forum"
                android:title="Sub item 2"/>
        </menu>
    </item>

</menu>将android:checkableBehavior="single"去掉,然后给每个item项添加android:checkable="true"。
然后在代码中:
navigationView.setNavigationItemSelectedListener(

                new NavigationView.OnNavigationItemSelectedListener()
                {

                    private MenuItem mPreMenuItem;

                    @Override
                    public boolean onNavigationItemSelected(MenuItem menuItem)
                    {
                        if (mPreMenuItem != null) mPreMenuItem.setChecked(false);
                        menuItem.setChecked(true);
                        mDrawerLayout.closeDrawers();
                        mPreMenuItem = menuItem;
                        return true;
                    }
                });
存一下preMenuItem,手动切换。
ok,哈~其实这个还是参考链接2里面的一个评论说的~~
到此用法就介绍完了有木有一点小激动~ 但是还有个问题,对于app,就像ActionBar最初的出现,一开始大家都欢欣鼓舞,后来发现app中多数情况下需要去定制,尼玛,是不是忽然觉得ActionBar太死板了,恶心死了(当然了现在有了ToolBar灵活度上好多了)对于上述NavigationView可能也会存在定制上的问题,比如我希望选中的Item左边有个高亮的竖线之类的效果。那么,针对于各种需求,想要能解决各种问题,最好的方式就是说对于NavigationView的效果自己可以实现。最好,我们就来看看NavigationView自己实现有多难?
三、自己实现NavigationView效果
其实NavigationView的实现非常简单,一个ListView就可以了,甚至都不需要去自定义,简单写一个Adapter就行了~~
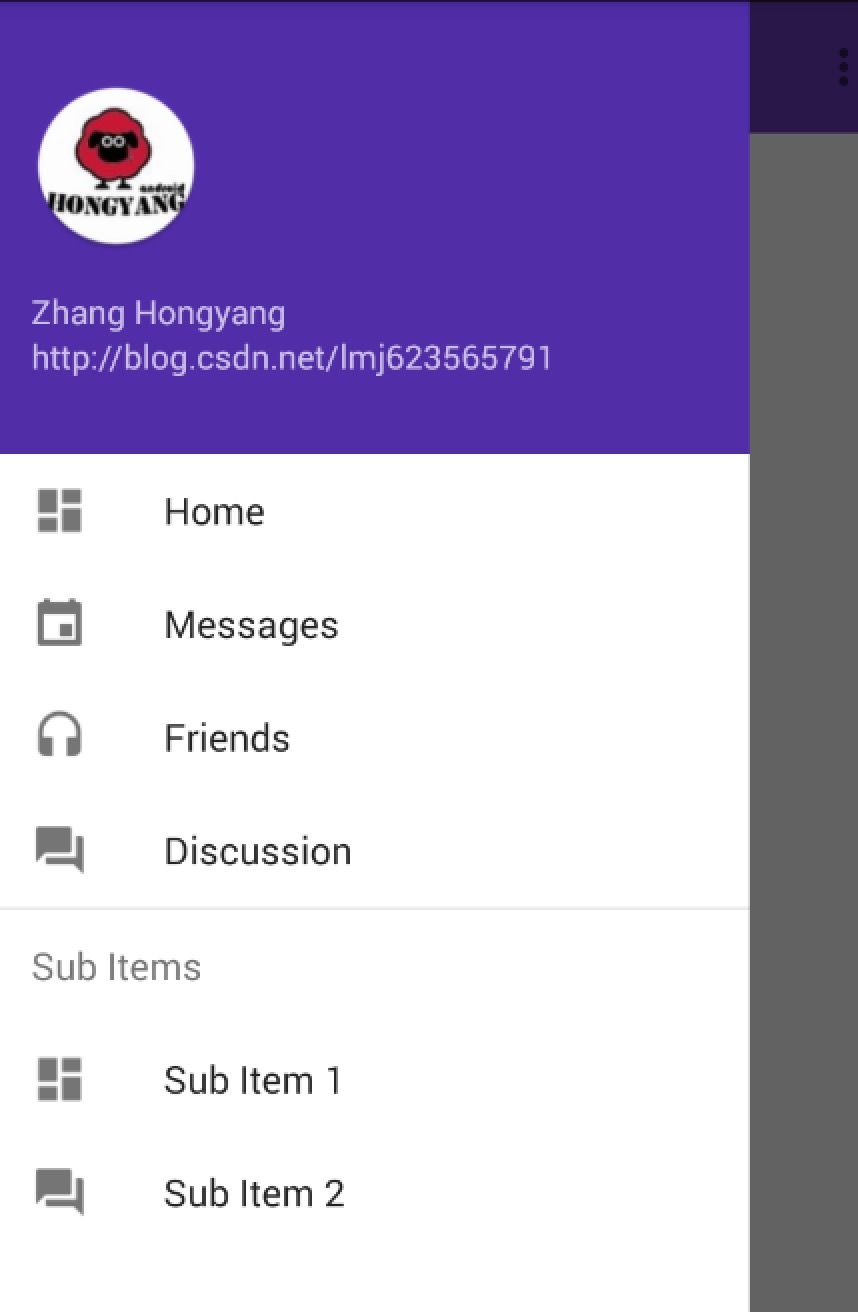
首先观察该图,有没有发现神奇之处,恩,你肯定发现不了,因为我们做的太像了。
其实这个图就是我通过ListView写的一个~是不是和原版很像(~哈~参考了源码的实现,当然像。)
接下来分析,如果说是ListView,那么Item的type肯定不止一种,那我们数一数种类:
- 带图标和文本的
- 仅仅是文本的 Sub Items
你会说还有顶部那个,顶部是headview呀~~
这么分析完成,是不是瞬间觉得没有难度了~
(一)首先布局文件
<?xml version="1.0" encoding="utf-8"?>
<android.support.v4.widget.DrawerLayout
    android:id="@+id/id_drawer_layout"
    xmlns:android="http://schemas.android.com/apk/res/android"
    xmlns:app="http://schemas.android.com/apk/res-auto"
    android:layout_width="match_parent"
    android:layout_height="match_parent"
    android:fitsSystemWindows="true"
    >

    <RelativeLayout
        android:layout_width="match_parent"
        android:layout_height="match_parent">

        <android.support.v7.widget.Toolbar
            android:id="@+id/id_toolbar"
            android:layout_width="match_parent"
            android:layout_height="?attr/actionBarSize"
            android:background="?attr/colorPrimary"
            app:layout_scrollFlags="scroll|enterAlways"
            app:popupTheme="@style/ThemeOverlay.AppCompat.Light"/>

        <TextView
            android:id="@+id/id_tv_content"
            android:layout_width="wrap_content"
            android:layout_height="wrap_content"
            android:layout_centerInParent="true"
            android:text="HelloWorld"
            android:textSize="30sp"/>
    </RelativeLayout>

    <ListView
        android:id="@+id/id_lv_left_menu"
        android:layout_width="match_parent"
        android:layout_height="match_parent"
        android:layout_gravity="start"
        android:paddingTop="0dp"
        android:background="#ffffffff"
        android:clipToPadding="false"
        android:divider="@null"
        android:listSelector="?attr/selectableItemBackground"
        />

</android.support.v4.widget.DrawerLayout>
布局文件上:和上文对比,我们仅仅把NavigationView换成了ListView.
下面注意了,一大波代码来袭.
(二) Activity
package com.imooc.testandroid;

public class NavListViewActivity extends ActionBarActivity
{
    private ListView mLvLeftMenu;
    private DrawerLayout mDrawerLayout;


    @Override
    protected void onCreate(Bundle savedInstanceState)
    {
        super.onCreate(savedInstanceState);
        setContentView(R.layout.activity_nav_list_view);

        mDrawerLayout = (DrawerLayout) findViewById(R.id.id_drawer_layout);
        mLvLeftMenu = (ListView) findViewById(R.id.id_lv_left_menu);

        Toolbar toolbar = (Toolbar) findViewById(R.id.id_toolbar);
        setSupportActionBar(toolbar);

        final ActionBar ab = getSupportActionBar();
        ab.setHomeAsUpIndicator(R.drawable.ic_menu);
        ab.setDisplayHomeAsUpEnabled(true);

        setUpDrawer();
    }

    private void setUpDrawer()
    {
        LayoutInflater inflater = LayoutInflater.from(this);
        mLvLeftMenu.addHeaderView(inflater.inflate(R.layout.header_just_username, mLvLeftMenu, false));
        mLvLeftMenu.setAdapter(new MenuItemAdapter(this));
    }

    @Override
    public boolean onCreateOptionsMenu(Menu menu)
    {
        // Inflate the menu; this adds items to the action bar if it is present.
        getMenuInflater().inflate(R.menu.menu_nav_list_view, menu);
        return true;
    }

    @Override
    public boolean onOptionsItemSelected(MenuItem item)
    {
        // Handle action bar item clicks here. The action bar will
        // automatically handle clicks on the Home/Up button, so long
        // as you specify a parent activity in AndroidManifest.xml.
        int id = item.getItemId();

        //noinspection SimplifiableIfStatement
        if (id == android.R.id.home)
        {
            mDrawerLayout.openDrawer(GravityCompat.START);
            return true;
        }

        return super.onOptionsItemSelected(item);
    }


}
直接看onCreate中的setUpDrawer(),可以看到我们首先去addHeadView,然后去setAdapter。
那么核心代码就是我们的Adapter了~~
(三)MenuItemAdapter
    public class LvMenuItem
    {
        public LvMenuItem(int icon, String name)
        {
            this.icon = icon;
            this.name = name;

            if (icon == NO_ICON && TextUtils.isEmpty(name))
            {
                type = TYPE_SEPARATOR;
            } else if (icon == NO_ICON)
            {
                type = TYPE_NO_ICON;
            } else
            {
                type = TYPE_NORMAL;
            }

            if (type != TYPE_SEPARATOR && TextUtils.isEmpty(name))
            {
                throw new IllegalArgumentException("you need set a name for a non-SEPARATOR item");
            }

            L.e(type + "");


        }

        public LvMenuItem(String name)
        {
            this(NO_ICON, name);
        }

        public LvMenuItem()
        {
            this(null);
        }

        private static final int NO_ICON = 0;
        public static final int TYPE_NORMAL = 0;
        public static final int TYPE_NO_ICON = 1;
        public static final int TYPE_SEPARATOR = 2;

        int type;
        String name;
        int icon;

    }

    public class MenuItemAdapter extends BaseAdapter
    {
        private final int mIconSize;
        private LayoutInflater mInflater;
        private Context mContext;

        public MenuItemAdapter(Context context)
        {
            mInflater = LayoutInflater.from(context);
            mContext = context;

            mIconSize = context.getResources().getDimensionPixelSize(R.dimen.drawer_icon_size);//24dp
        }

        private List<LvMenuItem> mItems = new ArrayList<LvMenuItem>(
                Arrays.asList(
                        new LvMenuItem(R.drawable.ic_dashboard, "Home"),
                        new LvMenuItem(R.drawable.ic_event, "Messages"),
                        new LvMenuItem(R.drawable.ic_headset, "Friends"),
                        new LvMenuItem(R.drawable.ic_forum, "Discussion"),
                        new LvMenuItem(),
                        new LvMenuItem("Sub Items"),
                        new LvMenuItem(R.drawable.ic_dashboard, "Sub Item 1"),
                        new LvMenuItem(R.drawable.ic_forum, "Sub Item 2")
                ));


        @Override
        public int getCount()
        {
            return mItems.size();
        }


        @Override
        public Object getItem(int position)
        {
            return mItems.get(position);
        }


        @Override
        public long getItemId(int position)
        {
            return position;
        }

        @Override
        public int getViewTypeCount()
        {
            return 3;
        }

        @Override
        public int getItemViewType(int position)
        {
            return mItems.get(position).type;
        }

        @Override
        public View getView(int position, View convertView, ViewGroup parent)
        {
            LvMenuItem item = mItems.get(position);
            switch (item.type)
            {
                case LvMenuItem.TYPE_NORMAL:
                    if (convertView == null)
                    {
                        convertView = mInflater.inflate(R.layout.design_drawer_item, parent,
                                false);
                    }
                    TextView itemView = (TextView) convertView;
                    itemView.setText(item.name);
                    Drawable icon = mContext.getResources().getDrawable(item.icon);
                    setIconColor(icon);
                    if (icon != null)
                    {
                        icon.setBounds(0, 0, mIconSize, mIconSize);
                        TextViewCompat.setCompoundDrawablesRelative(itemView, icon, null, null, null);
                    }

                    break;
                case LvMenuItem.TYPE_NO_ICON:
                    if (convertView == null)
                    {
                        convertView = mInflater.inflate(R.layout.design_drawer_item_subheader,
                                parent, false);
                    }
                    TextView subHeader = (TextView) convertView;
                    subHeader.setText(item.name);
                    break;
                case LvMenuItem.TYPE_SEPARATOR:
                    if (convertView == null)
                    {
                        convertView = mInflater.inflate(R.layout.design_drawer_item_separator,
                                parent, false);
                    }
                    break;
            }

            return convertView;
        }

        public void setIconColor(Drawable icon)
        {
            int textColorSecondary = android.R.attr.textColorSecondary;
            TypedValue value = new TypedValue();
            if (!mContext.getTheme().resolveAttribute(textColorSecondary, value, true))
            {
                return;
            }
            int baseColor = mContext.getResources().getColor(value.resourceId);
            icon.setColorFilter(baseColor, PorterDuff.Mode.MULTIPLY);
        }
    }
首先我们的每个Item对应于一个LvMenuItem,包含icon、name、type,可以看到我们的type分为3类。
那么adapter中代码就很简单了,多Item布局的写法。
这样就完成了,我们自己去书写NavigationView,是不是很简单~~如果你的app需要类似效果,但是又与NavigationView的效果并非一模一样,可以考虑按照上面的思路自己写一个。
最后贴一下用到的Item的布局文件:
- design_drawer_item_subheader.xml
<?xml version="1.0" encoding="utf-8"?>
<TextView xmlns:android="http://schemas.android.com/apk/res/android"
          android:layout_width="match_parent"
          android:layout_height="?attr/listPreferredItemHeightSmall"
          android:gravity="center_vertical|start"
          android:maxLines="1"
          android:paddingLeft="?attr/listPreferredItemPaddingLeft"
          android:paddingRight="?attr/listPreferredItemPaddingRight"
          android:textAppearance="?attr/textAppearanceListItem"
          android:textColor="?android:textColorSecondary"/>
- design_drawer_item_separator.xml
<?xml version="1.0" encoding="utf-8"?>
<FrameLayout xmlns:android="http://schemas.android.com/apk/res/android"
             android:layout_width="match_parent"
             android:layout_height="wrap_content">

    <View android:layout_width="match_parent"
          android:layout_height="1dp"
          android:background="?android:attr/listDivider"/>

</FrameLayout>
- design_drawer_item,xml:
<?xml version="1.0" encoding="utf-8"?>
<TextView
        xmlns:android="http://schemas.android.com/apk/res/android"
        android:layout_width="match_parent"
        android:layout_height="?attr/listPreferredItemHeightSmall"
        android:paddingLeft="?attr/listPreferredItemPaddingLeft"
        android:paddingRight="?attr/listPreferredItemPaddingRight"
        android:drawablePadding="32dp"
        android:gravity="center_vertical|start"
        android:maxLines="1"
        android:textAppearance="?attr/textAppearanceListItem"
android:textColor="?android:attr/textColorPrimary"/>ok,其实上述ListView的写法也正是NavigationView的源码实现~~item的布局文件直接从源码中拖出来的,还是爽爽哒~
源码点击下载
~~hava a nice day ~~
微信公众号:hongyangAndroid
(欢迎关注,第一时间推送博文信息)

Recommend
About Joyk
Aggregate valuable and interesting links.
Joyk means Joy of geeK