
17

PHP - MAC下PhpStorm安装调试环境xdebug
source link: https://www.cnblogs.com/GarveyCalvin/p/7783903.html
Go to the source link to view the article. You can view the picture content, updated content and better typesetting reading experience. If the link is broken, please click the button below to view the snapshot at that time.

今天下午一直在捣鼓如何用PhpStorm进行调试,查找了许多资料,零零碎碎的,所以自己弄篇文章记录一下步骤。
安装xdebug
使用brew安装xdebug,语法如下
brew install homebrew/php/php<version number>-xdebug
到https://xdebug.org/download.php下载xdebug,版本必须是与php对应的版本
brew install homebrew/php/php56-xdebug
如果你不知道该下载哪个版本的xdebug,xdebug网站有可以检测的地方(xdebug检测),把你的phpinfo()信息整个复制到文本框内,然后点击Analyse my phpinfo() output按钮,就会有相应的安装过程介绍。
查看现有php版本
$ php -v
PHP 5.6.32 (cli) (built: Oct 27 2017 11:56:18)
Copyright (c) 1997-2016 The PHP Group
Zend Engine v2.6.0, Copyright (c) 1998-2016 Zend Technologies
    with Xdebug v2.5.5, Copyright (c) 2002-2017, by Derick Rethans
下载完成后,解压压缩文件。把解压后的文件目录,整个复制到/usr/local/Cellar/php56/5.6.32_8/目录下
$ cd /usr/local/Cellar/php56/5.6.32_8/
$ phpize
若出现以下信息,则表示可以继续下一步
Configuring for:
PHP Api Version:         20131106
Zend Module Api No:      20131226
Zend Extension Api No:   220131226
继续走流程
$ ./configure
$ make
$ cp modules/xdebug.so /usr/lib/php/extensions/no-debug-non-zts-20131226
最后创建/etc/php.ini文件
vi /etc/php.ini
添加这一行
zend_extension = /usr/lib/php/extensions/no-debug-non-zts-20131226/xdebug.so
重启web服务器
apachectl restart
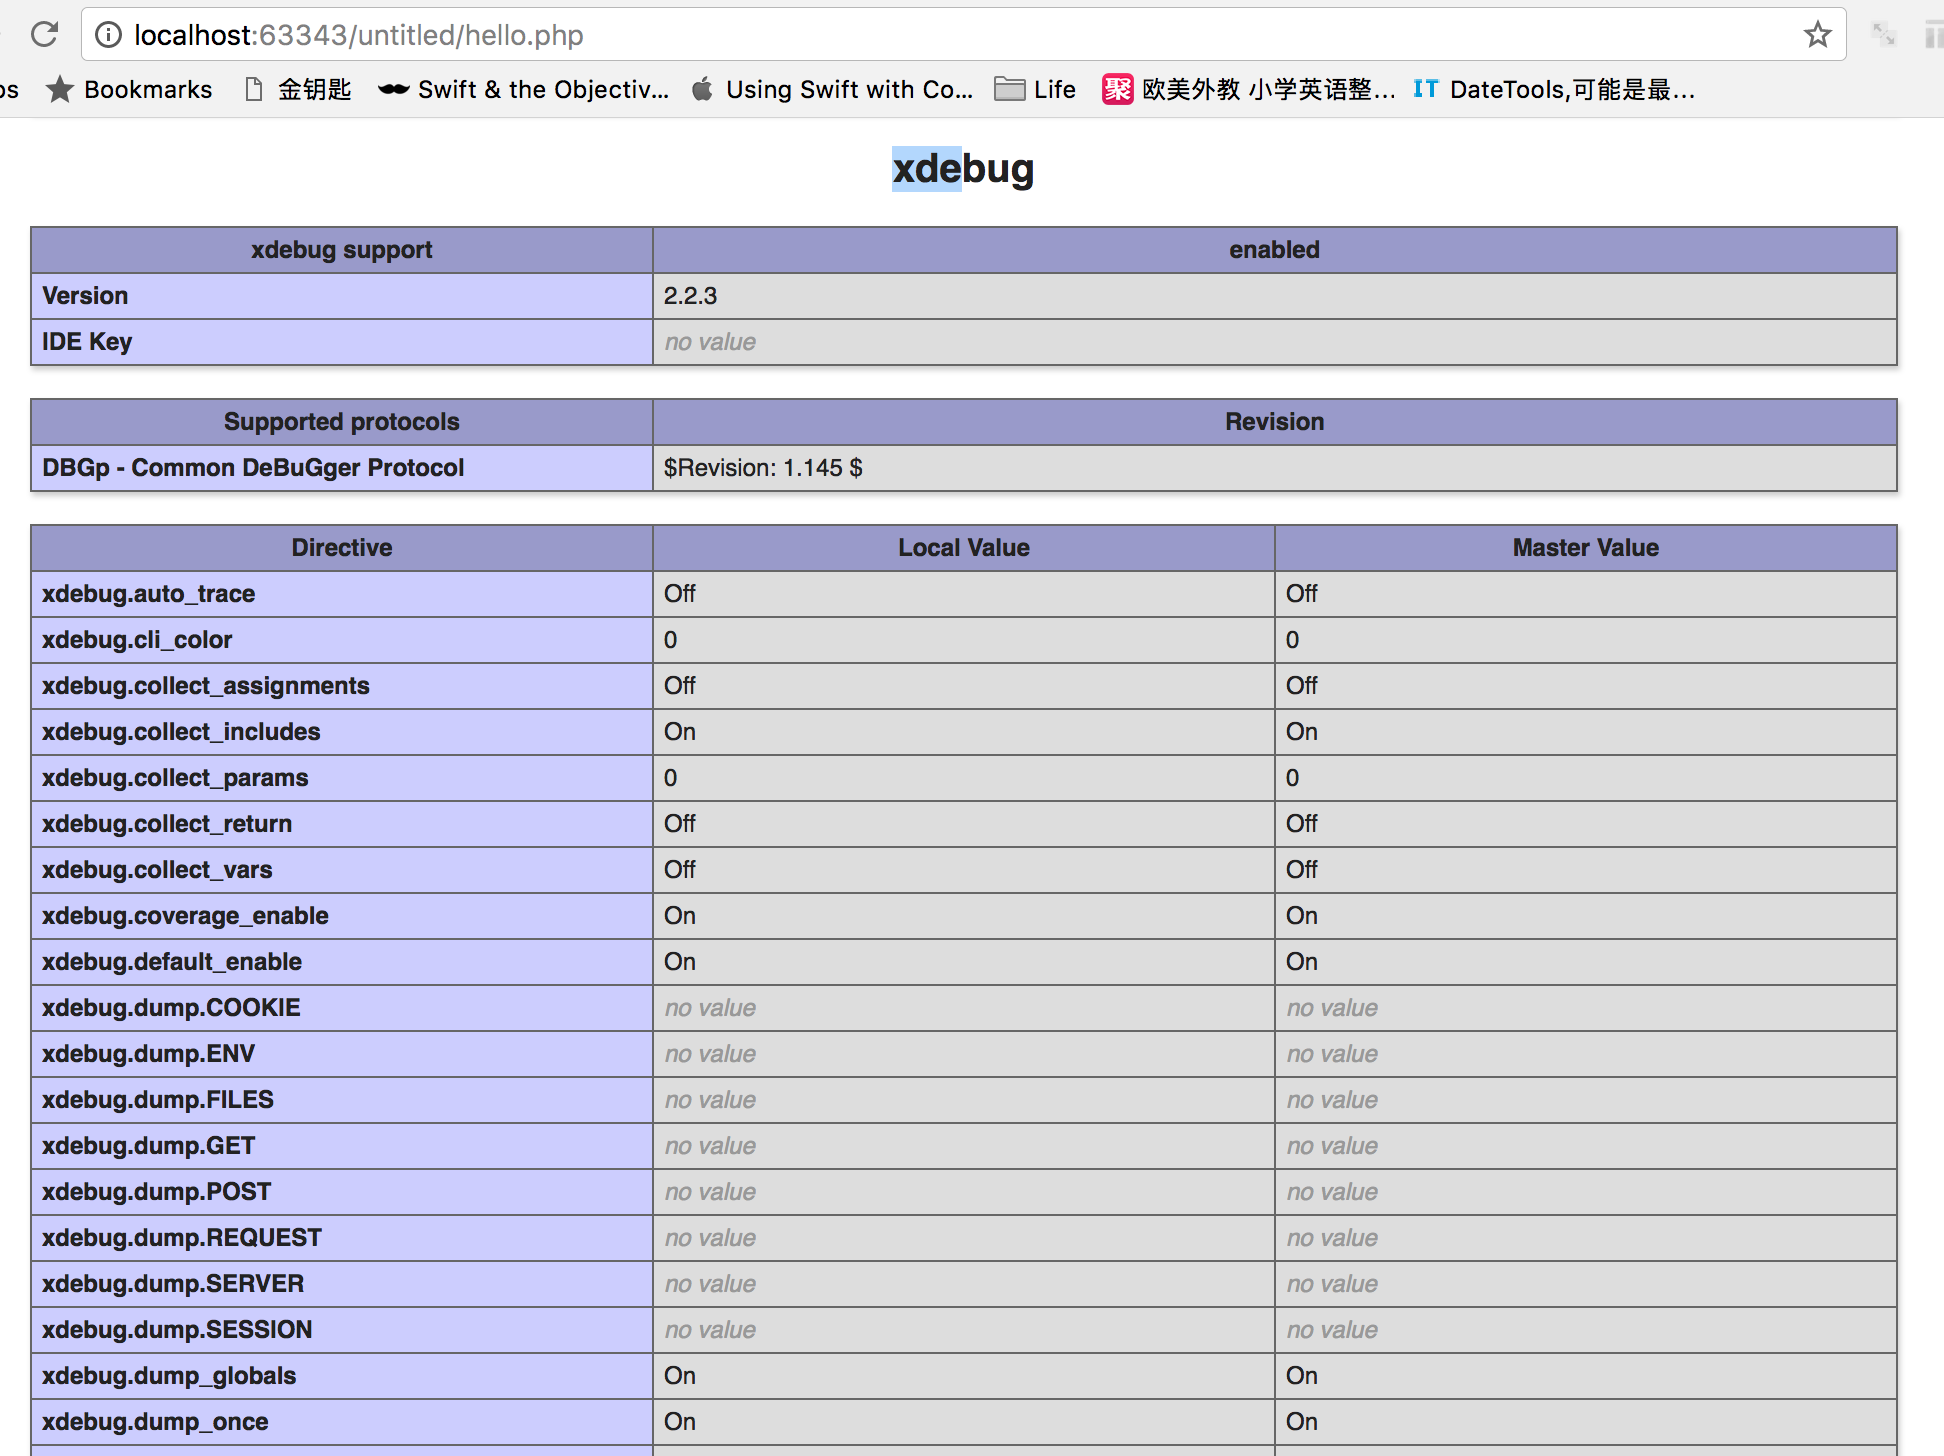
使用phpinfo查看是否安装成功
<?php phpinfo(); ?>
虽然/etc/php.ini的都有默认配置,但这几个配置最好写一下
xdebug.remote_enable = On

xdebug.remote_handler = dbgp

xdebug.remote_host= localhost

xdebug.remote_port = 9000

xdebug.idekey = PHPSTORM
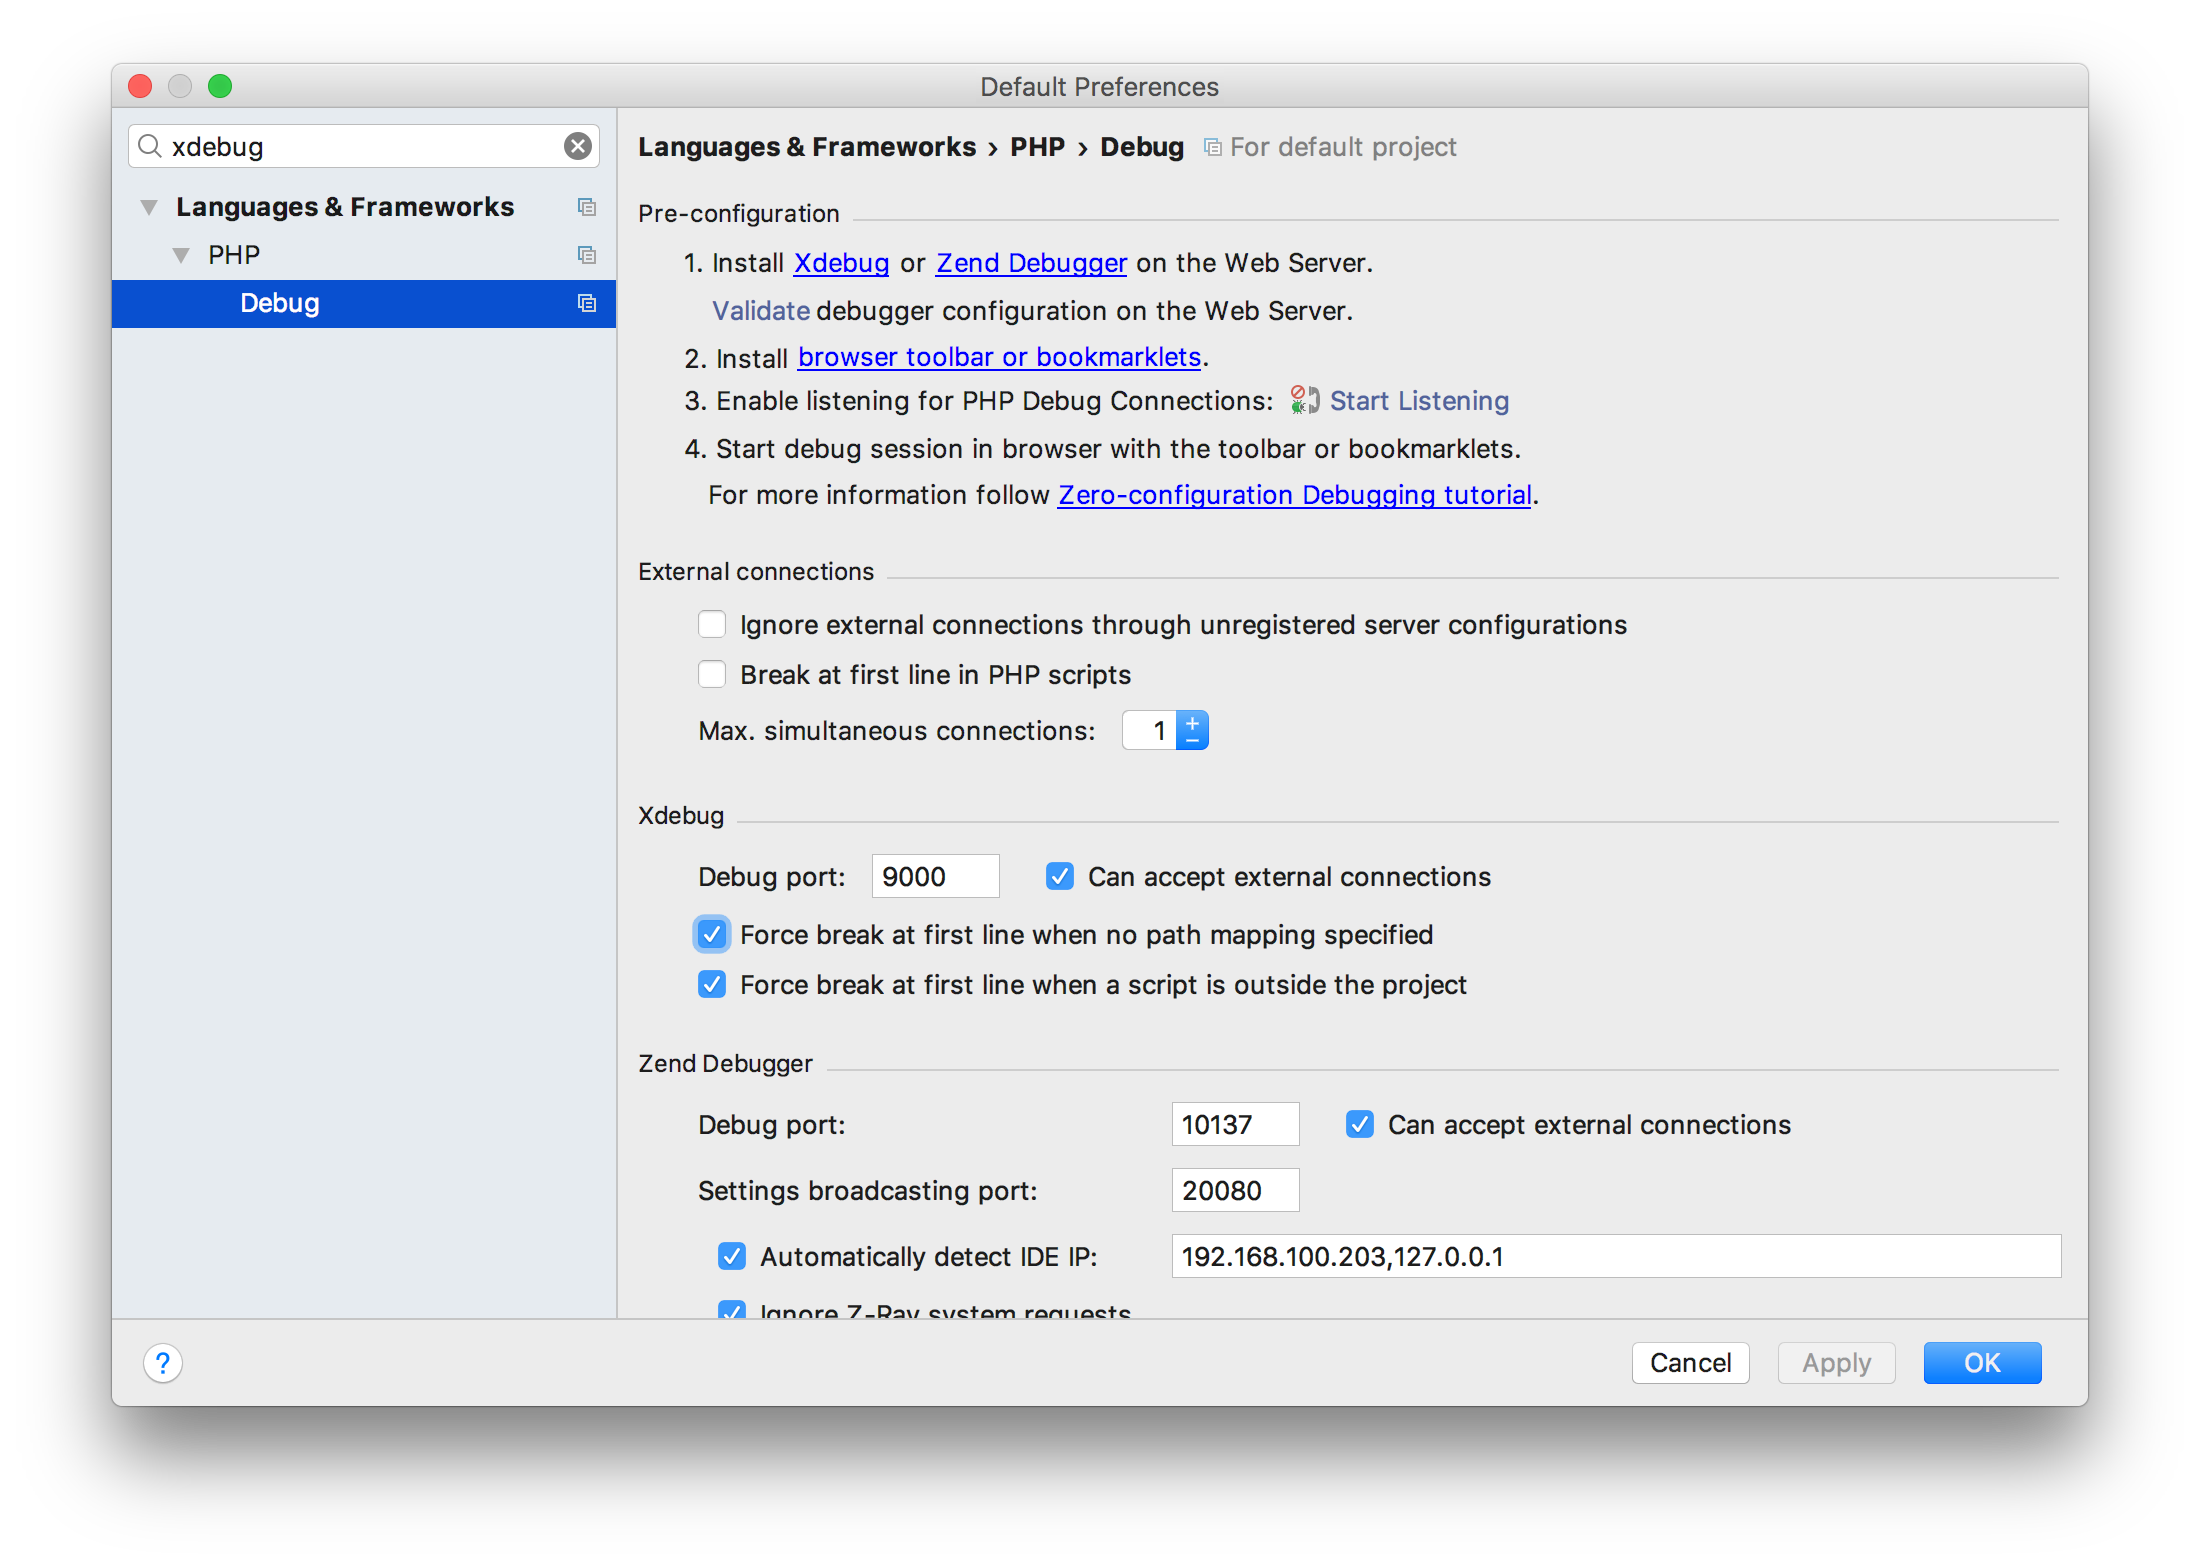
PhpStorm-配置xdebug
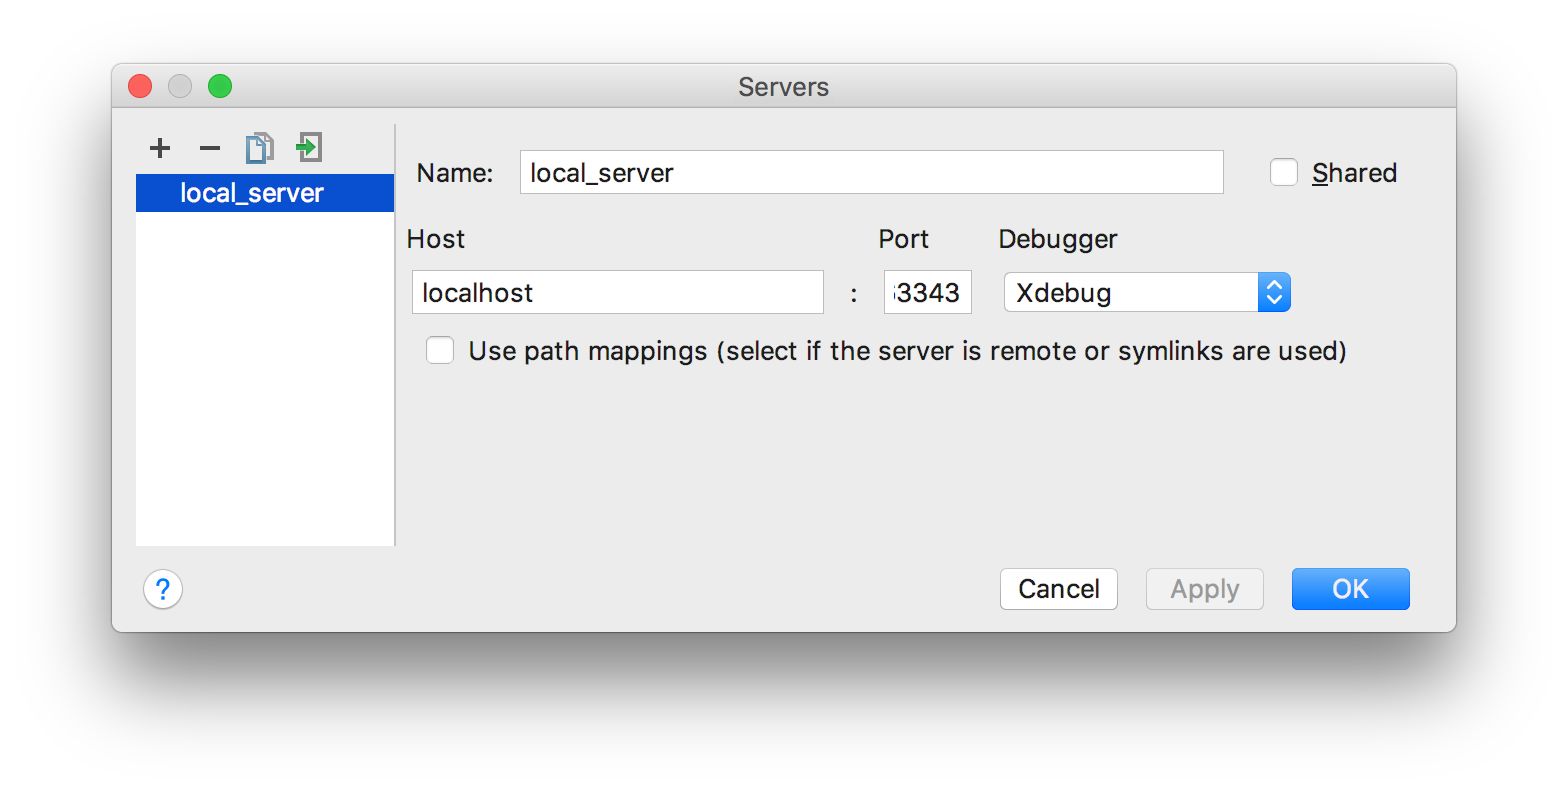
打开PhpStorm,查看xdebug的基本信息

这里的端口需要与/etc/php.ini里xdebug.remote_port的端口一致
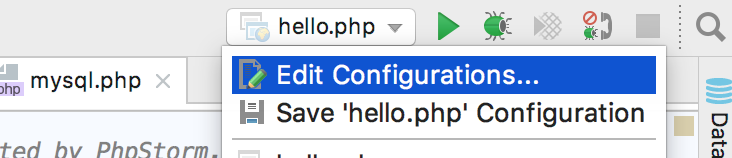
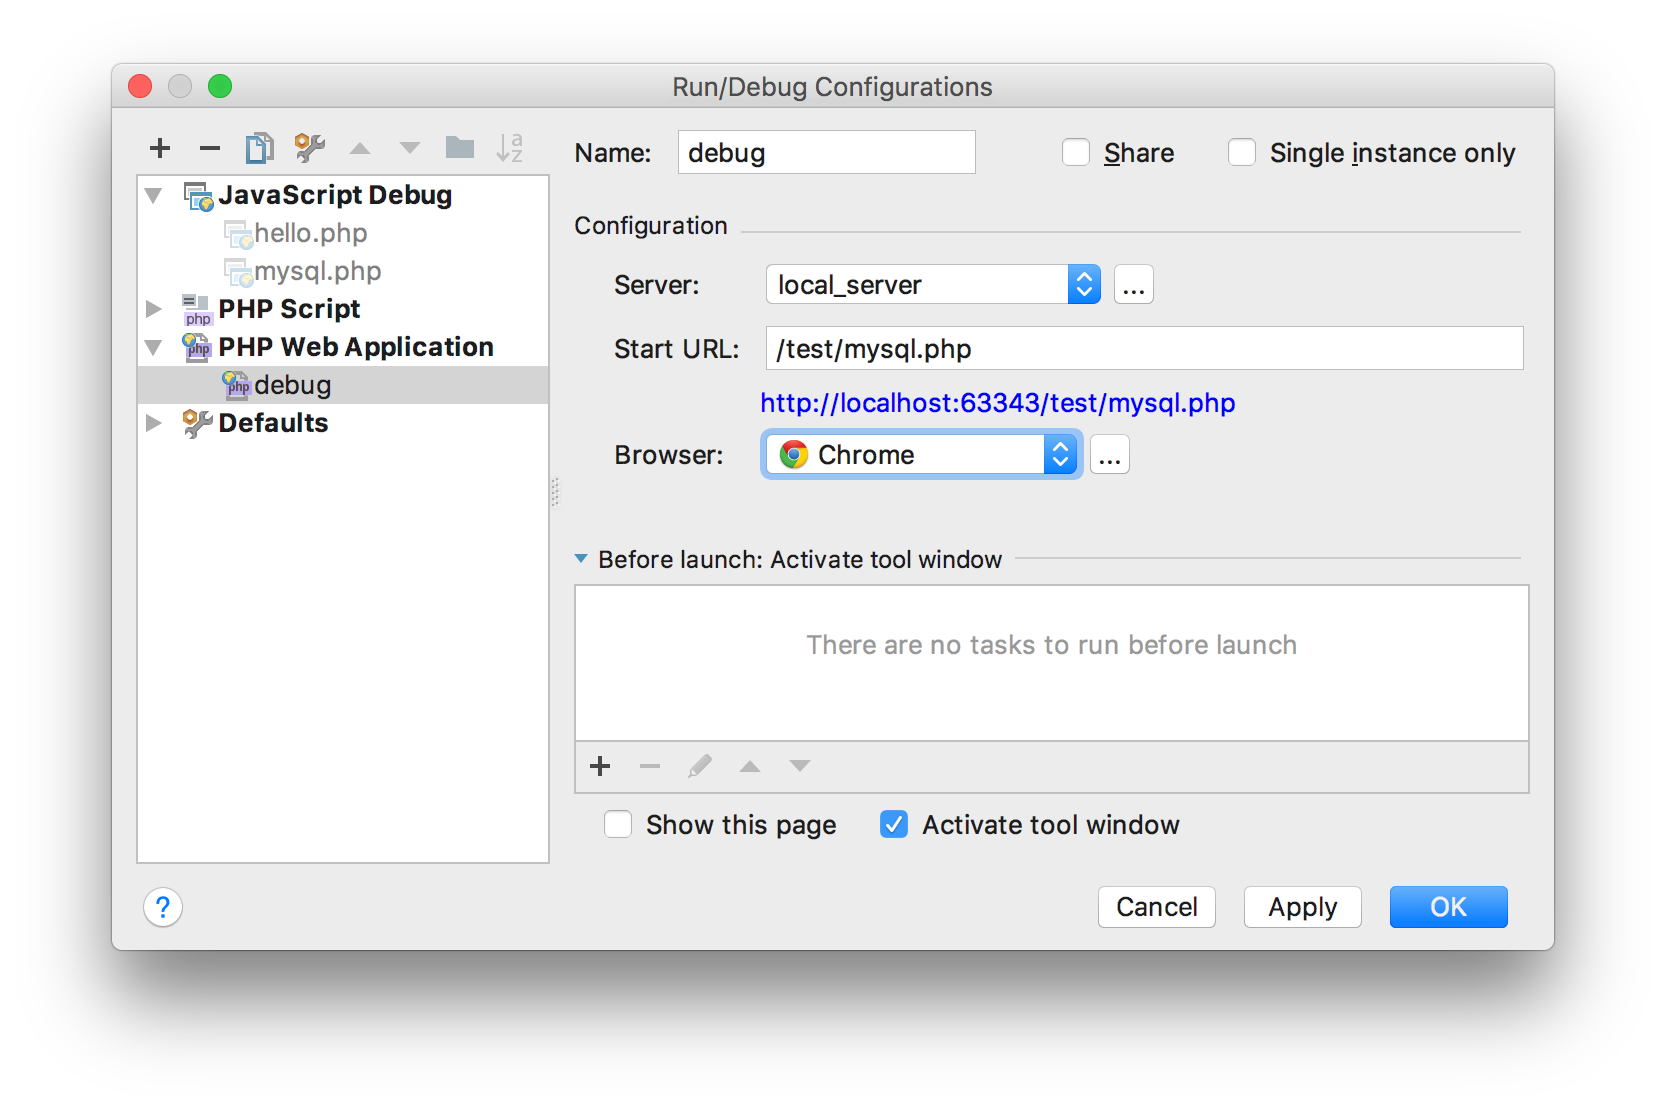
点击Edit Configurations
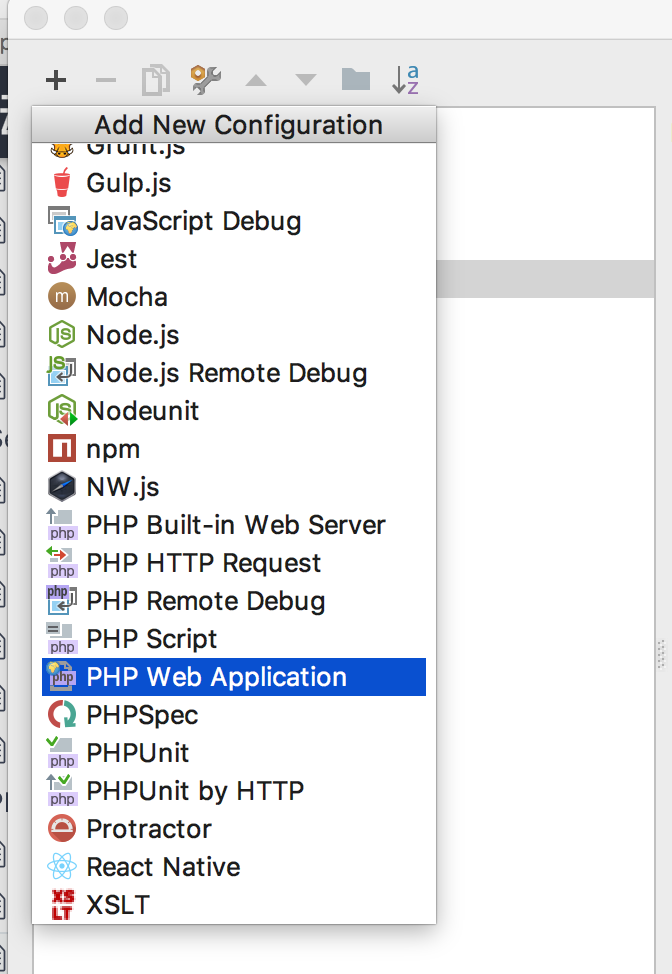
新建PHP Web Application
配置基本信息
配置Server
至此,Done!
博文作者:GarveyCalvin
博文出处:http://www.cnblogs.com/GarveyCalvin/
本文版权归作者和博客园共有,欢迎转载,但须保留此段声明,并给出原文链接,谢谢合作!
Recommend
About Joyk
Aggregate valuable and interesting links.
Joyk means Joy of geeK