

linux学习20,内核中的映射IDR机制
source link: https://blog.popkx.com/linux-learning-20-mapping-idr-mechanism-in-kernel/
Go to the source link to view the article. You can view the picture content, updated content and better typesetting reading experience. If the link is broken, please click the button below to view the snapshot at that time.

前面几节较为详细的讨论了 linux 内核中的“链表”和“队列”数据类型,本节再来说说中的映射(idr)机制。

先来说说映射适合用于解决什么问题
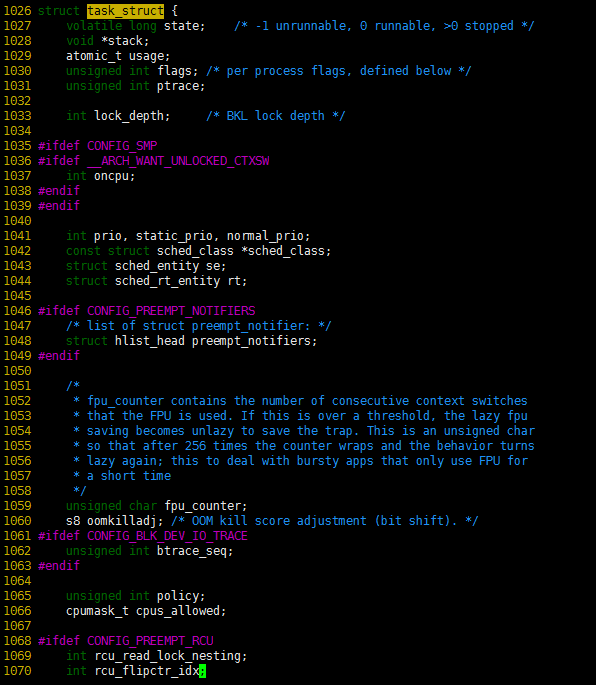
linux 系统中的许多资源都用整数 ID 标识,例如进程 PID,文件描述符 ID 等等。使用一个整数标识资源的确非常简洁,但是一个整数能够记录表达的信息太有限了,所以整数 ID 的背后常常都有一个结构体与之对应,例如每个进程 ID 都对应着一个巨大的 task_struct 结构体记录着进程的资源。
那么,整数 ID 该如何与结构体对应起来呢?这个问题可以简化为如何将两个整数对应起来。因为只要能根据整数 ID 找到结构体的地址就可以了,而结构体的地址也是一个整数。
要解决这个问题,首先就需要选择一个数据结构。如果使用数组进行索引,一旦 ID 很大,那数组也必须得很大,这样会占据大量的内存空间,所以数组显然是不合适的。而如果使用链表进行索引,则又会有查找效率问题,毕竟链表只能线性遍历查找。
映射就非常适合解决这样的问题。
什么是映射?
映射其实就是将要保存的数值(例如结构体指针)与另一个数关联起来,所谓的“另一个数”常常被称作“键值”。映射一般至少要支持三个模块:
* add(key, value),增加映射
* remove(key),删除映射
* value = lookup(key),根据键查找数值

这么看来,“哈希表”就是一种映射,不过也不是所有映射都需要通过“哈希表”才能实现,映射也可以通过自平衡二叉树(之后的文章会介绍二叉树)实现。
虽然“键值映射”是一个非常宽泛的概念,但是大多情况下都默认是借助自平衡二叉树实现的。
linux 内核是怎样设计和实现“映射”的?
linux 内核实现映射的目标很简单:就是将指针与一个唯一标识数(UID)对应起来。为此,linux 内核不仅实现了映射的三个标准模块外,还提供了自动产生 UID 的模块。这么看来,内核实现的映射更像是一种“定制化”的,而不是通用的映射。
先来看看 linux 内核中用于实现映射的数据结构,请看如下C语言代码:
-    50 struct idr_layer {
|    51     unsigned long        bitmap; /* A zero bit means "space here" */
|    52     struct idr_layer    *ary[1<<IDR_BITS];
|    53     int          count;  /* When zero, we can release it */
|    54 };
     55
-    56 struct idr {
|    57     struct idr_layer *top;
|    58     struct idr_layer *id_free;
|    59     int       layers;
|    60     int       id_free_cnt;
|    61     spinlock_t    lock;
|    62 };

idr_layer 结构很像一个链表,IDR_BITS 和平台相关,在 BITS_PER_LONG == 32 的平台上,IDR_BITS 等于 5,在 BITS_PER_LONG == 64 的平台上,IDR_BITS 等于 6。
也就是说,1<<IDR_BITS 等于 32 或者 64。以下以 IDR_BITS 等于 5 为例行文。
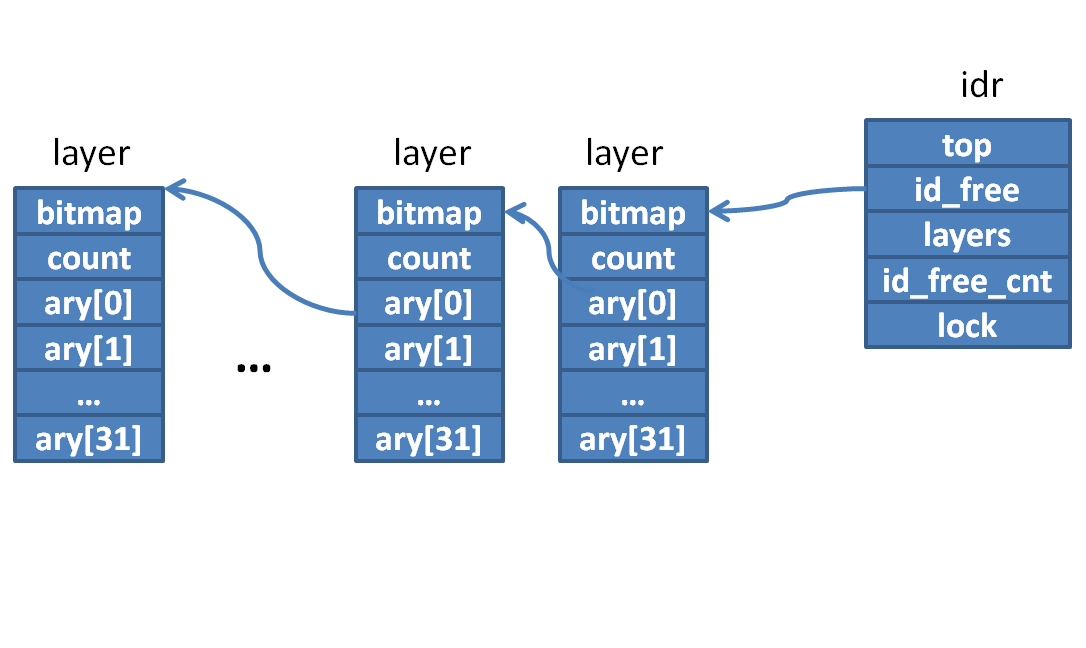
这么看来,idr_layer 结构体可用下图表示: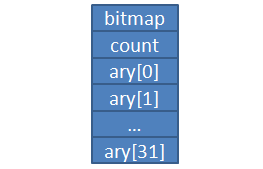
初始化一个 idr(映射)
初始化一个 idr 非常简单,调用 idr_init() 函数即可,它的C语言代码如下,请看:
void idr_init(struct idr *idp)
{
     memset(idp, 0, sizeof(struct idr));
     spin_lock_init(&idp->lock);
}
idr_init() 函数只是将 idr 清零,并初始化锁而已,所以在调用 idr_init() 函数之前,需要静态定义或者动态分配一个 idr,例如:
struct idr myidr;
idr_init(myidr);
分配一个新的 UID
建立好一个新的 idr 后,就可以分配新的 UID 了。这一步 linux 内核是通过 idr_pre_get() 和 idr_get_new() 两个函数完成的。idr_pre_get() 函数的C语言代码如下:
    105 int idr_pre_get(struct idr *idp, gfp_t gfp_mask)
-   106 {
|-  107     while (idp->id_free_cnt < IDR_FREE_MAX) {
||  108         struct idr_layer *new;
||  109         new = kmem_cache_alloc(idr_layer_cache, gfp_mask);
||  110         if (new == NULL)
||  111             return (0);
||  112         free_layer(idp, new);
||  113     }
|   114     return 1;
|   115 }
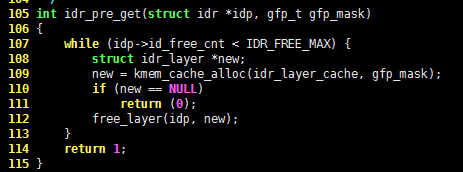
idr_pre_get() 函数的核心就是 free_layer() 函数。这里可以看出,即使是 linux 内核的源代码,命名也有可能是不太合适的。 free_layer() 函数并不是如字面意思“释放 idr”,而是将新分配的 new 连接到 idr 的 id_free 成员上,请看:
     61 static void free_layer(struct idr *idp, struct idr_layer *p)
-    62 {
|    63     unsigned long flags;
|    64
|    65     /*
|    66      * Depends on the return element being zeroed.
|    67      */
|    68     spin_lock_irqsave(&idp->lock, flags);
|    69     __free_layer(idp, p);
|    70     spin_unlock_irqrestore(&idp->lock, flags);
|    71 }
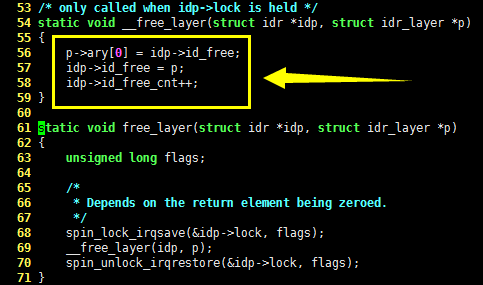
idr_pre_get() 函数执行完毕后,得到的数据结构如下图:
idr_pre_get() 就是实际执行获取 UID 的函数了,它的C语言代码如下,请看:
    306 int idr_get_new(struct idr *idp, void *ptr, int *id)
-   307 {
|   308     int rv;
|   309
|   310     rv = idr_get_new_above_int(idp, ptr, 0);
|   311     /*
|   312      * This is a cheap hack until the IDR code can be fixed to
|   313      * return proper error values.
|   314      */
|-  315     if (rv < 0) {
||  316         if (rv == -1)
||  317             return -EAGAIN;
||  318         else /* Will be -3 */
||  319             return -ENOSPC;
||  320     }
|   321     *id = rv;
|   322     return 0;
|   323 }
核心是 idr_get_new_above_int() 函数,继续跟踪:
    236 static int idr_get_new_above_int(struct idr *idp, void *ptr, int starting_id)
-   237 {
|   238     struct idr_layer *pa[MAX_LEVEL];
|   239     int id;
|   240
|   241     id = idr_get_empty_slot(idp, starting_id, pa);
|-  242     if (id >= 0) {
||  243         /*
||  244          * Successfully found an empty slot.  Install the user
||  245          * pointer and mark the slot full.
||  246          */
||  247         pa[0]->ary[id & IDR_MASK] = (struct idr_layer *)ptr;
||  248         pa[0]->count++;
||  249         idr_mark_full(pa, id);
||  250     }
|   251
|   252     return id;
|   253 }
发现实际负责申请 UID 的动作由 idr_get_empty_slot() 函数完成,它的C语言代码如下:
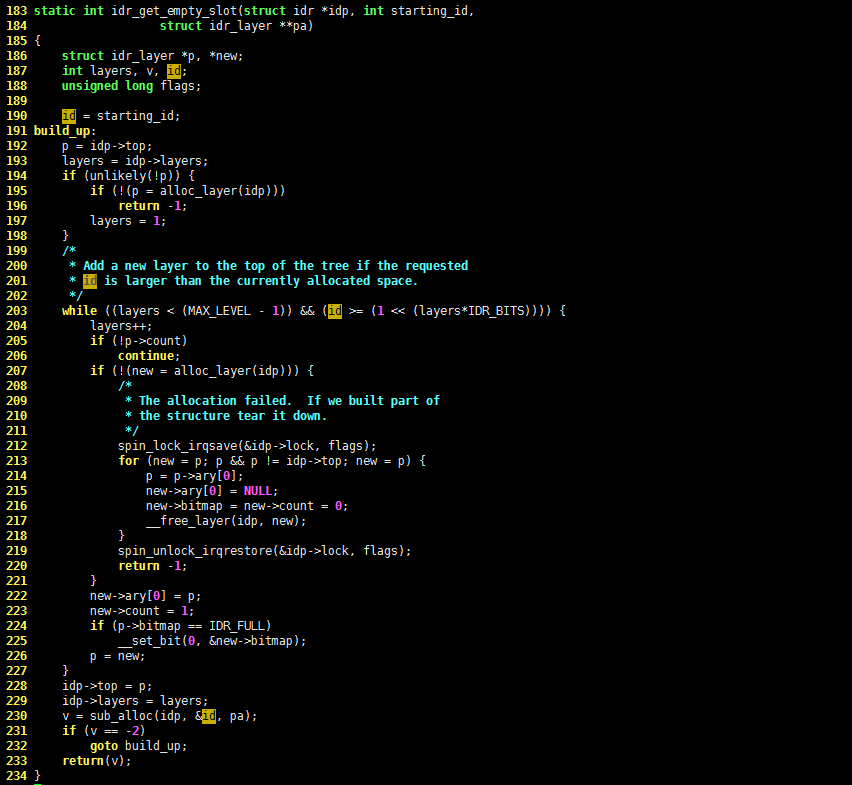
到这里就非常清楚了, int idr_get_new(struct idr* idp, void* ptr, int* id) 函数执行成功后,将获得一个新的 UID,它会被映射到 ptr,并通过指针参数 id 返回。
通过 UID 查找指针地址
根据 UID 查找其对应的指针地址就简单许多了,只需调用 idr_find() 函数即可,它的 C语言代码如下:
    464 void *idr_find(struct idr *idp, int id)
-   465 {
|   466     int n;
|   467     struct idr_layer *p;
|   468
|   469     n = idp->layers * IDR_BITS;
|   470     p = idp->top;
|   471
|   472     /* Mask off upper bits we don't use for the search. */
|   473     id &= MAX_ID_MASK;
|   474
|   475     if (id >= (1 << n))
|   476         return NULL;
|   477
|-  478     while (n > 0 && p) {
||  479         n -= IDR_BITS;
||  480         p = p->ary[(id >> n) & IDR_MASK];
||  481     }
|   482     return((void *)p);
|   483 }
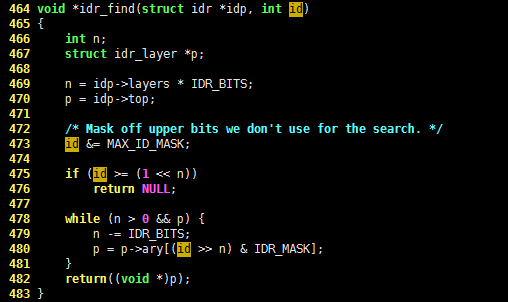
可以看出 idr_find() 函数执行成功后,会返回 id 关联的指针地址,如果执行失败,则会返回 NULL。从这里也可以看出,应尽量避免将空指针 NULL 与 UID 映射,否则调用 idr_find() 函数时将无法区分是成功还是失败。

到这里,我们就对 linux 内核中的映射有所了解了,其他相关代码的分析(例如删除一个UID映射 idr_remove()函数)也是类似的,这里就不再赘述了。(实际上,linux 内核关于 idr 的设计与实现还是有一定的复杂度的,这里仅仅只是粗略的先留个大体印象,更详细的讨论以后再介绍了。)
Recommend
About Joyk
Aggregate valuable and interesting links.
Joyk means Joy of geeK