

那些制作CLI可能用到的轮子
source link: https://zhuanlan.zhihu.com/p/128990729
Go to the source link to view the article. You can view the picture content, updated content and better typesetting reading experience. If the link is broken, please click the button below to view the snapshot at that time.

那些制作CLI可能用到的轮子
开始之前先要了解npm的bin用法。
 "bin": {
   "init": "index.js"
}执行npm install -g就在全局安装了init命令,在CMD里就可以执行init。
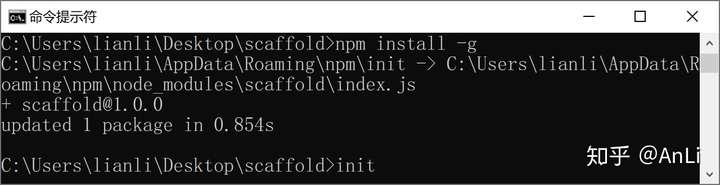
执行之后,由于在我本机目前默认是由VS Code打开JavaScript文件,所以效果并不是执行代码(这个问题下文有继续,千万别走开,有个坑)。从上面日志打印可以看出,实际上Node.js相当于建立了一个快捷方式,init指向安装到全局模块的该工程的index.js,而init是被加入了到环境变量PATH可以直接执行。
也可以使用npm link直接将index.js链接到PATH里,但先要npm uninstall -g卸载一下,否则会报重复了的错误。
现在正式开始观赏轮子,以下排名不分先后。
command.js
command.js可以和刚才bin生成的全局命令一起配合使用,有一个优势是它居然还有中文文档,虽然E文对我来说不是难事,但是中文的还是读起来快多了。
const { program } = require("commander");
program
.version("0.0.1")
.arguments("<file>")
.description('Login Module')
.option("-u, --username <username>", "The user to authenticate as")
.option("-p, --password <password>", "The user's password")
.action(function (file) {
console.log(program.opts());
console.log(file);
})
.parse(process.argv);
一开始使用全局命令不能接受参数而直接使用Node.js执行是可以的。
后来找了下,原来主入口文件开头的#! /usr/bin/env node是必须的,加入后变为
#! /usr/bin/env node
const { program } = require("commander");
program
.version("0.0.1")
.arguments("<file>")
.description("Login Module")
.option("-u, --username <username>", "The user to authenticate as")
.option("-p, --password <password>", "The user's password")
.action(function (file) {
console.log(program.opts());
console.log(file);
})
.parse(process.argv);
再次执行(有可能需要重新npm [un]install -g或者npm [un]link),这次OK了
arguments里带<>的参数表示是必须的,如果缺失,就不能继续进行。
参数里要定义必填项使用.requiredOption,比如program.requiredOption('-c, --cheese <type>', 'pizza must have cheese');。
commander.js根据参数也自动帮你生成了帮助命令init --help
更详细的用法请参考官方文档。
svg-term-cli
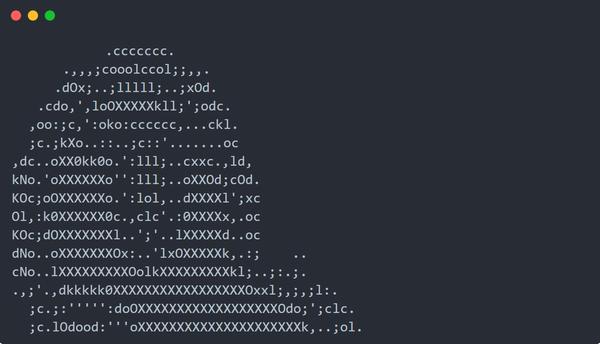
svg-term-cli用来生成ascii码动画的SVG文件。它需要全局安装
npm install -g svg-term-cli现在从https://asciinema.org/a/113643上生成SVG动图
svg-term --cast 113643 --out examples/parrot.svg --window --no-cursor --from=4500结束后会在examples下生成一个parrot.svg的文件,打开这个文件看看,太浪了
progress
progress用来生成一个等待进度条。
var ProgressBar = require("progress");
var bar = new ProgressBar(":bar", { total: 40 });
var timer = setInterval(function () {
bar.tick();
if (bar.complete) {
console.log("\ncomplete\n");
clearInterval(timer);
}
}, 1000);
生成如下的进度条
我们常见的下载进度展示,就可以用它来实现
ora
对于不确定的进度情况,就可以使用ora了。它就是那种爱的魔力转圈圈的样式。

const ora = require("ora");
const spinner = ora("Loading unicorns").start();
setTimeout(() => {
spinner.color = "yellow";
spinner.text = "Loading rainbows";
}, 1000);
setTimeout(() => {
spinner.fail();
}, 3000);
log-symbols
log-symbols用来显示一个状态标记。
const logSymbols = require("log-symbols");

console.log(logSymbols.success, "success");
console.log(logSymbols.info, "info");
console.log(logSymbols.warning, "warning");
console.log(logSymbols.error, "error");
chalk
chalk可以在漆黑的bash里给它带点绿或者各种别的颜色。
直接看官网的例子
const chalk = require("chalk");
const log = console.log;
// Combine styled and normal strings
log(chalk.blue("Hello") + " World" + chalk.red("!"));
// Compose multiple styles using the chainable API
log(chalk.blue.bgRed.bold("Hello world!"));
// Pass in multiple arguments
log(chalk.blue("Hello", "World!", "Foo", "bar", "biz", "baz"));
// Nest styles
log(chalk.red("Hello", chalk.underline.bgBlue("world") + "!"));
// Nest styles of the same type even (color, underline, background)
log(
chalk.green("I am a green line " + chalk.blue.underline.bold("with a blue substring") + " that becomes green again!")
);
// ES2015 template literal
log(`
CPU: ${chalk.red("90%")}
RAM: ${chalk.green("40%")}
DISK: ${chalk.yellow("70%")}
`);
// ES2015 tagged template literal
log(chalk`
CPU: {red 90%}
RAM: {green 40%}
DISK: {rgb(255,131,0) 70%}
`);
// Use RGB colors in terminal emulators that support it.
log(chalk.keyword("orange")("Yay for orange colored text!"));
log(chalk.rgb(123, 45, 67).underline("Underlined reddish color"));
log(chalk.hex("#DEADED").bold("Bold gray!"));
inquirer
inquirer用来制作脚手架使用时的对话。
比如在Vue Cli中,会询问工程的参数选项
现在来制作一个交互式问答以获取参数
var inquirer = require("inquirer");
inquirer
  .prompt([
    {
      // input number confirm list rawlist expand checkbox password editor
      type: "input",
      name: "name",
      message: "请输入工程名称",
      validate: (name) => name.length >= 5,
    },
    {
      type: "list",
      name: "hobby",
      message: "请选择你的爱好",
      default: "basketball",
      choices: [
        {
          name: "唱",
          value: "sing",
        },
        {
          name: "跳",
          value: "jump",
        },
        {
          name: "Rap",
          value: "rap",
        },
        {
          name: "打篮球",
          value: "basketball",
        },
      ],
    },
  ])
  .then((answers) => {
    console.log(answers);
  })
  .catch((error) => {
    if (error.isTtyError) {
      // Prompt couldn't be rendered in the current environment
    } else {
      // Something else when wrong
    }
  });
listr
listr用来执行任务列表,可以把任务配置成同时执行,也可以配置成顺序执行。比如官方的例子就很实际
const execa = require("execa");
const Listr = require("listr");

const tasks = new Listr([
  {
    title: "Git",
    task: () => {
      return new Listr(
        [
          {
            title: "Checking git status",
            task: () =>
              execa("git", ["status", "--porcelain"]).then((result) => {
                if (result !== "") {
                  throw new Error("Unclean working tree. Commit or stash changes first.");
                }
              }),
          },
          {
            title: "Checking remote history",
            task: () =>
              execa("git", ["rev-list", "--count", "--left-only", "@{u}...HEAD"]).then((result) => {
                if (result !== "0") {
                  throw new Error("Remote history differ. Please pull changes.");
                }
              }),
          },
        ],
        { concurrent: true }
      );
    },
  },
  {
    title: "Install package dependencies with Yarn",
    task: (ctx, task) =>
      execa("yarn").catch(() => {
        ctx.yarn = false;

        task.skip("Yarn not available, install it via `npm install -g yarn`");
      }),
  },
  {
    title: "Install package dependencies with npm",
    enabled: (ctx) => ctx.yarn === false,
    task: () => execa("npm", ["install"]),
  },
  {
    title: "Run tests",
    task: () => execa("npm", ["test"]),
  },
  {
    title: "Publish package",
    task: () => execa("npm", ["publish"]),
  },
]);

tasks.run().catch((err) => {
  console.error(err);
});
首先同时检查本地Git状态和远程Git状态,随后按次序执行依赖安装、测试、发布。
handlebars.js
handlebars.js代表的是一系列的模板渲染引擎,比如我们生成了package.json的模板,但是具体的参数还是要根据用户的输入填充进去的,像工程名称,作者等。
const Handlebars = require("handlebars");
const template = Handlebars.compile(`
    {
        "name": "{{name}}",
        "version": "{{version}}",
        "description": "{{description}}",
    }
`);
console.log(
  template({
    name: "dummy",
    version: "1.0.1",
    description: "Long long ago...",
  })
);
execa
execa是对Node.js内置模块child_process的增强,它的口号是Process execution for humans,听口气是人性化设计特别好,不过我也没用过子进程,只能听他吹了
- Promise interface.
- Strips the final newline from the output so you don't have to do
stdout.trim(). - Supports shebang binaries cross-platform.
- Improved Windows support.
- Higher max buffer. 100 MB instead of 200 KB.
- Executes locally installed binaries by name.
- Cleans up spawned processes when the parent process dies.
- Get interleaved output from
stdoutandstderrsimilar to what is printed on the terminal. (Asynconly) - Can specify file and arguments as a single string without a shell
- More descriptive errors.
硬翻过来会失去原有的味道。不管怎么说,至少Promise的用法比事件的用法要舒服一些,而且还能改造成async/await的语法使其更可读。
const execa = require("execa");
(async () => {
const subprocess = await execa("node");
console.log(subprocess);
})();
以上代码执行后会看到两个Node.js进程
以下代码不要轻易尝试,会一直递归产生新的子进程
(async () => {
  const subprocess = await execa("node", ["index.js"]);
  console.log(subprocess);
})();
minimist
minimist用来把命令参数转换成对象,适用于轻量级场景。
 var argv = require('minimist')(process.argv.slice(2));
 console.log(argv);
 C:\Users\lianli\Desktop\scaffold>node index -a foo -b bar
 { _: [], a: 'foo', b: 'bar' }
get-port
get-port顾名思义就是用来获取端口,我们在create-react-app或者vue cli生成的项目启动时会提醒你端口被占用,是否换一个端口或者直接采用新的端口。
const getPort = require("get-port");

(async () => {
  //随机搞一个可用的端口
  console.log(await getPort());
})();

(async () => {
  //默认用3000,如果被占用就搞一个随机的可用端口
  console.log(await getPort({ port: 3000 }));
})();

// 端口范围
(async () => {
  console.log(await getPort({ port: [3000, 3001, 3002] }));
})();

(async () => {
  console.log(await getPort({ port: getPort.makeRange(3000, 3100) }));
})();
shelljs
shelljs用来执行操作系统级的命令。一方面它内置了一些诸如cd、ls常用的命令,另一方面如果不满足需要可以直接调用exec方法执行命令,只要你的bash能支持的命令,这里也就能支持。
var shell = require("shelljs");

if (!shell.which("git")) {
  shell.echo("Sorry, this script requires git");
  shell.exit(1);
} else {
  shell.echo("Your environment supports git");
}

// Copy files to release dir
shell.rm("-rf", "out/Release");
shell.cp("-R", "stuff/", "out/Release");
shell.mkdir("lib");
// Replace macros in each .js file
shell.cd("lib");
shell.cd("..");
shell.ls("*.js").forEach(function (file) {
  console.log(file);
});

// Run external tool synchronously
if (shell.exec('git commit -am "Auto-commit"').code !== 0) {
  shell.echo("Error: Git commit failed");
  shell.exit(1);
}
fs-extra
fs-extra是fs的增强版,它包含了fs并在此基础上增强了一些API,脚手架中常常会对文件进行操作。它的异步增强方法有
 copy
 emptyDir
 ensureFile
 ensureDir
 ensureLink
 ensureSymlink
 mkdirp
 mkdirs
 move
 outputFile
 outputJson
 pathExists
 readJson
 remove
 writeJson
axios
axios,这没什么好说的了,就是用来做HTTP请求,虽然也有其他诸如request、superagent等老牌工具,但axios近几年事实上更流行,不光用于Web也能用于Node.js。
 async function getUser() {
   try {
     const response = await axios.get("/user?ID=12345");
     console.log(response);
   } catch (error) {
     console.error(error);
   }
 }
http-server
http-server代表了一大批静态Web服务器工具。许多CLI需要开启一个Web服务器,比如vue ui会开启一个图形界面进行交互,就可以使用http-server作为Web服务器。
node-semver
node-semver是npm官方出品的,用来处理npm版本号字符串,我们知道npm的版本号是形如1.3.5这样子的三位字符串,用.分割,像涉及到版本号的比较大小、判断版本号是否有效,可以通过node-semver来快捷处理。
const semver = require('semver')
semver.valid('1.2.3') // '1.2.3'
semver.valid('a.b.c') // null
semver.clean(' =v1.2.3 ') // '1.2.3'
semver.satisfies('1.2.3', '1.x || >=2.5.0 || 5.0.0 - 7.2.3') // true
semver.gt('1.2.3', '9.8.7') // false
semver.lt('1.2.3', '9.8.7') // true
semver.minVersion('>=1.0.0') // '1.0.0'
semver.valid(semver.coerce('v2')) // '2.0.0'
semver.valid(semver.coerce('42.6.7.9.3-alpha')) // '42.6.7'
rimraf
rimraf其实就是rm -rf的快捷方式,不过加入了一些参数做增强,比如比较实用的maxBusyTries,有时候文件正在被占用而无法删除,通过maxBusyTries可以进行多次的尝试。
yargs
yargs其实就是又一个版本的command.js。我们来尝试一下
#!/usr/bin/env node
require("yargs")
.scriptName("pirate-parser")
.usage("$0 <cmd> [args]")
.command(
"hello [name]",
"welcome ter yargs!",
(yargs) => {
yargs.positional("name", {
type: "string",
default: "Cambi",
describe: "the name to say hello to",
});
},
function (argv) {
console.log("hello", argv.name, "welcome to yargs!");
}
)
.help().argv;
借助于已经配置好的命令,执行init hello --name Anli
它也是能自动实现帮助命令的
meow
meow又是一个类command.js工具,meow英语里就是猫叫的象声词。
用法也是大同小异的
#!/usr/bin/env node
"use strict";
const meow = require("meow");

const cli = meow(
  `
	Usage
	  $ foo <input>

	Options
	  --rainbow, -r  Include a rainbow

	Examples
	  $ foo unicorns --rainbow
	    unicorns
`,
  {
    flags: {
      rainbow: {
        type: "boolean",
        alias: "r",
      },
    },
  }
);
/*
{
	input: ['unicorns'],
	flags: {rainbow: true},
	...
}
*/
console.log(cli.input[0], cli.flags);
node-glob
node-glob用来对文件进行模式匹配,但是API还是用以前那种老旧的回调用法。
var glob = require("glob");
// options is optional
glob("**/*.js", {}, function (er, files) {
console.log(files);
});
这下它把node_modules下的js文件也找出来了。
支持的通配符有
*在一个路径下匹配0个或多个字母?匹配一个字母[...]匹配一组字母,如果以!或者^开头,那么表示匹配不在组里的字母!(pattern|pattern|pattern)提供的pattern里不匹配任何内容?(pattern|pattern|pattern)匹配提供的pattern里0个或1个+(pattern|pattern|pattern)匹配提供的pattern里1个或多个*(a|b|c)匹配其中0个或多个@(pattern|pat*|pat?erN)精确匹配其中的一个**匹配0个或多个目录、子目录
它另外还有一个加强版本globby。
node-ssh
node-ssh用来执行跟服务器的交互,它已经用了Promise的方式暴露出接口。
它提供了如下的API
 class SSH{
   connect(config: SSH2Config): Promise<this>
   requestSFTP(): Promise<SSH2SFTP>
   requestShell(): Promise<SSH2Shell>
   mkdir(path: string, method: 'sftp' | 'exec' = 'sftp', givenSftp?: Object): Promise<string>
   exec(command: string, parameters: Array<string>, options: ExecOptions = {}): Promise<Object | string>
   execCommand(command: string, options: { cwd: string, stdin: string } = {}): Promise<{ stdout: string, options?: Object, stderr: string, signal: ?string, code: number }>
   putFile(localFile: string, remoteFile: string, sftp: ?Object = null, opts: ?Object = null): Promise<void>
   getFile(localFile: string, remoteFile: string, sftp: ?Object = null, opts: ?Object = null): Promise<void>
   putFiles(files: Array<{ local: string, remote: string }>, options: PutFilesOptions = {}): Promise<void>
   putDirectory(localDirectory: string, remoteDirectory: string, options: PutDirectoryOptions = {}): Promise<boolean>
   dispose(): void
 }
node-archiver
node-archiver用来执行打包存档。
var fs = require("fs");
var archiver = require("archiver");

// 存档目的地
var output = fs.createWriteStream(__dirname + "/example.zip");
var archive = archiver("zip", {
  zlib: { level: 9 }, // 压缩级别
});

// 事件监听
output.on("close", function () {
  console.log(archive.pointer() + " total bytes");
  console.log("archiver has been finalized and the output file descriptor has closed.");
});

output.on("end", function () {
  console.log("Data has been drained");
});

archive.on("warning", function (err) {
  if (err.code === "ENOENT") {
    // log warning
  } else {
    // throw error
    throw err;
  }
});

archive.on("error", function (err) {
  throw err;
});

archive.pipe(output);

// 从stream里添加文件
var file1 = __dirname + "/index.js";
archive.append(fs.createReadStream(file1), { name: "index.js" });

// 从字符串里添加文件
archive.append("string cheese!", { name: "file2.txt" });

// 从buffer里添加文件
var buffer3 = Buffer.from("buff it!");
archive.append(buffer3, { name: "file3.txt" });

// 直接添加文件
archive.file("package.json", { name: "package.json" });

// 从子目录添加并改名
archive.directory("subdir/", "new-subdir");

// 从子目录添加文件,内容放在存档的根部
archive.directory("subdir/", false);

// 根据glob模式添加文件
archive.glob("subdir/*.txt");

archive.finalize();
Recommend
About Joyk
Aggregate valuable and interesting links.
Joyk means Joy of geeK