

Easily deploy a Kubernetes cluster on OpenStack
source link: https://cloudbase.it/easily-deploy-a-kubernetes-cluster-on-openstack/
Go to the source link to view the article. You can view the picture content, updated content and better typesetting reading experience. If the link is broken, please click the button below to view the snapshot at that time.

Platform and cloud interoperability has come a long way. IaaS and unstructured PaaS options such as OpenStack and Kubernetes can be combined to create cloud-native applications. In this port we’re going to show how Kubernetes can de deployed on an OpenStack cloud infrastructure.
Setup
My setup is quite simple, an Ocata all-in-one deployment with compute KVM. The OpenStack infrastructure was deployed with Kolla. The deployment method is not important here, but Magnum and Heat need to be deployed alongside other OpenStack services such as Nova or Neutron. To do this, enable those two services form /etc/kolla/global.yml file. If you are using Devstack, here is a local.conf that is deploying Heat and Magnum.
Kubernetes deployment
The Kubernetes cluster will consist of 1 master node and 2 minion nodes. I’m going to use Fedora atomic images for VMs. One useful info is that I used a 1 CPU, 2GB of RAM and 7GB disk flavor for the VMs. Below are the commands used to create the necessary environment setup. Please make sure to change IPs and different configurations to suit your environment.
Before the Kubernetes cluster is deployed, a cluster template must be created. The nice thing about this process is that Magnum does not require long config files or definitions for this. A simple cluster template creation can look like this:
Based on this template the cluster can be deployed:
The deployment status can be checked and viewed from Horizon. There are two places where this can be done, first one in Container Infra -> Clusters tab and second in Orchestration -> Staks tab. This is because Magnum relies on Heat templates to deploy the user defined resources. I find the the Stacks option better because it allows the user to see all the resources and events involved in the process. If something goes wrong, the issue can easily be identified by a red mark.
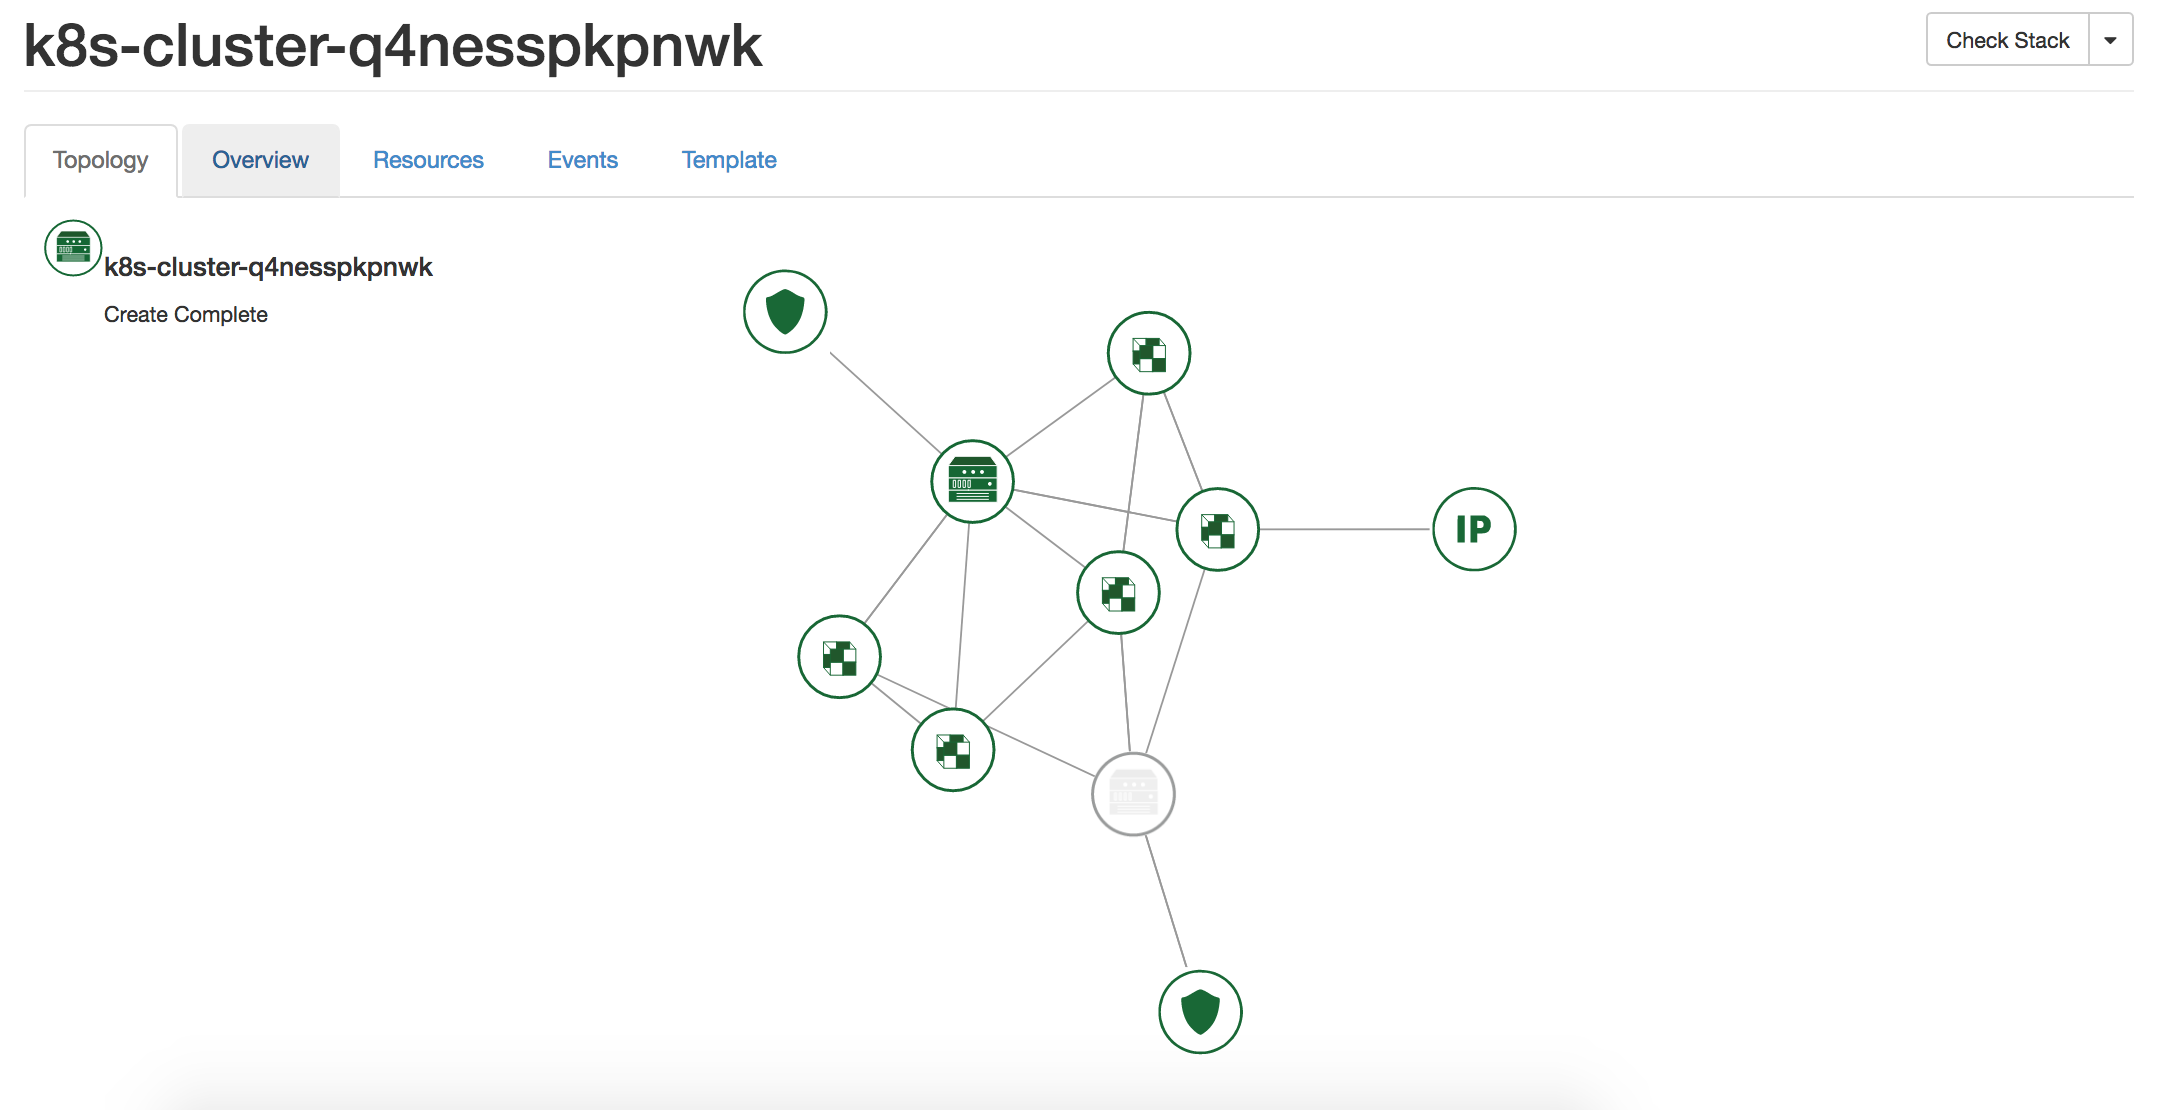
In the end my cluster should look something like this:
SSH into the master node to check the cluster status
So there it is, a fully functioning Kubernetes cluster with 1 master and 2 minion nodes.
A word on networking
Kubernetes networking is not the easiest thing to explaing but I’ll do my best to do the essentials. After an app is deployed, the user will need to access it from outside the Kubernetes Cluster. This is done with Services. To achive this, on each minion node there is a kube-proxy service running that will allow the Service to do its job. Now the service can work in multiple ways, some of them are via an VIP LoadBalancer IP provided by the cloud underneath K8S, or with port-forward on the minion node IP.
Deploy an app
Now that all is set up, an app can be deployed. I am going to install WordPress with Helm. Helm is the package manager for Kubernetes. It installs applications with charts, which are basically apps definitions written in yaml. Here are documentation on how to install Helm.
I am going to install WordPress.
Pods can be seen
There are multiple ways of accessing the contents of a pod. I am going to port-forward 8080 port from the master node to the 80 port of the pod.
Now WordPress can be accessed via the Kubernetes node IP and port 8080
Kubernetes on OpenStack is not only possible, it can also be easy!
Recommend
About Joyk
Aggregate valuable and interesting links.
Joyk means Joy of geeK