

Pupy利用分析——Windows平台下的屏幕控制
source link: https://3gstudent.github.io/3gstudent.github.io/Pupy%E5%88%A9%E7%94%A8%E5%88%86%E6%9E%90-Windows%E5%B9%B3%E5%8F%B0%E4%B8%8B%E7%9A%84%E5%B1%8F%E5%B9%95%E6%8E%A7%E5%88%B6/
Go to the source link to view the article. You can view the picture content, updated content and better typesetting reading experience. If the link is broken, please click the button below to view the snapshot at that time.

0x00 前言
Pupy在Windows平台下的后渗透模块包括一个实用的功能:屏幕控制。这个功能不仅能够查看屏幕内容,也能够发送鼠标和键盘消息。本文将要对这个功能的实现方法进行分析,换一种思路实现类似的功能,便于二次开发。
0x01 简介
本文将要介绍以下内容:
- Pupy的屏幕控制模块测试
- Pupy的实现方法
- 另一种实现方法
0x02 Pupy的屏幕控制模块测试
Pupy的基本使用方法可以参考之前的文章《Pupy利用分析——Windows平台下的功能》
获得session后,输入rdesktop加载屏幕控制模块,如下图

浏览器访问url可以对屏幕进行查看和操作,如下图
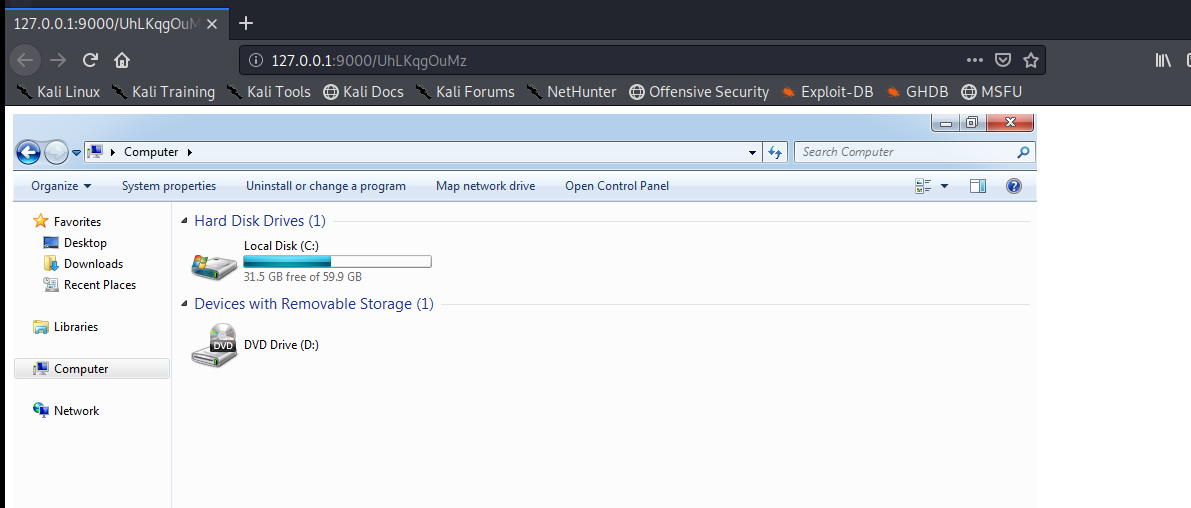
这里支持输入键盘消息和鼠标单击的操作
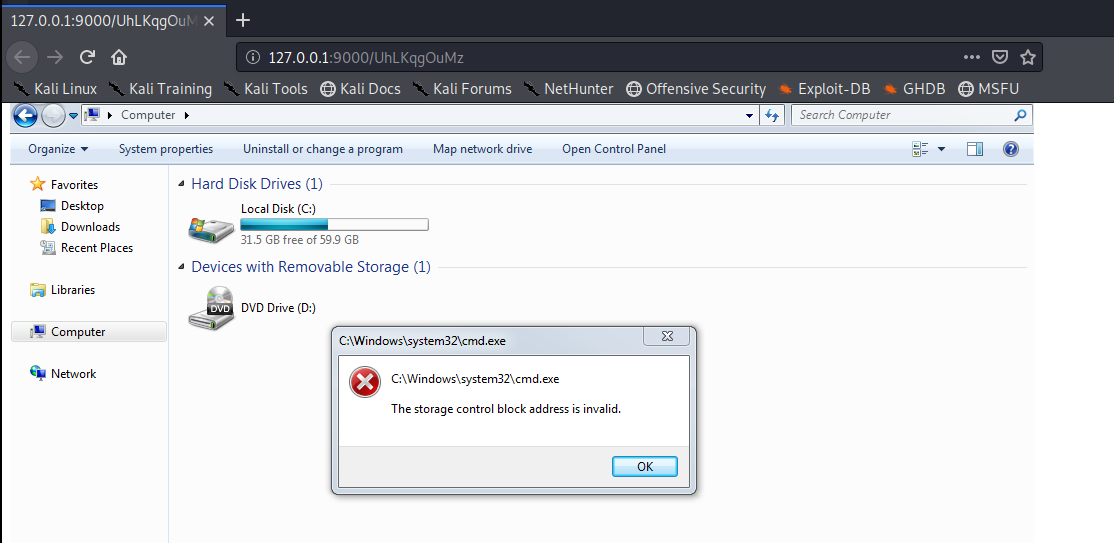
在使用普通用户权限进行操作时需要注意UAC的问题(无法对UAC的弹框进行操作)
弹出UAC时会创建进程consent.exe
需要使用System权限关闭这个进程,关闭后弹出对话框提示The storage control block address is invalid.
注:
关闭UAC弹框提示的cmd命令:
reg add HKLM\SOFTWARE\Microsoft\Windows\CurrentVersion\Policies\System /v ConsentPromptBehaviorAdmin /t REG_DWORD /d 0 /f
开启UAC弹框提示的cmd命令:
reg add HKLM\SOFTWARE\Microsoft\Windows\CurrentVersion\Policies\System /v ConsentPromptBehaviorAdmin /t REG_DWORD /d 5 /f
0x03 Pupy的实现方法
rdesktop模块的实现代码:https://github.com/n1nj4sec/pupy/blob/unstable/pupy/modules/rdesktop.py
在实现上分成以下三部分:
1.Client
同目标屏幕进行交互,包括以下功能:
- 回传目标当前的屏幕内容
- 接收Server的鼠标和键盘消息并执行
实现代码:
https://github.com/n1nj4sec/pupy/blob/unstable/pupy/packages/all/rdesktop.py
2.transfer
Client和Server之间通信的桥梁,包括如下功能:
- 接收Client的消息,解码后转发至本地的指定端口,用作浏览器访问
- 编码浏览器的鼠标和键盘消息并发送至Client
实现代码:
https://github.com/n1nj4sec/pupy/blob/unstable/pupy/network/lib/transports/websocket.py
https://github.com/n1nj4sec/pupy/blob/unstable/pupy/network/transports/ws/conf.py
3.Server
通过浏览器控制目标屏幕,包括以下功能:
- 在浏览器显示Client的屏幕内容
- 获取当前浏览器的鼠标和键盘消息并发送至transfer
实现代码:
https://github.com/n1nj4sec/pupy/blob/unstable/pupy/webstatic/rdesktop/index.html
https://github.com/n1nj4sec/pupy/blob/unstable/pupy/webstatic/rdesktop/rdesktop.js
Pupy在实现上,Client和Server之间通过transfer处理数据,使用RSA+AES加密,优点是增加还原通信数据的难度
为了直观的读取通信数据,便于屏幕控制功能的二次开发,所以这里尝试去掉transfer功能,实现Client和Server之间的直接通信
0x04 另一种实现方法
这里基于HTTP-Remote-Desktop-Server进行介绍
1.HTTP-Remote-Desktop-Server的环境搭建
HTTP-Remote-Desktop-Server的run.py中使用了Python2下的PyGtk库(import gtk.gdk)
而最新的PyGtk库不再支持Python2,改为Python3
为了能够编译代码,这里需要注意以下问题:
(1)需要安装32位的Python2
64位系统也需要安装32位的Python2,否则无法使用PyGtk库
(2)下载Python2下的PyGtk库
http://ftp.gnome.org/pub/GNOME/binaries/win32/pygtk/2.24/pygtk-all-in-one-2.24.0.win32-py2.7.msi
(3)安装其他包
pip install -U wxPython
pip install pyautogui
2.HTTP-Remote-Desktop-Server的测试
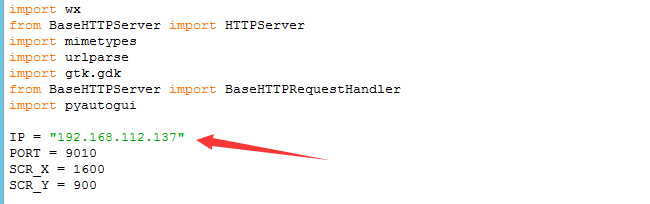
修改run.py中的IP,设置为当前操作系统的ip,如下图
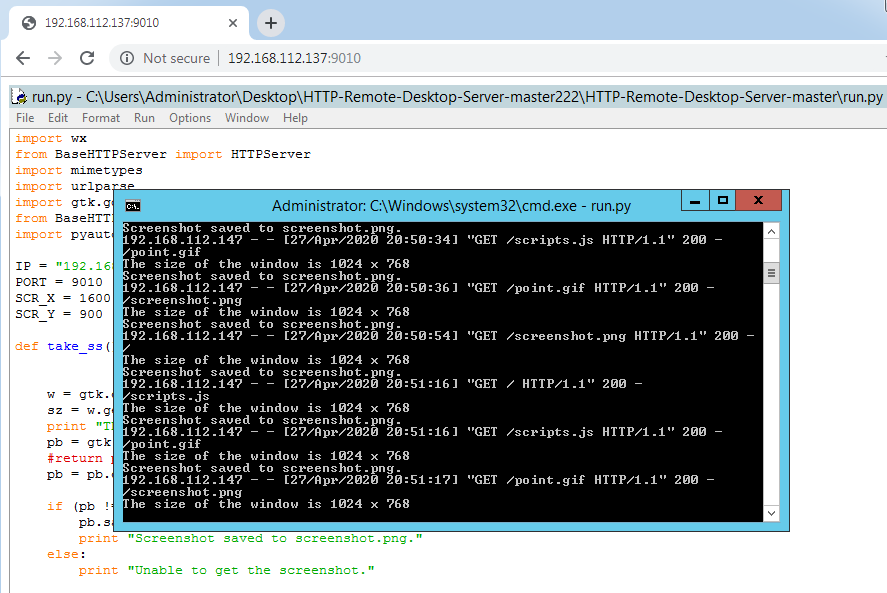
启动run.py
在另一系统上,通过浏览器访问指定url,获得屏幕内容,如下图
注:
使用时需要开启防火墙规则,对应的cmd命令如下:
netsh advfirewall firewall add rule name="test" protocol=TCP dir=in localport=9010 action=allow
3.HTTP-Remote-Desktop-Server的实现
(1)Client
同目标屏幕进行交互,包括以下功能:
- 截取当前屏幕,保存为
screenshot.png - 接收Server的鼠标和键盘消息并执行
实现代码:
https://github.com/BernardoGO/HTTP-Remote-Desktop-Server/blob/master/run.py
(2)Server
通过浏览器控制目标屏幕,包括以下功能:
- 在浏览器显示
screenshot.png - 获取当前浏览器的鼠标和键盘消息并发送至Client
实现代码:
https://github.com/BernardoGO/HTTP-Remote-Desktop-Server/blob/master/index.html
https://github.com/BernardoGO/HTTP-Remote-Desktop-Server/blob/master/scripts.js
HTTP-Remote-Desktop-Server在实现上通过截取屏幕(screenshot.png)显示和发送命令,所以无法连续显示,需要刷新后才能获得新的屏幕内容
支持键盘输入,但需要刷新后才能获得新的屏幕内容
4.HTTP-Remote-Desktop-Server的优化
我fork了原代码,修改后的代码地址:
https://github.com/3gstudent/HTTP-Remote-Desktop-Server
优化如下:
(1)将index.html中引用jQuery的地址改成相对路径
(2)修改run.py,通过参数传入监听的IP和端口
(3)将Python代码编译成独立的exe文件
使用Pyinstaller,命令如下:
C:\Python27\Scripts\pyinstaller.exe -F run.py
编译后的文件地址:
https://github.com/3gstudent/HTTP-Remote-Desktop-Server/releases/download/v1.0/run.exe
为了支持鼠标双击操作,可以修改run.py,添加如下代码:
pyautogui.click(clicks=2)
在二次开发上需要注意如下问题:
(1)通信数据未做编码,可以选择压缩算法提高效率
(2)访问url:port/screenshot.png可以获得屏幕截图
(3)使用时需要开启防火墙规则,对应的cmd示例命令如下:
netsh advfirewall firewall add rule name="test" protocol=TCP dir=in localport=9010 action=allow
0x05 小结
本文分析了Pupy的实现方法,以HTTP-Remote-Desktop-Server为模板介绍了第二种实现方法,便于二次开发。
Recommend
About Joyk
Aggregate valuable and interesting links.
Joyk means Joy of geeK