

Getting Started with the VIPER Architecture Pattern [FREE]
source link: https://www.raywenderlich.com/8440907-getting-started-with-the-viper-architecture-pattern
Go to the source link to view the article. You can view the picture content, updated content and better typesetting reading experience. If the link is broken, please click the button below to view the snapshot at that time.

The VIPER architectural pattern is an alternative to MVC or MVVM. And while the SwiftUI and Combine frameworks create a powerful combination that makes quick work of building complex UIs and moving data around an app, they also come with their own challenges and opinions about architecture.
It’s a common belief that all of the app logic should now go into a SwiftUI view, but that’s not the case.
VIPER offers an alternative to this scenario and can be used in conjunction with SwiftUI and Combine to help build apps with a clean architecture that effectively separates the different functions and responsibilities required, such as the user interface, business logic, data storage and networking. These are then easier to test, maintain and expand.
In this tutorial, you’ll build an app using the VIPER architecture pattern. The app is also conveniently called VIPER : Visually Interesting Planned Easy Roadtrips. Clever, right? :]
It will allow users to build out road trips by adding waypoints to a route. Along the way, you’ll also learn about SwiftUI and Combine for your iOS projects.

Getting Started
Download the project materials from the Download Materials button at the top or bottom of the tutorial. Open the starter project. This includes some code to get you started:
-
The
ContentViewwill launch the app’s other views as you build them. -
There are some helper views in the Functional Views
group: one for wrapping the MapKit
map view, a special “split image” view, which is used by the
TripListCell. You’ll be adding these to the screen in a little bit. - In the Entities group, you’ll see the classes related to the data model. Trip and Waypoint will serve later as the Entities of the VIPER architecture. As such, they just hold data and don’t include any functional logic.
- In the Data Sources group, there are the helper functions for saving or loading data.
- Peek ahead if you like in the WaypointModule group. This has a VIPER implementation of the Waypoint editing screen. It’s included with the starter so you can complete the app by the end of this tutorial.
This sample uses Pixabay, a permissively licensed photo-sharing site. To pull images into the app, you’ll need to create a free account and obtain an API key.
Follow the instructions here https://pixabay.com/accounts/register/
to create an account. Then, copy your API key into the apiKey
variable found in ImageDataProvider.swift
. You can find it in the Pixabay API docs
under Search Images
.
If you build and run now, you won’t see anything too interesting.

However, by the end of the tutorial, you’ll have a fully functional road-trip planning app.
What is VIPER?
VIPER is an architectural pattern like MVC or MVVM, but it separates the code further by single responsibility. Apple-style MVC motivates developers to put all logic into a UIViewController
subclass. VIPER, like MVVM before it, seeks to fix this problem.
Each of the letters in VIPER stand for a component of the architecture: View , Interactor , Presenter , Entity and Router .
-
The View
is the user interface. This corresponds to a SwiftUI
View. - The Interactor is a class that mediates between the presenter and the data. It takes direction from the presenter.
- The Presenter is the “traffic cop” of the architecture, directing data between the view and interactor, taking user actions and calling to router to move the user between views.
- An Entity represents application data.
- The Router handles navigation between screens. That’s different than it is in SwiftUI, where the view shows any new views.
This separation is borne out of “Uncle” Bob Martin’s Clean Architecture paradigm .

When you look at the diagram, you can see there’s a complete path for the data to flow between the view and entities.
SwiftUI has its own opinionated way of doing things. The mapping of VIPER responsibilities onto domain objects will be different if you compare this to tutorials for UIKit apps.
Comparing Architectures
People often discuss VIPER with MVC and MVVM, but it is different from those patterns.
MVC
, or Model-View-Controller, is the pattern most people associate with 2010’s iOS app architecture. With this approach, you define the View
in a storyboard, and the Controller
is an associated UIViewController
subclass. The Controller modifies the View, accepts user input and interacts directly with the Model
. The Controller bloats with view logic and business logic.
MVVM is a popular architecture that separates the view logic from the business logic in a View Model . The view model interacts with the Model .
The big difference is that a view model, unlike a view controller, only has a one-way reference to the view and to the model. MVVM is a good fit for SwiftUI, and there is a whole tutorial on the topic .
VIPER goes a step further by separating the view logic from the data model logic. Only the presenter talks to the view, and only the interactor talks to the model (entity). The presenter and interactor coordinate with each other. The presenter is concerned with display and user action, and the interactor is concerned with manipulating the data.

Defining an Entity
VIPER is a fun acronym for this architecture, but its order isn’t proscriptive.
The fastest way to get something on screen is to start with the entity. The entity is the data object(s) for the project. In this case, the main entities are Trip , which contains a list of Waypoint s, which are the stops in the trip.
The app contains a DataModel class that holds a list of trips. The model uses a JSON file for local persistence, but you can replace this by a remote back end without having to modify any of the UI-level code. That’s one of the advantages of clean architecture: When you change one part — like the persistence layer — it’s isolated from other areas of the code.
Adding an Interactor
Create a new Swift File named TripListInteractor.swift .
Add the following code to the file:
class TripListInteractor {
  let model: DataModel

  init (model: DataModel) {
    self.model = model
  }
}
This creates the interactor class and assigns it a DataModel
, which you’ll use later.
Setting Up the Presenter
Now, create a new Swift File named TripListPresenter.swift . This will be for the presenter class. The presenter cares about providing data to the UI and mediating user actions.
Add this code to the file:
import SwiftUI
import Combine

class TripListPresenter: ObservableObject {
  private let interactor: TripListInteractor

  init(interactor: TripListInteractor) {
    self.interactor = interactor
  }
}
This creates a presenter class that has reference to the interactor.
Since it’s the presenter’s job to fill the view with data, you want to expose the list of trips from the data model.
Add a new variable to the class:
@Published var trips: [Trip] = []
This is the list of trips the user will see in the view. By declaring it with the @Published
property wrapper, the view will be able to listen to changes to the property and update itself automatically.
The next step is to synchronize this list with the data model from the interactor. First, add the following helper property:
private var cancellables = Set<AnyCancellable>()
This set is a place to store Combine subscriptions so their lifetime is tied to the class’s. That way, any subscriptions will stay active as long as the presenter is around.
Add the following code to the end of init(interactor:)
:
interactor.model.$trips
  .assign(to: \.trips, on: self)
  .store(in: &cancellables)
interactor.model.$trips
creates a publisher that tracks changes to the data model’s trips
collection. Its values are assigned to this class’s own trips
collection, creating a link that keeps the presenter’s trips updated when the data model changes.
Finally, this subscription is stored in cancellables
so you can clean it up later.
Building a View
You now need to build out the first View : the trip list view.
Creating a View with a Presenter
Create a new file from the SwiftUI View template and name it TripListView.swift .
Add the following property to TripListView
:
@ObservedObject var presenter: TripListPresenter
This links the presenter to the view. Next, fix the previews by changing the body of TripListView_Previews.previews
to:
let model = DataModel.sample
let interactor = TripListInteractor(model: model)
let presenter = TripListPresenter(interactor: interactor)
return TripListView(presenter: presenter)
Now, replace the content of TripListView.body
with:
List {
  ForEach (presenter.trips, id: \.id) { item in
    TripListCell(trip: item)
      .frame(height: 240)
  }
}
This creates a List
where the presenter’s trips are enumerated, and it generates a pre-supplied TripListCell
for each.

Modifying the Model from the View
So far, you’ve seen data flow from the entity to the interactor through the presenter to populate the view. The VIPER pattern is even more useful when sending user actions back down to manipulate the data model.
To see that, you’ll add a button to create a new trip.
First, add the following to the class in TripListInteractor.swift :
func addNewTrip() {
  model.pushNewTrip()
}
This wraps the model’s pushNewTrip()
, which creates a new Trip
at the top of the trips list.
Then, in TripListPresenter.swift , add this to the class:
func makeAddNewButton() -> some View {
  Button(action: addNewTrip) {
    Image(systemName: "plus")
  }
}

func addNewTrip() {
  interactor.addNewTrip()
}
This creates a button with the system +
image with an action that calls addNewTrip()
. This forwards the action to the interactor, which manipulates the data model.
Go back to TripListView.swift
and add the following after the List
closing brace:
.navigationBarTitle("Roadtrips", displayMode: .inline)
.navigationBarItems(trailing: presenter.makeAddNewButton())
This adds the button and a title to the navigation bar. Now modify the return
in TripListView_Previews
as follows:
return NavigationView {
  TripListView(presenter: presenter)
}
This allows you to see the navigation bar in preview mode.
Resume the live preview to see the button.

Seeing It In Action
Now’s a good time to go back and wire up TripListView
to the rest of the application.
Open ContentView.swift
. In the body of view
, replace the VStack
with:
TripListView(presenter:
  TripListPresenter(interactor:
    TripListInteractor(model: model)))
This creates the view along with its presenter and interactor. Now build and run.
Tapping the + button will add a New Trip to the list.

Deleting a Trip
Users who create trips will probably also want to be able to delete them in case they make a mistake or when the trip is over. Now that you’ve created the data path, adding additional actions to the screen is straightforward.
In TripListInteractor
, add:
func deleteTrip(_ index: IndexSet) {
  model.trips.remove(atOffsets: index)
}
This removes items from the trips
collection in the data model. Because it’s an @Published
property, the UI will automatically update because of its subscription to the changes.
In TripListPresenter
, add:
func deleteTrip(_ index: IndexSet) {
  interactor.deleteTrip(index)
}
This forwards the delete command on to the interactor.
Finally, in TripListView
, add the following after the end brace of the ForEach
:
.onDelete(perform: presenter.deleteTrip)
Adding an .onDelete
to an item in a SwiftUI List
automatically enables the swipe to delete behavior. The action is then sent to the presenter, kicking off the whole chain.
Build and run, and you’ll now be able to remove trips!

Routing to the Detail View
Now’s the time to add in the Router part of VIPER.
A router will allow the user to navigate from the trip list view to the trip detail view. The trip detail view will show a list of the waypoints along with a map of the route.
The user will be able to edit the list of waypoints and the trip name from this screen.

Setting Up the Trip Detail Screens
Before showing the detail screen, you’ll need to create it.
Following the previous example, create two new Swift File s: TripDetailPresenter.swift and TripDetailInteractor.swift and a SwiftUI View named TripDetailView.swift .
Set the contents of TripDetailInteractor
to:
import Combine
import MapKit

class TripDetailInteractor {
  private let trip: Trip
  private let model: DataModel
  let mapInfoProvider: MapDataProvider

  private var cancellables = Set<AnyCancellable>()

  init (trip: Trip, model: DataModel, mapInfoProvider: MapDataProvider) {
    self.trip = trip
    self.mapInfoProvider = mapInfoProvider
    self.model = model
  }
}
This creates a new class for the interactor of the trip detail screen. This interacts with two data sources: an individual Trip
and Map information from MapKit. There’s also a set for the cancellable subscriptions that you’ll add later.
Then, in TripDetailPresenter
, set its contents to:
import SwiftUI
import Combine

class TripDetailPresenter: ObservableObject {
  private let interactor: TripDetailInteractor

  private var cancellables = Set<AnyCancellable>()

  init(interactor: TripDetailInteractor) {
    self.interactor = interactor
  }
}
This creates a stub presenter with a reference for interactor and cancellable set. You’ll build this out in a bit.
In TripDetailView
, add the following property:
@ObservedObject var presenter: TripDetailPresenter
This adds a reference to the presenter in the view.
To get the previews building again, change that stub to:
static var previews: some View {
    let model = DataModel.sample
    let trip = model.trips[1]
    let mapProvider = RealMapDataProvider()
    let presenter = TripDetailPresenter(interactor:
      TripDetailInteractor(
        trip: trip,
        model: model,
        mapInfoProvider: mapProvider))
    return NavigationView {
      TripDetailView(presenter: presenter)
    }
  }
Now the view will build, but the preview is still just “Hello, World!”

Routing
Before building out the detail view, you’ll want to link it to the rest of the app through a router from the trip list.
Create a new Swift File named TripListRouter.swift .
Set its contents to:
import SwiftUI

class TripListRouter {
  func makeDetailView(for trip: Trip, model: DataModel) -> some View {
    let presenter = TripDetailPresenter(interactor:
      TripDetailInteractor(
        trip: trip,
        model: model,
        mapInfoProvider: RealMapDataProvider()))
    return TripDetailView(presenter: presenter)
  }
}
This class outputs a new TripDetailView
that’s been populated with an interactor and presenter. The router handles transitioning from one screen to another, setting up the classes needed for the next view.
In an imperative UI paradigm — in other words, with UIKit — a router would be responsible for presenting view controllers or activating segues.
SwiftUI declares all of the target views as part of the current view and shows them based on view state. To map VIPER onto SwiftUI, the view is now responsible for showing/hiding of views, the router is a destination view builder, and the presenter coordinates between them.
In TripListPresenter.swift , add the router as a property:
private let router = TripListRouter()
You’ve now created the router as part of the presenter.
Next, add this method:
func linkBuilder<Content: View>(
    for trip: Trip,
    @ViewBuilder content: () -> Content
  ) -> some View {
    NavigationLink(
      destination: router.makeDetailView(
        for: trip,
        model: interactor.model)) {
          content()
    }
}
This creates a NavigationLink
to a detail view the router provides. When you place it in a NavigationView
, the link becomes a button that pushes the destination
onto the navigation stack.
The content
block can be any arbitrary SwiftUI view. But in this case, the TripListView
will provide a TripListCell
.
Go to TripListView.swift
and change the contents of the ForEach
to:
self.presenter.linkBuilder(for: item) {
  TripListCell(trip: item)
    .frame(height: 240)
}
This uses the NavigationLink
from the presenter, sets the cell as its content and puts it in the list.
Build and run, and now, when the user taps the cell, it will route them to a “Hello World” TripDetailView
.

Finishing Up the Detail View
There are a few trip details you still need to fill out the detail view so the user can see the route and edit the waypoints.
Start by adding a the trip title:
In TripDetailInteractor
, add the following properties:
var tripName: String { trip.name }
var tripNamePublisher: Published<String>.Publisher { trip.$name }
This exposes just the String
version of the trip name and a Publisher
for when that name changes.
Also, add the following:
func setTripName(_ name: String) {
  trip.name = name
}

func save() {
  model.save()
}
The first method allows the presenter to change the trip name, and the second will save the model to the persistence layer.
Now, move onto TripDetailPresenter
. Add the following properties:
@Published var tripName: String = "No name"
let setTripName: Binding<String>
These provide the hooks for the view to read and set the trip name.
Then, add the following to the init
method:
// 1
setTripName = Binding<String>(
  get: { interactor.tripName },
  set: { interactor.setTripName($0) }
)

// 2
interactor.tripNamePublisher
  .assign(to: \.tripName, on: self)
  .store(in: &cancellables)
This code:
TextField
tripName
Separating the trip name into properties like this allows you to synchronize the value without creating an infinite loop of updates.
Next, add this:
func save() {
  interactor.save()
}
This adds a save feature so the user can save any edited details.
Finally, go to TripDetailView
, and replace the body
with:
var body: some View {
  VStack {
    TextField("Trip Name", text: presenter.setTripName)
      .textFieldStyle(RoundedBorderTextFieldStyle())
      .padding([.horizontal])
  }
  .navigationBarTitle(Text(presenter.tripName), displayMode: .inline)
  .navigationBarItems(trailing: Button("Save", action: presenter.save))
}
The VStack
for now holds a TextField
for editing the trip name. The navigation bar modifiers define the title using the presenter’s published tripName
, so it updates as the user types, and a save button that will persist any changes.
Build and run, and now, you can edit the trip title.

Save after editing the trip name, and the changes will appear after you relaunch the app.

Using a Second Presenter for the Map
Adding additional widgets to a screen will follow the same pattern of:
- Adding functionality to the interactor.
- Bridging the functionality through the presenter.
- Adding the widgets to the view.
Go to TripDetailInteractor
, and add the following properties:
@Published var totalDistance: Measurement<UnitLength> =
  Measurement(value: 0, unit: .meters)
@Published var waypoints: [Waypoint] = []
@Published var directions: [MKRoute] = []
These provide the following information about the waypoints in a trip: the total distance as a Measurement
, the list of waypoints and a list of directions that connect those waypoints.
Then, add the follow subscriptions to the end of init(trip:model:mapInfoProvider:)
:
trip.$waypoints
  .assign(to: \.waypoints, on: self)
  .store(in: &cancellables)

trip.$waypoints
  .flatMap { mapInfoProvider.totalDistance(for: $0) }
  .map { Measurement(value: $0, unit: UnitLength.meters) }
  .assign(to: \.totalDistance, on: self)
  .store(in: &cancellables)

trip.$waypoints
  .setFailureType(to: Error.self)
  .flatMap { mapInfoProvider.directions(for: $0) }
  .catch { _ in Empty<[MKRoute], Never>() }
  .assign(to: \.directions, on: self)
  .store(in: &cancellables)
This performs three separate actions based on the changing of the trip’s waypoints.
The first is just a copy to the interactor’s waypoint list. The second uses the mapInfoProvider
to calculate the total distance for all of the waypoints. And the third uses the same data provider to get directions between the waypoints.
The presenter then uses these values to provide information to the user.
Go to TripDetailPresenter
, and add these properties:
@Published var distanceLabel: String = "Calculating..."
@Published var waypoints: [Waypoint] = []
The view will use these properties. Wire them up for tracking data changes by adding the following to the end of init(interactor:)
:
interactor.$totalDistance
  .map { "Total Distance: " + MeasurementFormatter().string(from: $0) }
  .replaceNil(with: "Calculating...")
  .assign(to: \.distanceLabel, on: self)
  .store(in: &cancellables)

interactor.$waypoints
  .assign(to: \.waypoints, on: self)
  .store(in: &cancellables)
The first subscription takes the raw distance from the interactor and formats it for display in the view, and the second just copies over the waypoints.
Considering the Map View
Before heading over to the detail view, consider the map view. This widget is more complicated than the others.
In addition to drawing the geographical features, the app also overlays pins for each point and the route between them.
This calls for its own set of presentation logic. You could use the TripDetailPresenter
, or in this case, create a separate TripMapViewPresenter
. It will reuse the TripDetailInteractor
since it shares the same data model and is a read-only view.
Create a new Swift File named TripMapViewPresenter.swift . Set its contents to:
import MapKit
import Combine

class TripMapViewPresenter: ObservableObject {
  @Published var pins: [MKAnnotation] = []
  @Published var routes: [MKRoute] = []

  let interactor: TripDetailInteractor
  private var cancellables = Set<AnyCancellable>()

  init(interactor: TripDetailInteractor) {
    self.interactor = interactor

    interactor.$waypoints
      .map {
        $0.map {
          let annotation = MKPointAnnotation()
          annotation.coordinate = $0.location
          return annotation
        }
    }
    .assign(to: \.pins, on: self)
    .store(in: &cancellables)

    interactor.$directions
      .assign(to: \.routes, on: self)
      .store(in: &cancellables)
  }
}
Here, the map presenter exposes two arrays to hold annotations and routes. In init(interactor:)
, you map the waypoints
from the interactor to MKPointAnnotation
objects so that they can be displayed as pins on the map. You then copy the directions
to the routes
array.
To use the presenter, create a new SwiftUI View named TripMapView.swift . Set its contents to:
import SwiftUI

struct TripMapView: View {
  @ObservedObject var presenter: TripMapViewPresenter

  var body: some View {
    MapView(pins: presenter.pins, routes: presenter.routes)
  }
}

#if DEBUG
struct TripMapView_Previews: PreviewProvider {
  static var previews: some View {
    let model = DataModel.sample
    let trip = model.trips[0]
    let interactor = TripDetailInteractor(
      trip: trip,
      model: model,
      mapInfoProvider: RealMapDataProvider())
    let presenter = TripMapViewPresenter(interactor: interactor)
    return VStack {
      TripMapView(presenter: presenter)
    }
  }
}
#endif
This uses the helper MapView
and supplies it with pins and routes from the presenter. The previews
struct builds the VIPER chain the app needs to preview just the map. Use Live Preview
to see the map properly:

To add the map to the app, first add the following method to TripDetailPresenter
:
func makeMapView() -> some View {
   TripMapView(presenter: TripMapViewPresenter(interactor: interactor))
}
This makes a map view, providing it with its presenter.
Next, open TripDetailView.swift .
Add the following to the VStack
below the TextField
:
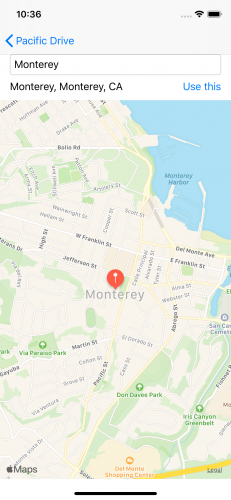
presenter.makeMapView()
Text(presenter.distanceLabel)
Build and run to see the map on screen:

Editing Waypoints
The final feature is to add waypoint editing so you can make your own trips! You can rearrange the list on the trip detail view. But to create a new waypoint, you’ll need a new view for the user to type in the name.
To get to a new view, you’ll want a Router . Create a new Swift File named TripDetailRouter.swift .
Add this code to the new file:
import SwiftUI

class TripDetailRouter {
  private let mapProvider: MapDataProvider

  init(mapProvider: MapDataProvider) {
    self.mapProvider = mapProvider
  }

  func makeWaypointView(for waypoint: Waypoint) -> some View {
    let presenter = WaypointViewPresenter(
      waypoint: waypoint,
      interactor: WaypointViewInteractor(
        waypoint: waypoint,
        mapInfoProvider: mapProvider))
    return WaypointView(presenter: presenter)
  }
}
This creates a WaypointView
that is already set up and ready to go.
With the router on hand, go to TripDetailInteractor.swift , and add the following methods:
func addWaypoint() {
   trip.addWaypoint()
}

func moveWaypoint(fromOffsets: IndexSet, toOffset: Int) {
 trip.waypoints.move(fromOffsets: fromOffsets, toOffset: toOffset)
}

func deleteWaypoint(atOffsets: IndexSet) {
  trip.waypoints.remove(atOffsets: atOffsets)
}

func updateWaypoints() {
  trip.waypoints = trip.waypoints
}
These methods are self descriptive. They add, move, delete, and update waypoints.
Next, expose these to the view through TripDetailPresenter
. In TripDetailPresenter
, add this property:
private let router: TripDetailRouter
This will hold the router. Create it by adding this to the top of init(interactor:)
:
self.router = TripDetailRouter(mapProvider: interactor.mapInfoProvider)
This creates the router for use with the waypoint editor. Next, add these methods:
func addWaypoint() {
  interactor.addWaypoint()
}

func didMoveWaypoint(fromOffsets: IndexSet, toOffset: Int) {
  interactor.moveWaypoint(fromOffsets: fromOffsets, toOffset: toOffset)
}

func didDeleteWaypoint(_ atOffsets: IndexSet) {
  interactor.deleteWaypoint(atOffsets: atOffsets)
}

func cell(for waypoint: Waypoint) -> some View {
  let destination = router.makeWaypointView(for: waypoint)
    .onDisappear(perform: interactor.updateWaypoints)
  return NavigationLink(destination: destination) {
    Text(waypoint.name)
  }
}
The first three are part of the operations on the waypoint. The final method calls the router to get a waypoint view for the waypoint and put it in a NavigationLink
.
Finally, show this to the user in TripDetailView
by adding the following to the VStack
under the Text
:
HStack {
  Spacer()
  EditButton()
  Button(action: presenter.addWaypoint) {
    Text("Add")
  }
}.padding([.horizontal])
List {
  ForEach(presenter.waypoints, content: presenter.cell)
    .onMove(perform: presenter.didMoveWaypoint(fromOffsets:toOffset:))
    .onDelete(perform: presenter.didDeleteWaypoint(_:))
}
This adds the following controls to the view:
-
An
EditButtonthat puts the list into editing mode so the user can move or delete waypoints. -
An add
Buttonthat uses the presenter to add a new waypoint to the list. -
A
Listthat uses aForEachwith the presenter to make a cell for each waypoint. The list defines anonMoveandonDeleteaction that enables those edit actions and calls back into the presenter.
Build and run, and you can now customize a trip! Be sure to save any changes.

Making Modules
With VIPER, you can group together the presenter, interactor, view, router and related code into modules.
Traditionally, a module would expose the interfaces for the presenter, interactor and router in a single contract. This doesn’t make a lot of sense with SwiftUI because it’s view forward. Unless you want to package each module as its own framework, you can instead conceptualize modules as groups.
Take TripListView.swift , TripListPresenter.swift , TripListInteractor.swift and TripListRouter.swift and group them together in a group named TripListModule .
Do the same for the detail classes: TripDetailView.swift , TripDetailPresenter.swift , TripDetailInteractor.swift , TripMapViewPresenter.swift , TripMapView.swift , and TripDetailRouter.swift .
Add them to a new group called TripDetailModule .
Modules are a good way to keep the code clean and separated. As a good rule of thumb, a module should be a conceptual screen/feature, and the routers hand the user off between modules.
Where to Go From Here?
Click the Download Materials button at the top or bottom of the tutorial to download the completed project files.
One of the advantages of the separation VIPER endorses is in testability. You can test the interactor so that it can read and manipulate the data model. And you can do all that while independently testing the presenter to change the view and respond to user actions.
Think of it as a fun exercise to try on your own!
Because of the reactive power of Combine and its native support in SwiftUI, you may have noticed that the interactor and presenter layers are relatively thin. They do separate the concerns, but mostly, they’re just passing data through an abstraction layer.
With SwiftUI, it’s a little more natural to collapse the presenter and interactor functionality into a single ObservableObject
that holds most of the view state and interacts directly with the entities.
For an alternate approach, read MVVM with Combine Tutorial for iOS .
We hope you enjoyed this tutorial! If you think of questions or comments, drop them in the discussion below. We’d love to hear about your favorite architecture and what’s changed in the era of SwiftUI.
Recommend
About Joyk
Aggregate valuable and interesting links.
Joyk means Joy of geeK