

Orchestrator 单节点模式介绍-10931853
source link: https://blog.51cto.com/wujianwei/2472610
Go to the source link to view the article. You can view the picture content, updated content and better typesetting reading experience. If the link is broken, please click the button below to view the snapshot at that time.

一、环境说明:
1.1、3台vm虚拟机系统环境介绍:
3台VM系统为:
[root@mgr01 ~]# cat /etc/redhat-release
CentOS Linux release 7.2.1511 (Core)
3台VM centos 系统都关闭iptables,关闭selinux
3台虚拟机系统时间同步:
ntpdate ntp1.aliyun.com
3台vm虚拟机上各安装一个orchestrator mysql
orchestrator版本为:orchestrator-3.1.4-linux-amd64.tar.gz
下载地址:
https://github.com/github/orchestrator/releases
mysql的版本为mysql5.7.24 GA 二进制版本安装
三台机器ip:
10.0.0.130    172.16.0.130
10.0.0.131    172.16.0.131
10.0.0.132    172.16.0.132
三台vm绑定主机名:
[root@mgr01 bin]# cat /etc/hosts
172.16.0.130 mgr01
172.16.0.131 mgr03
172.16.0.132 mgr02
[root@mgr02 ~]# cat /etc/hosts
172.16.0.132 mgr02
172.16.0.131 mgr03
172.16.0.130 mgr01
[root@mgr03 bin]# cat /etc/hosts
172.16.0.132 mgr02
172.16.0.131 mgr03
172.16.0.130 mgr01提示:orchestrator 建议使用机器名,而不是ip来管理MySQL实例,比如change master to 中的 master_host 如果指定的是ip,有可能导致主从切换或者故障切换出现问题
所以最好是绑定hosts,设置主机名
1.2、三台vm上安装mysql说明
安装MySQL的步骤省略,和常规安装MySQL一样。
提前配置好一主2从mysql 基于Gtid 过滤复制
    172.16.0.131  master
    172.16.0.130  slave
    172.16.0.132  slave
三台vm实例mysql的配置文件都要开启如下参数:
说明:开启gtid,只复制测试库test001下的表,其他的数据库都忽略掉
[root@mgr01 orchestrator]# egrep -i 'gtid|replicate_wild' /data/mysql/mysql3306/my3306.cnf
####: for gtid
#gtid_executed_compression_period    =1000                          #   1000
gtid_mode                           =on                            #    off
enforce_gtid_consistency            =on                            #    off
replicate_wild_do_table=test001.%
replicate_wild_ignore_table=information_schema.%
replicate_wild_ignore_table=performance_schema.%
replicate_wild_ignore_table=mysql.%
replicate_wild_ignore_table=orchestrator.%
172.16.0.131: master操作:
mysql -uroot -p'123456' -e "reset mater;"
mysql -e "grant replication slave on *.* to repuser@'172.16.0.%' identified by 'JuwoSdk21TbUser'; flush privileges;"
mysqldump -uroot -p'123456' -B -A -F --set-gtid-purged=OFF  --master-data=2 --single-transaction  --events|gzip >/opt/test_$(date +%F).sql.gz
172.16.0.130:slave 操作:
mysql < /test_$(date +%F).sql.gz
mysql  -e "CHANGE MASTER TO MASTER_HOST='mgr03',MASTER_PORT=3306,MASTER_USER='repuser',MASTER_PASSWORD='JuwoSdk21TbUser',MASTER_AUTO_POSITION = 1;start slave;show slave status\G" |grep -i "yes"
172.16.0.132 slave 操作:
mysql < /test_$(date +%F).sql.gz
mysql  -e "CHANGE MASTER TO MASTER_HOST='mgr03',MASTER_PORT=3306,MASTER_USER='repuser',MASTER_PASSWORD='JuwoSdk21TbUser',MASTER_AUTO_POSITION = 1;start slave;show slave status\G" |grep -i "yes"
二、三台vm上安装Orchestrator
提示!!!!: {{{本篇博文主要介绍Orchestrator 单节点机器安装和使用}}}
2.1、机器角色说明:
orchestrator机器:172.16.0.130 172.16.0.131 172.16.0.132
orchestrator后端元数据库MySQL:172.16.0.131
监控目标数据库:172.16.0.130 172.16.0.131 172.16.0.132
2.2、每台VM机器都执行下面命令
安装orchestrator:
下载orchestrator安装包,orchestrator-3.1.4-linux-amd64.tar.gz
https://github.com/github/orchestrator/releases
解压orchestrator安装包:
tar -xf orchestrator-3.1.4-linux-amd64.tar.gz
会多出usr 、etc下面2个目录:
[root@mgr01 ~]# ls -lrt /root/
drwxr-xr-x 3 root root 4096 Jan 26 22:05 usr
drwxr-xr-x 3 root root 4096 Jan 26 22:05 etc
将usr/local/orchestrator/orchestrator-sample.conf.json移动到/etc下,并命名为orchestrator.conf.json
cp /root/usr/local/orchestrator/orchestrator-sample.conf.json /etc/orchestrator.conf.json安装完成后创建orchestrator需要用到的库和用户:
CREATE DATABASE orchestrator;
CREATE USER 'orchestrator'@'127.0.0.1' IDENTIFIED BY 'orchestrator';
GRANT ALL PRIVILEGES ON `orchestrator`.* TO 'orchestrator'@'127.0.0.1';
这里元数据库MySQL和orchestrator在同一台机器上,所以创建账号的时候用的'127.0.0.1',
如果不在同一台机器上,将IP换成orchestrator所在机器ip。
监控目标数据库授权:
在需要监控的目标数据库上进行授权
CREATE USER 'orchestrator'@'172.16.0.%'  IDENTIFIED BY 'orchestrator';
GRANT SUPER, PROCESS, REPLICATION SLAVE, RELOAD ON *.* TO 'orchestrator'@'172.16.0.%';
GRANT SELECT ON mysql.slave_master_info TO 'orchestrator'@'172.16.0.%';
提示:
MySQLTopologyUser 账号的权限应该设置为super,process,reload,select,replicatiopn slave,
官网文档中缺少了select权限,orchestrator切换过程中需要通过读取从库的mysql.slave_master_info表,获取复制账号和密码,如果没有select权限,将导致读取失败,并且不会有任何错误信息报出来。
2.3、每台VM修改orchestrator配置文件
修改/etc/orchestrator.conf.json如下:
####配置orchestrator后端元数据库信息
"MySQLOrchestratorHost": "127.0.0.1",
"MySQLOrchestratorPort": 3306,
"MySQLOrchestratorDatabase": "orchestrator",
"MySQLOrchestratorUser": "orchestrator",
"MySQLOrchestratorPassword": "orchestrator",
###配置orchestrator监控的目标数据库信息
"MySQLTopologyUser": "orchestrator",
"MySQLTopologyPassword": "orchestrator",
2.4、只单独启动一台orchestrator服务
单独启动172.16.0.131 机器上的orchestrator服务,默认监听的端口是3000
启动命令:
cd /root/usr/local/orchestrator && ./orchestrator --config=/etc/orchestrator.conf.json http &[root@mgr01 ~]# ps -ef|grep orc
root 3478 3477 6 23:47 pts/3 00:00:02 ./orchestrator --config=/etc/orchestrator.conf.json http
root 3489 2648 0 23:48 pts/2 00:00:00 grep --color=auto orc
[root@mgr01 ~]# ss -lntup|grep orc
tcp LISTEN 0 128 :::3000 :::* users:(("orchestrator",pid=3478,fd=5))日志中有报错:
2020-02-20 23:47:40 ERROR ReadTopologyInstance(mgr01:3306) show slave hosts: ReadTopologyInstance(mgr01:3306) 'show slave hosts' returned row with <host,port>: <,3306>
2020-02-20 23:47:41 DEBUG Waiting for 15 seconds to pass before running failure detection/recovery
2020-02-20 23:47:41 ERROR ReadTopologyInstance(mgr02:3306) show slave hosts: ReadTopologyInstance(mgr02:3306) 'show slave hosts' returned row with <host,port>: <,3306>
报错的解决办法:
在MySQL配置文件my.cnf中report_host参数,
report_host为只读参数,必须重启mysql服务才可生效
report_host=x.x.x.x //ip为服务器自身的ip
提示:关于mysql的report-系列参数说明如下:
#report-系列Report系列是设置在从库上的,包含四个参数 report-[host|port|user|password].
当my.cnf中设置了report-host时,在从库执行start slave的时候,会将report-host和report-port(默认3306)发给主库,主库记录在全局哈希结构变量 slave_list 中
同时需要注意的是 mysql对report_host限制为最长60个字节长度,也就是非中文的60个字符,所以mysql服务器的主机名要小于60个字符,否则在做主从复制时,slave会报错
参考:https://www.jianshu.com/p/9a5b7d30b0ae
原因:my.cnf配置文件不加report_host ,在orchestrator程序中 show slave hosts 不会显示host,会导致程序报错的
或者是修改/etc/orchestrator.conf.json 配置文件参数DiscoverByShowSlaveHosts 为false,重启orchestrator 服务,这样就不需要设置report_host了
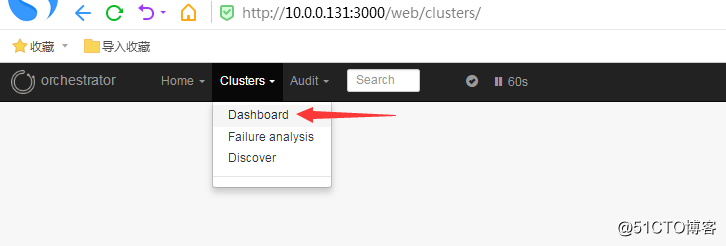
2.5、Web页面访问介绍
http://10.0.0.130:3000/web/status
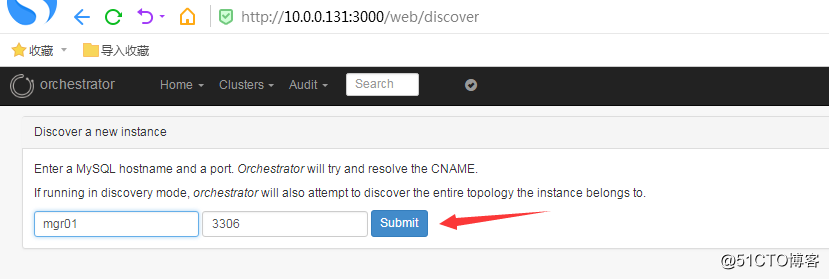
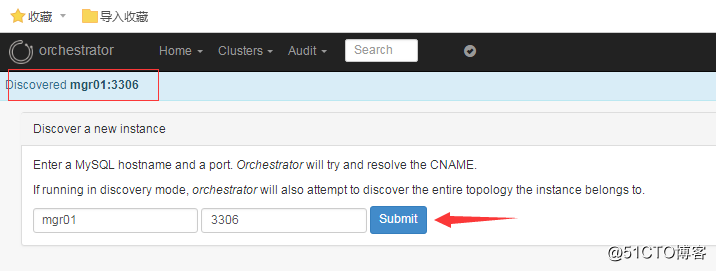
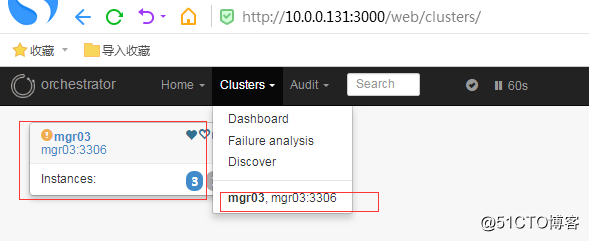
初次打开web页面是看不到mysql cluster 集群名称的,需要点击discover发现instance,如下图:
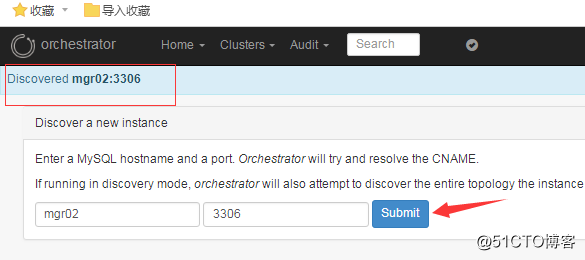
再次点击Clusters,便出现集群别名和Instance:
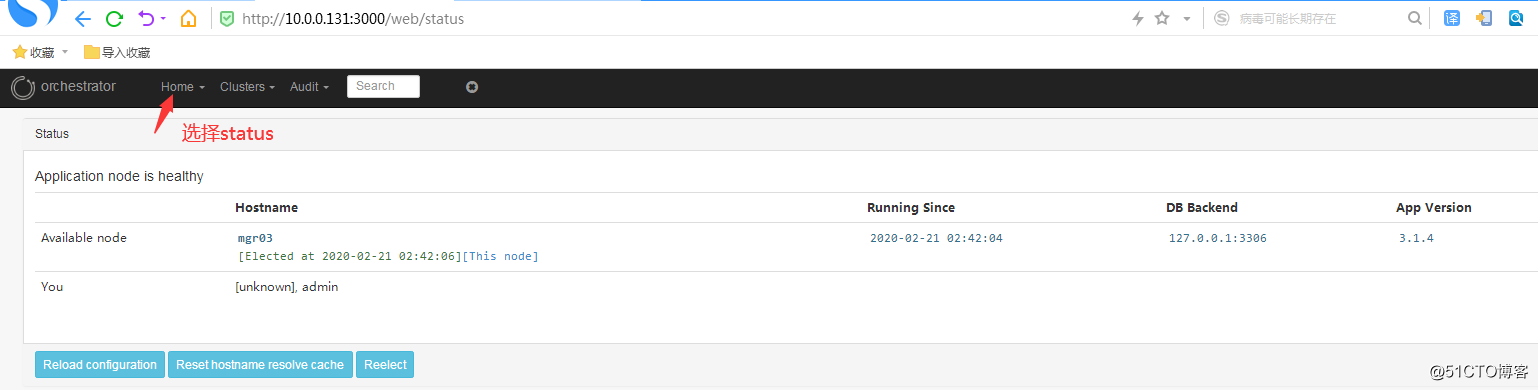
选择home下的status,可以看到当前的健康的节点:
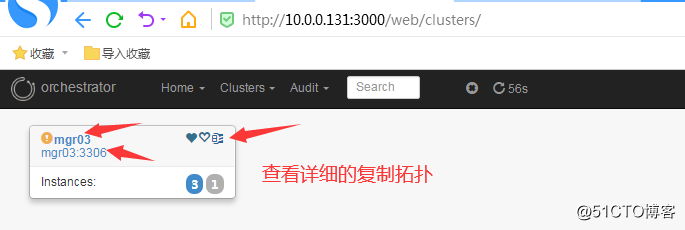
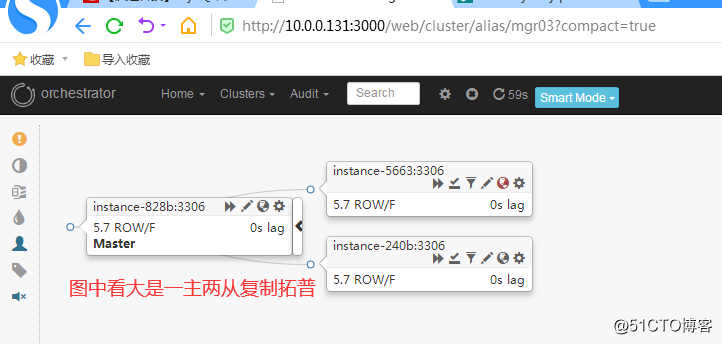
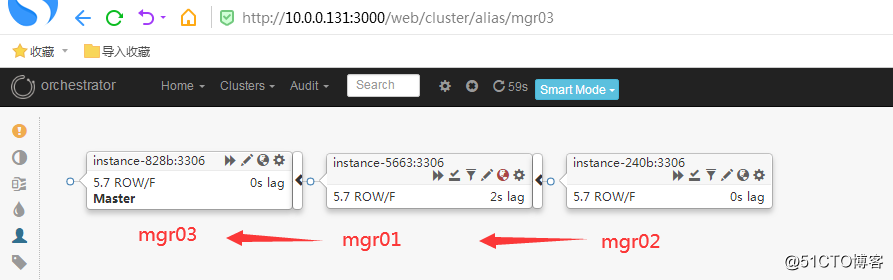
查看详细的复制拓扑:
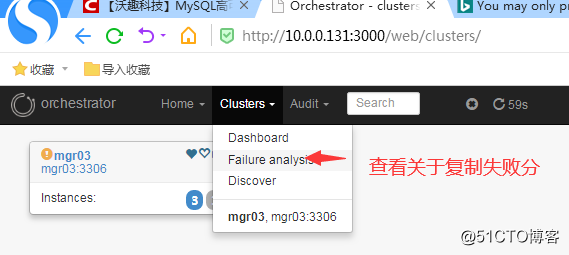
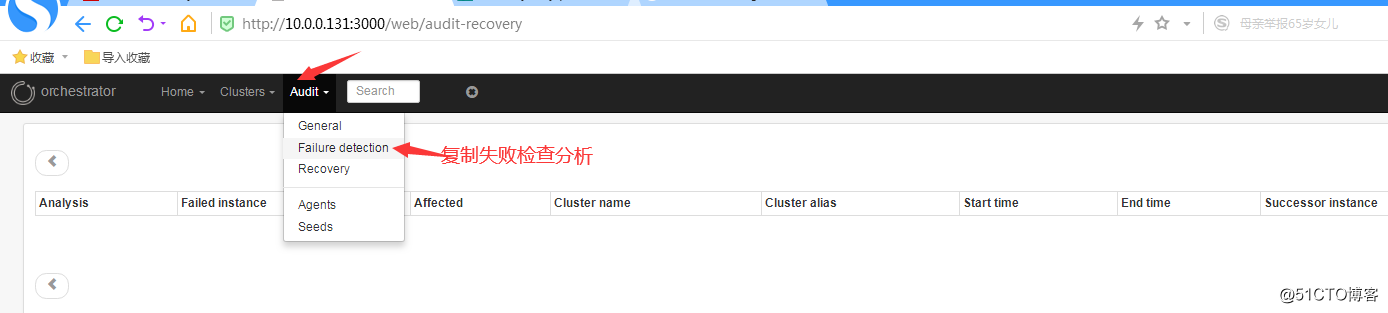
查看关于复制失败的分析:
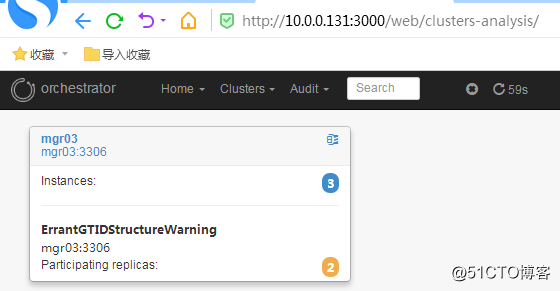
关于复制失败的诊断:

查看复制的详细的信息:

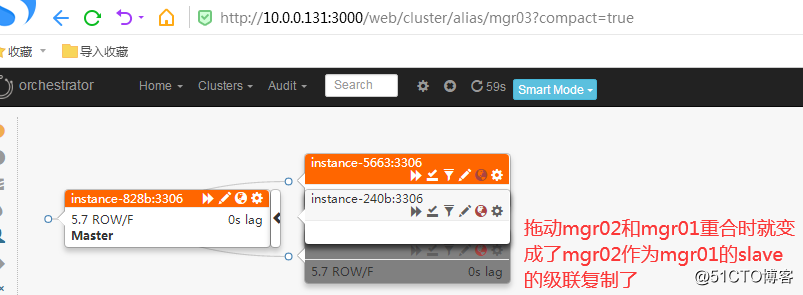
在线调整复制关系有1主2从变为级联复制:
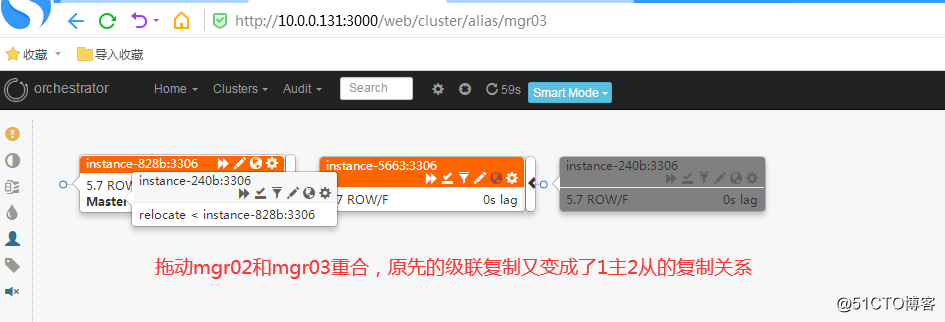
再由级联复制变为1主2从:
以上就是关于的orchestrator服务单节点启动管理mysql复制集群的简单web页面应用介绍,欢迎一起交流学习
Recommend
About Joyk
Aggregate valuable and interesting links.
Joyk means Joy of geeK