

GitHub - chriszielinski/Ribbon: 🎀 A simple cross-platform toolbar/custom input a...
source link: https://github.com/chriszielinski/Ribbon
Go to the source link to view the article. You can view the picture content, updated content and better typesetting reading experience. If the link is broken, please click the button below to view the snapshot at that time.

README.md
Ribbon 🎀
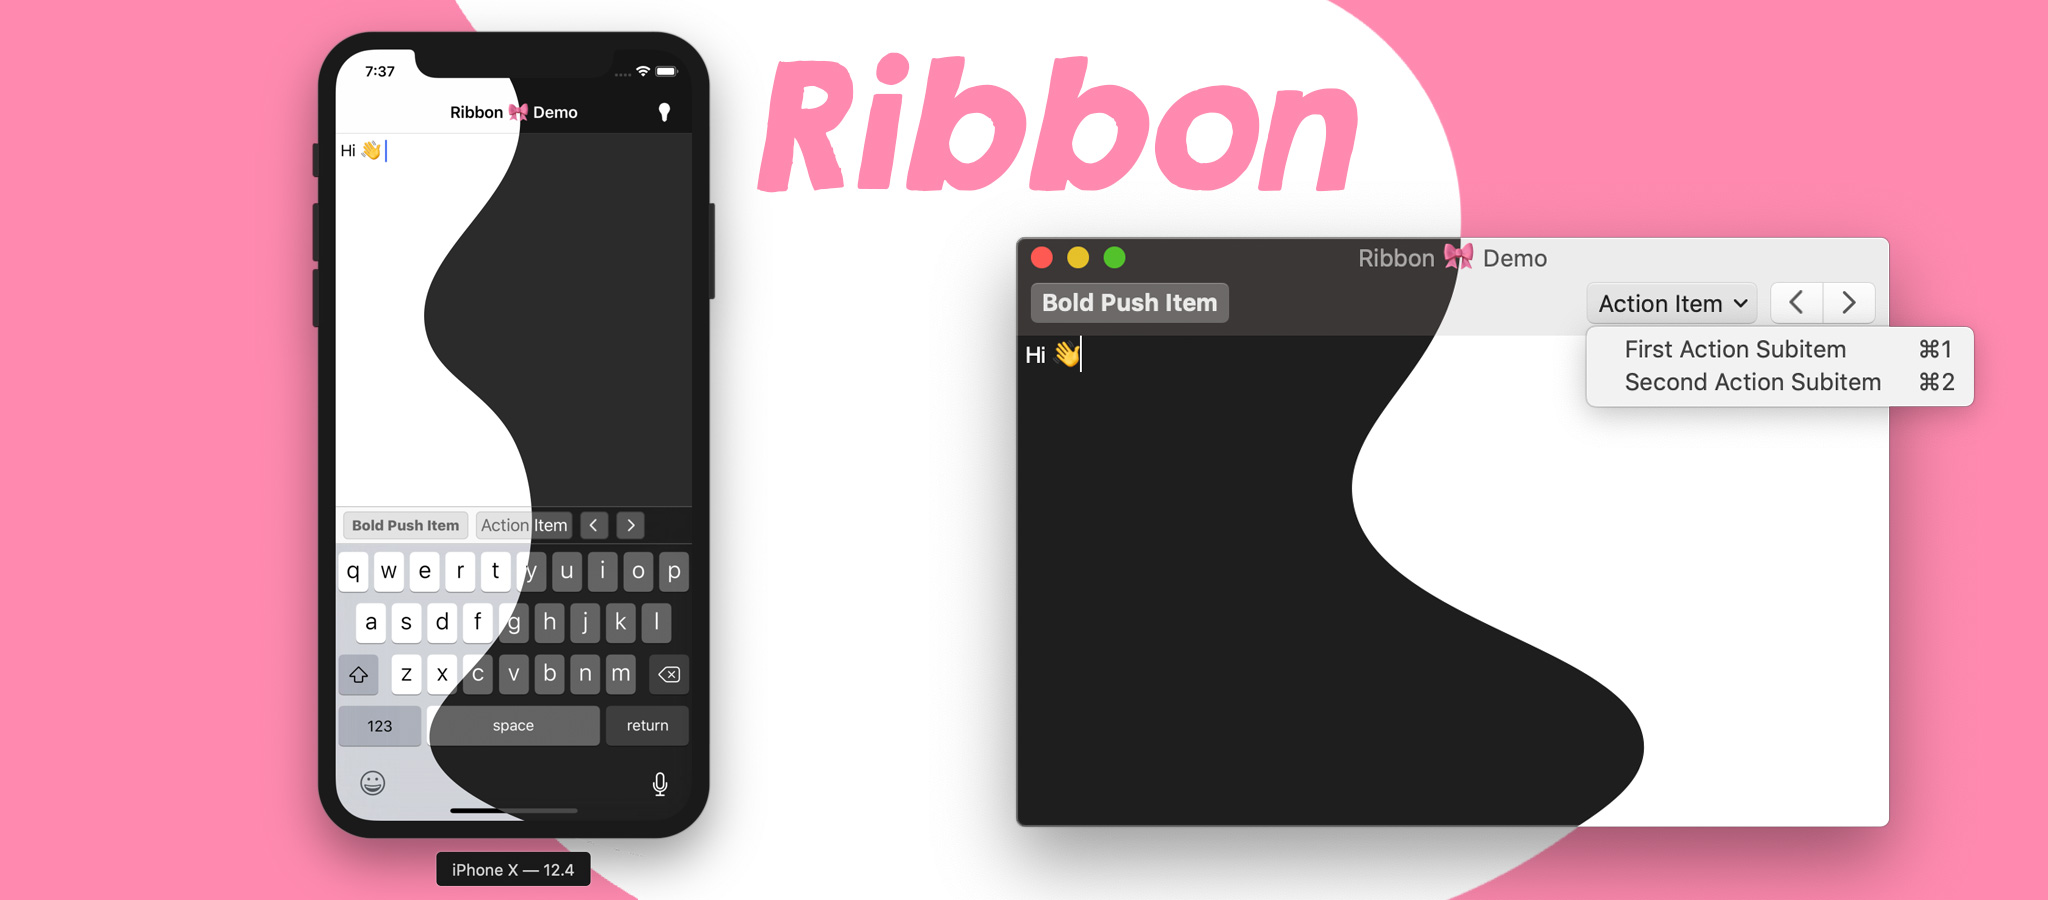
A simple cross-platform toolbar/custom input accessory view library for iOS & macOS.
Written in Swift.
Looking for...
- A type-safe, XPC-available SourceKitten (SourceKit) interface with some sugar? Check out Sylvester 😼.
- A Floating Action Button for macOS? Check out Fab. 🛍️.
- An Expanding Bubble Text Field for macOS? Check out BubbleTextField 💬.
- An integrated spotlight-based onboarding and help library for macOS? Check out Enlighten 💡.
Features
🎡Try: Includes an iOS & macOS demo.
- Provide items either programmatically or from a JSON configuration file.
- Dark mode.
- + more!
iOS
-
Supports push buttons—a segmented item's subitems become push buttons.
-
iOS 13: action items use the new context menu interaction:
macOS
- Supports push, action, & segmented control toolbar items.
- Provides
NSMenuItems for each item.
Requirements
- iOS 10.0+ (12.0+ for dark mode)
- macOS 10.12+ (10.13+ for full functionality)
Installation
Ribbon is available for installation using Carthage or CocoaPods.
Carthage
github "chriszielinski/Ribbon"CocoaPods
pod "Ribbon"iOS 13
Building for iOS 13 requires Xcode 11 and modifying iOS13.xcconfig:
// Uncomment to build Ribbon for iOS 13.
//
// - Note: Requires Xcode 11.

SWIFT_ACTIVE_COMPILATION_CONDITIONS = $(inherited) IOS13
Usage
There are two ways of integrating Ribbon into your project:
Configuration File
🔥 The recommended approach.
The configuration file makes for a quick & easy integration. The default configuration filename is ribbon-configuration.json and should be copied into the target's bundle resources (in the Copy Bundle Resources build phase).
The JSON below defines a single action item and toolbar configuration—which is only relevant for the macOS platform.
🧐 See: Demos/Shared/ribbon-configuration.json for a more comprehensive example.
{
    "items": [
        {
            "action": "actionItemHandler",
            "controlKind": "action",
            "identifier": "action-item-identifier",
            "imageName": "NSActionTemplate",
            "keyEquivalent": "a",
            "keyEquivalentModifier": ["command", "shift"],
            "title": "Action Item",
            "toolTip": "The action button's tool-tip.",
            "subitems": [
                {
                    "action": "firstActionSubitemHandler",
                    "identifier": "first-action-subitem",
                    "imageName": "hand.thumbsup",
                    "keyEquivalent": "1",
                    "keyEquivalentModifier": ["command"],
                    "title": "First Action Subitem",
                    "toolTip": "The first action's tool-tip."
                },
                {
                    "action": "secondActionSubitemHandler",
                    "identifier": "second-action-subitem",
                    "imageName": "hand.thumbsdown",
                    "keyEquivalent": "2",
                    "keyEquivalentModifier": ["command"],
                    "title": "Second Action Subitem",
                    "toolTip": "The second action's tool-tip."
                }
            ]
        }
    ],
    "toolbar": {
        "displayMode": "iconOnly",
        "sizeMode": "regular",
        "identifier": "toolbar-identifier",
        "defaultItems" : ["NSToolbarFlexibleSpaceItem", "action-item-identifier"]
    }
}
Integration into your view controller is as simple as:
📌Note: The code below is an abstraction and will not compile.
import Ribbon

class YourViewController ... {

    ...

    var ribbon: Ribbon!

    override func viewDidLoad() {
        ribbon = try! Ribbon.loadFromMainBundle(target: self)

        #if canImport(UIKit)
        textView.inputAccessoryView = ribbon
        #endif
    }

    #if canImport(AppKit)
    override func viewWillAppear() {
        view.window?.toolbar = ribbon.toolbar

        super.viewWillAppear()
    }
    #endif

    @objc
    func actionItemHandler() { }

    @objc
    func firstActionSubitemHandler() { }

    @objc
    func secondActionSubitemHandler() { }

}
Programmatically
📌Note: The code below is an abstraction and will not compile.
import Ribbon

class YourViewController ... {

    ...

    var ribbon: Ribbon!

    override func viewDidLoad() {
        let firstActionSubitem = RibbonItem(subItemTitle: "First Action Subitem")
        firstActionSubitem.action = #selector(firstActionSubitemHandler)
        let secondActionSubitem = RibbonItem(subItemTitle: "Second Action Subitem")
        secondActionSubitem.action = #selector(secondActionSubitemHandler)

        let actionItem = RibbonItem(controlKind: .action,
                                    title: "Action Item",
                                    subitems: [firstActionSubitem, secondActionSubitem])
        actionItem.action = #selector(actionItemHandler)
        ribbon = Ribbon(items: [actionItem], target: self)

        #if canImport(UIKit)
        textView.inputAccessoryView = ribbon
        #endif
    }

    #if canImport(AppKit)
    override func viewWillAppear() {
        view.window?.toolbar = ribbon.toolbar

        super.viewWillAppear()
    }
    #endif

    @objc
    func actionItemHandler() { }

    @objc
    func firstActionSubitemHandler() { }

    @objc
    func secondActionSubitemHandler() { }

}
// ToDo:
- Add documentation.
- Implement
UIKeyCommand.
Community
- Found a bug? Open an issue.
- Feature idea? Open an issue. Do it yourself & PR when done 😅 (or you can open an issue 🙄).
- Want to contribute? Submit a pull request.
Acknowledgements
- Based on Rudd Fawcett's
RFKeyboardToolbar.
Contributors
- Chris Zielinski — Original author.
Frameworks & Libraries
Ribbon depends on the wonderful contributions of the Swift community, namely:
- realm/SwiftLint — A tool to enforce Swift style and conventions.
License
Ribbon is available under the MIT license, see the LICENSE file for more information.
Recommend
About Joyk
Aggregate valuable and interesting links.
Joyk means Joy of geeK